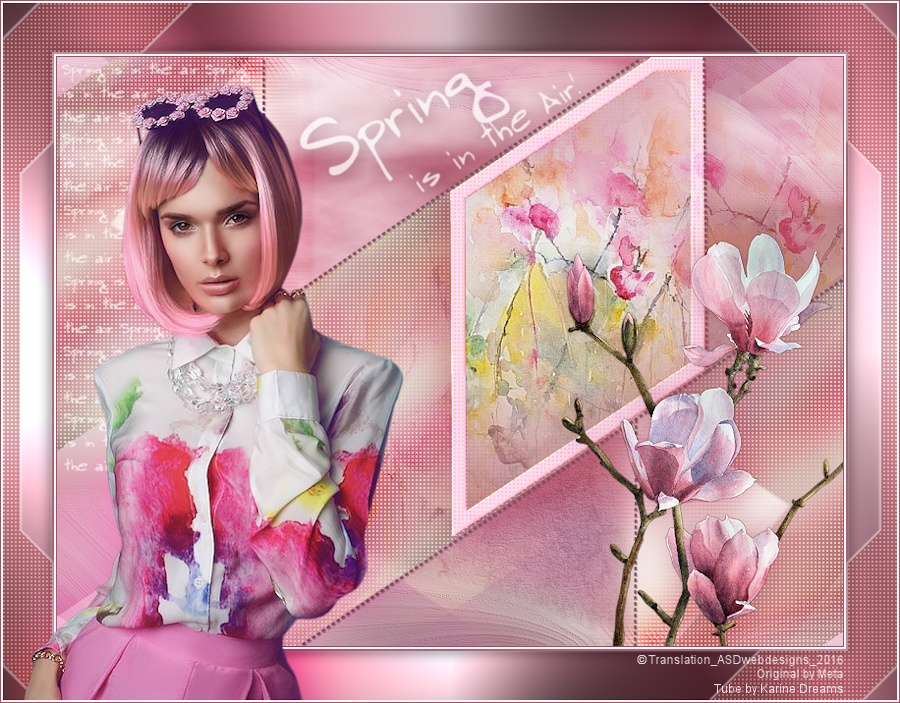
The tutorial:
01
Open a new
transparent image of 800 x 600 px
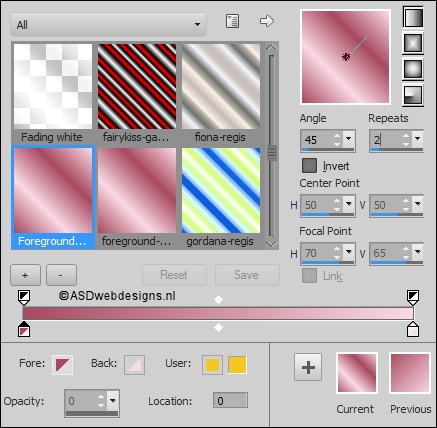
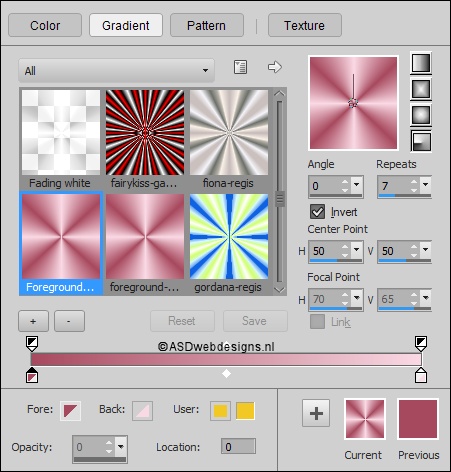
Fill with the Gradient 
Selections - Select
All
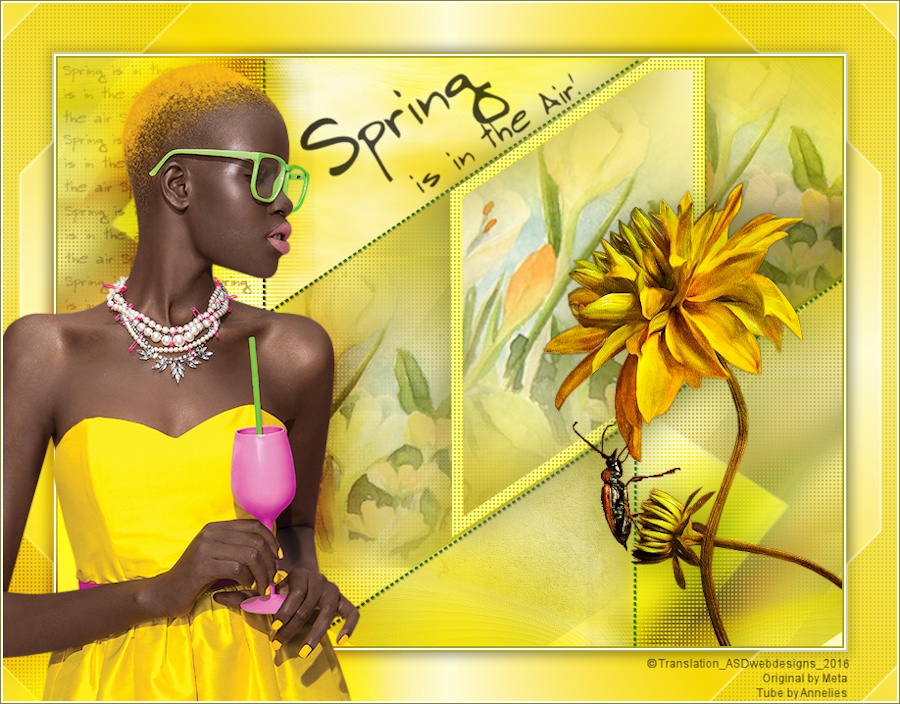
Maximize Tube"_k@rine_
Dreams_Pretty_Woman_2977_Juin_2014" from
tray
Note: If
you are using a tube of your own the
result may be different, if you
want the same result you can use this
tube for this step You can colorize it to match
your work
Edit - Copy
Minimize the tube to tray again
On your work image: Edit - Paste
Into Selection
Selections - Select None
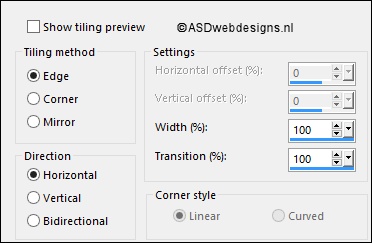
Effects - Image Effects - Seamless Tiling -
Default settings
Adjust - Blur - Gaussian Blur -
32
02
Layers - Duplicate
Effects - Plugins - Simple -
Blintz
Effects - Image Effects -
Seamless Tiling
03
Layers - Duplicate
Image - Mirror -
Mirror Horizontal (
Image - Mirror in previous PSP
Versions)
Layer Palette - Double click on this Layer and
set the Opacity of this Layer to
40
Layers - Merge - Merge
Down
04
Layers - Duplicate
Image - Resize - 60% -
Resize all Layers not checked
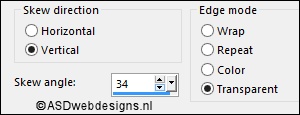
Effects - Geometric Effects -
Skew
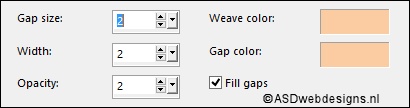
Effects -
Texture Effects - Weave - Weave Color & Gap Color
#fbcba1 
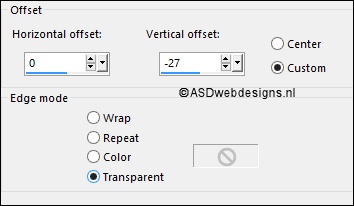
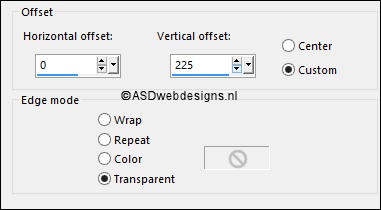
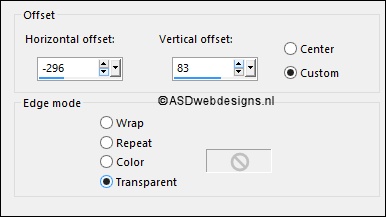
Effects - Image Effects - Offset
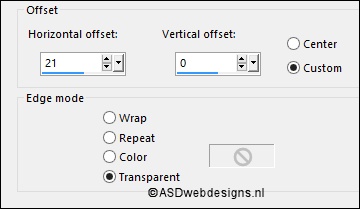
05
Layers - Duplicate
Effects
- Image Effects -
Offset
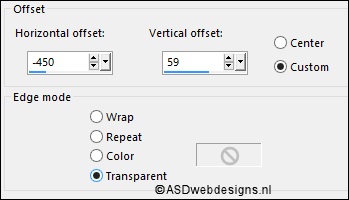
06
Layers - Duplicate
Image - Mirror - Mirror Horizontal (
Image - Mirror in previous PSP
Versions)
Image -
Mirror - Mirror Vertical (
Image - Flip in previous PSP
Versions)
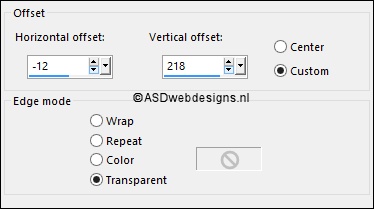
Effects - Image Effects -
Offset
Layers - Merge - Merge Down
Edit - Repeat Layer Merge Down
07
Layer Palette - Click on the
Middle Layer (Copy of Raster 1)
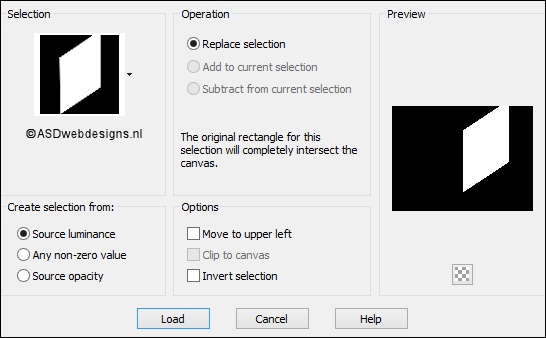
Selections - Load/Save Selection
- Load Selection From Disk -
Msb_Sel_Spring_01
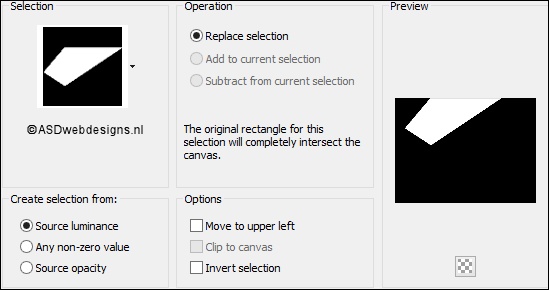
Selections - Promote Selection
to Layer
Effects - Plugins - <I.C.NET
Software> - Filters Unlimited 2.0
- Render - Clouds
(fore-/backgroud color)
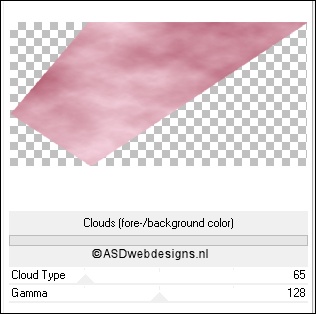
Keep selected
08
Layer Palette - Click on the Top
Layer (Copy (2) of Raster 1)
Selections - Promote Selection to
Layer
Selections - Select None
Effects - Distortion Effects -
Wind - From Left checked - Wind Strength:
80
09
Layers - Duplicate
Image - Mirror - Mirror Horizontal (
Image - Mirror in previous PSP
Versions)
Image - Mirror - Mirror Vertical (
Image - Flip in previous PSP
Versions)
Effects - Image Effects - Offset
Layers - Merge - Merge
Down
Layer Palette - Double click on this Layer and
set the Blend Mode of this Layer to
Overlay
10
Layers - Duplicate
Layer Palette - Double click on this Layer and set the
Blend Mode to "Screen" and the Layer Opacity to
55
Layers - Merge - Merge
Down
Layer Palette - Double click on this Layer and
set the Opacity of this Layer to
86 (Blend Mode is set to
Overlay)
Layers - Merge - Merge Down
Edit - Repeat Layer Merge Down
11
Layers - New Raster Layer
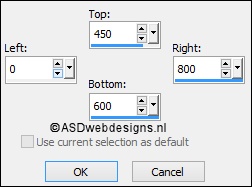
Selection Tool -
Rectangle  - Custom Selection:
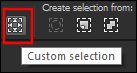
Fiil the Selection with the
Gradient
Selections - Select None
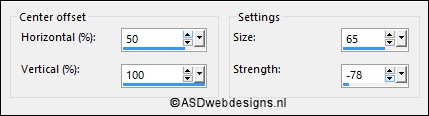
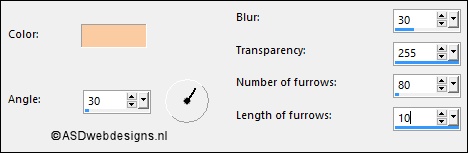
Effects - Distortion Effects -
Warp
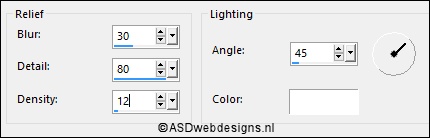
Effects - Texture
Effects - Soft Plastic - Color
#ffffff 
Effects - 3D Effects - Drop
Shadow - Vertical Minus 5 -
Horizontal 5 - Opacity 20 -
Blur - 15 - Color -
#fbcba1
Effects - Edge Effects -
Enhance
12
Layers - Duplicate
Image
- Mirror - Mirror Horizontal (
Image - Mirror in previous PSP
Versions)
Image - Mirror - Mirror Vertical (
Image - Flip in previous PSP
Versions)
Layers - Merge - Merge
Down
Layer Palette - Double click on this Layer and set the
Blend Mode to "Soft Light"
13
Layer Palette - Click on the
Second Layer from the Bottom (Copy of
Raster 1)
Selections - Load/Save Selection -
Load Selection From Disk -
Msb_Sel_ Spring_02
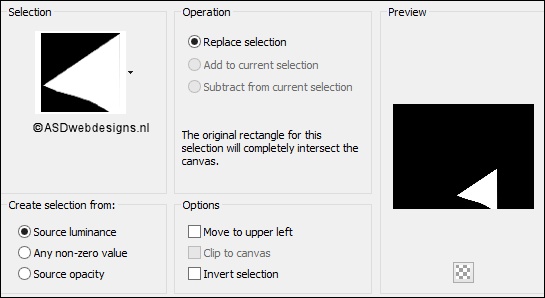
Selections - Promote Selection to
Layer
Effects - Texture
Effects - Fine Leather - Color
#fbcba1
Effects - Plugins - <I.C.NET
Software> - Filters Unlimited 2.0
- Photo Aging Kit - Dirt & Dust

Selections - Select None
Layer Palette - Double click on this Layer and set the
Blend Mode to "Soft Light"
14
Layer Palette - Click on the Top
Layer
Maximize Tube
"Msb_Deco01_Spring1" from
tray
Edit - Copy
On your work image: Edit - Paste
As New Layer
Effects - Image Effects -
Offset
Layer Palette - Double click on this Layer and set the
Blend Mode to "Overlay" and the Layer Opacity to
55
Adjust - Sharpnes - Sharpen
More
15
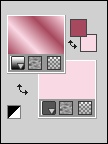
Color Palette: Set the Foreground
Gradient back to color

Layers - New Raster Layer
Selections - Load/Save Selection -
Load Selection From Disk -
Msb_Sel_ Spring_03
Fill the Selection with the
Foregroundcolor
Selections -
Modify - Contract - 12 px
Edit - Cut (Or
hit the Delete Key of your Keyboard) 
Keep selected!
16
Layers - New Raster Layer
Set the Foreground
color back to Gradient
Fill the Selection
with the Gradient
Adjust - Blur -
Gaussian Blur - 30
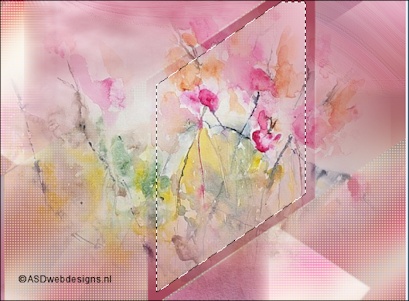
Maximize Tube
"Watercolorfiledpink" from
tray
Edit - Copy
On your work image: Edit - Paste
As New Layer
Image - Resize - 95% - Resize all
Layers not checked
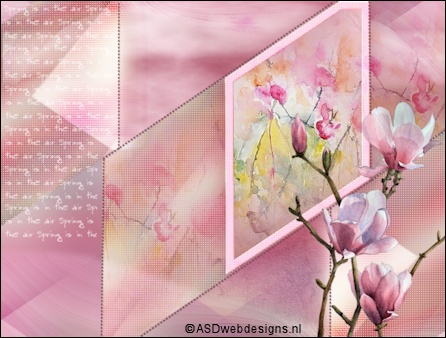
Move into the Selection like
this:
Selections - Invert
Edit - Cut (Or hit the Delete Key of
your Keyboard)
Selections - Select
None
Layers - Merge -
Merge Down
17
Layer
Palette - Click on the Second Layer
from the Top
Selections - Select
All
Selections -
Float
Effects - 3D
Effects - Inner Bevel - Color: #f9d9e4 
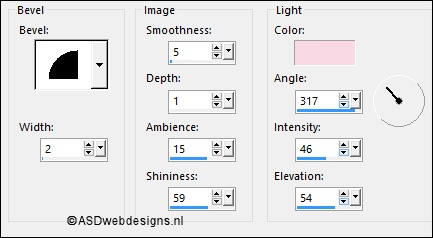
Effects -
Texture Effects - Weave - Weave Color & Gap Color
#fbcba1
Selections
- Select None
18
Layer Palette
- Click on the Top Layer
Layers - Arrange -
Move Down
Layer Palette
- Click on the Top Layer
Layers - Merge -
Merge Down
Effects - 3D
Effects - Drop Shadow - Vertical & Horizontal
5 - Opacity 50 - Blur -
50 - Color - #a7495e
Repeat with the Vertical and Horizontal
Offset to Minus 5
19
Layer
Palette - Click on the Second Layer
from the Top (Raster 3)
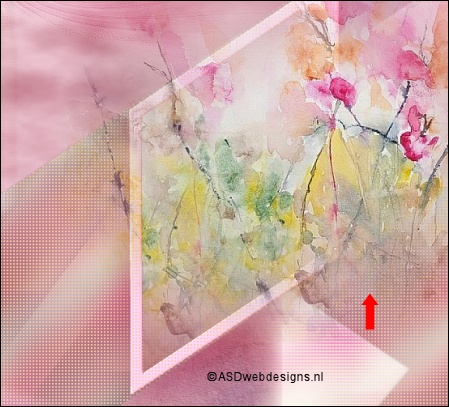
Edit - Paste as New
Layer ( Tube is still in your PSP
Memory)
Move to the Right
like this:
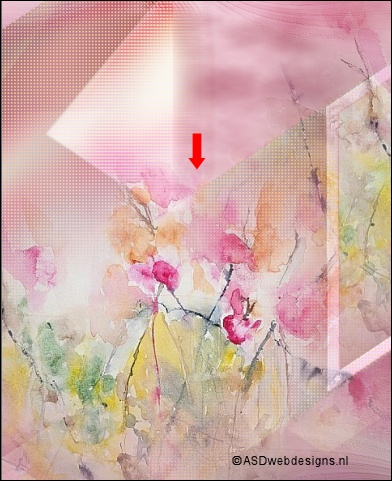
Edit - Paste as New
Layer ( Tube is still in your PSP
Memory)
Move to the Left
like this:
Layers - Merge -
Merge Down
Selections -
Load/Save Selection - Load Selection From Disk
- Msb_Sel_Spring_04
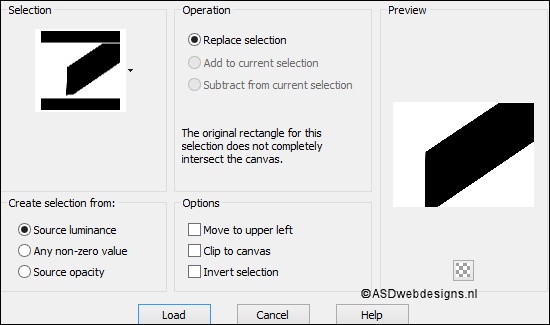
Edit - Cut (Or hit
the Delete Key of your Keyboard)
Selections - Select
None
Layer Palette -
Double click on this Layer and set the Blend Mode to "Soft
Light" and the Layer Opacity to
85
Note: If you use
a different tube you might need to use another Blend Mode or
just lower the Opacity if the Layer
20
Maximize Tube
"Msb_Deco02_Spring1" from
tray
Edit - Copy
On your work image: Edit - Paste
As New Layer
Effects - Image Effects - Offset

Effects - 3D Effects - Drop
Shadow - Vertical & Horizontal
1 - Opacity 25
- Blur - 1 - Color - #000000

21
Maximize Tube
"Msb_Deco03_Spring1" from
tray
Edit - Copy
On your work image: Edit - Paste
As New Layer
Effects - Image Effects - Offset
Layer Palette - Double click on this Layer and
set the Opacity of this Layer to
70
22
Layer Palette - Click on the Top
Layer
Maximize Tube
"JHanna_813
tube" from
tray
Edit - Copy
On your work image: Edit - Paste
As New Layer
Image - Resize - 60% - Resize all
Layers not checked
Eraser Tool  - Erase the Watermark
Image - Mirror -
Mirror Horizontal (
Image - Mirror in previous PSP
Versions)
Move to the Left like this:
Effects - 3D Effects - Drop
Shadow - Vertical & Horizontal
0 - Opacity 50 - Blur -
50 - Color - #a7495e
Adjust - Sharpness -
Sharpen
23
Maximize Tube
"Msb_Text_SpringIsInTheAir" from
tray
Edit - Copy
On your work image: Edit - Paste
As New Layer
Effects - Image Effects - Offset
24
Color Palette: Set the
Foreground Gradient back to color
Image - Add Borders -
Symmetric checked - 2 px - #a7495e
Image - Add Borders -
Symmetric checked - 2 px - #ffffff
Image - Add Borders -
Symmetric checked - 2 px - #a7495e
Selections - Select All
Image - Add Borders -
Symmetric checked - 50 px - #ffffff
Selections - Invert
Selections -
Promote Selection to Layer
Fill the Selection with #a7495e
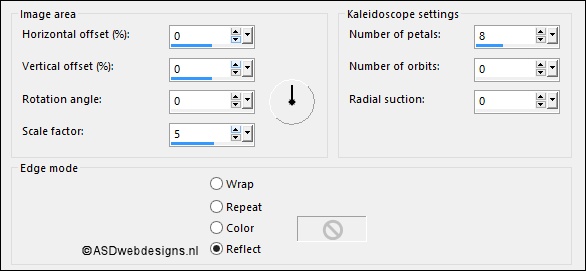
Effects - Reflection Effects -
Kaleidoscope
Keep selected
25
Layer Palette - Click on the
Bottom Layer
Color Palette: Set your
Foregroundcolor to Foreground/Background Gradient
(Corel_06_029) - Style: Radial
Layers
- New Raster Layer
Fill the Selection with the
Gradient 
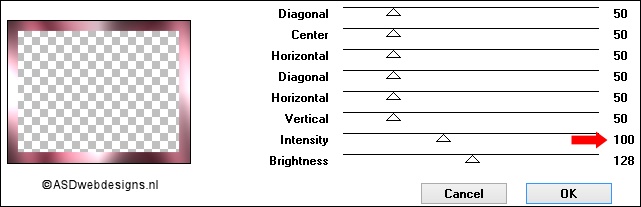
Effects - Plugins
- Graphics Plus - Cross Shadow
Selections - Invert
Effects - 3D
Effects - Drop Shadow - Vertical & Horizontal
5 - Opacity 30 - Blur -
15 - Color - #000000
Repeat with the Vertical and Horizontal
Offset to Minus 5
Selections - Select None
26
Layer Palette - Click on the Top
Layer
Magic Wand Tool
 - Mode: Add /Shift -
Tolerance 0 - Contiguous checked -
Anti Alias Checked - Click
in the solid borders like
this:
- Mode: Add /Shift -
Tolerance 0 - Contiguous checked -
Anti Alias Checked - Click
in the solid borders like
this:
Effects -
Texture Effects - Weave - Weave Color & Gap Color
#fbcba1
Selections - Select
None
Effects - 3D Effects - Drop Shadow
- Vertical & Horizontal 1 - Opacity
100 - Blur - 1 - Color
#ffffff
Repeat with the Vertical and Horizontal
Offset to Minus 1
Effects - 3D
Effects - Drop Shadow - Vertical -Minus 1
- Horizontal 1 - Opacity
100 - Blur - 1 - Color
#ffffff
Effects - 3D Effects - Drop
Shadow - Vertical -1 -
Horizontal Minus 1 - Opacity
100 - Blur - 1 -
Color #ffffff
Layer Palette - Double click on this Layer and
set the Opacity of this Layer to
50
27
Maximize Tube
"_k@rine_
Dreams_Pretty_Woman_2977_Juin_2014" from tray
Edit - Copy
On your work image: Edit - Paste
As New Layer
Image - Resize - 85% -
Resize all Layers not checked
Move Like this:
Layers - Duplicate
Layer Palette - Click on the
Second Layer from the Top
Adjust - Blur - Gaussian Blur - 30
Layer Palette - Double click on this Layer and set the
Blend Mode to "Overlay"
28
Image - Add Borders -
Symmetric checked - 2 px - #ffffff
Image - Add Borders -
Symmetric checked - 1 px - #a7495e
Image - Resize - Width 900
Pixels - Resize all Layers checked
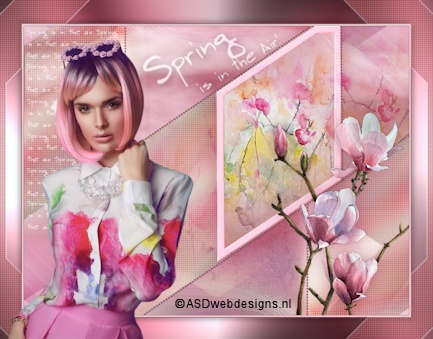
Add your name or watermark, save as JPG
file and you're done!
If
you wish you can post your result on my Face book Page