The tutorial:
01
Open a new
transparent image of 900 x 550 px
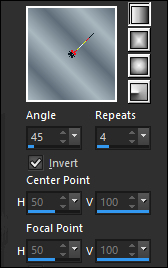
Fill the Layer with the Gradient

02
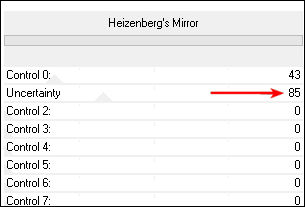
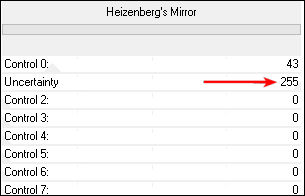
Effects - Plugins - <I.C.NET
Software> Filters Unlimited
2.0 - Funhouse - Heizenberg's Mirror
ATTENTION: There are more
versions available for this filter,
if you see only one option
(Uncertainty) it is also OK.
The example might look different but
it will be the same at the end
result
Effects - Plugins -
<I.C.NET Software> Filters
Unlimited 2.0 - Funhouse -
Heizenberg's Mirror
03
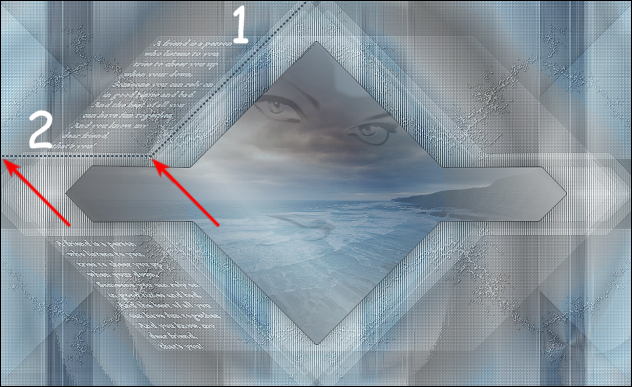
Layers - Duplicate
Image - Mirror - Mirror Horizontal (
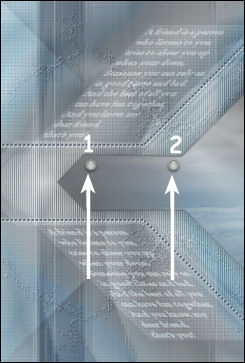
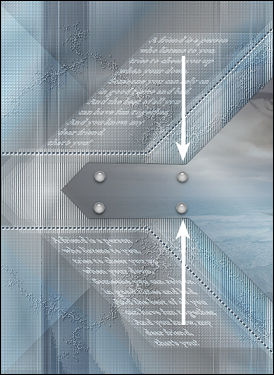
Image - Mirror in previous PSP
Versions)
Layer Palette: Lower the Opacity of
this Layer to 50
Layers - Merge Merge Down
Effects - Image Effects - Seamless
Tiling
Window - Duplicate or
Shift+D on your keyboard
File - Save - Save to your
desktop for later in case PSP should
shut down
04
Back on your original image:
Layers - Duplicate
Edit - Repeat Duplicate Layer
Layer Palette: Click on the Middle
Layer
Set the Blend Mode to Multiply
and lower the Opacity to
70
Click on the Top Layer
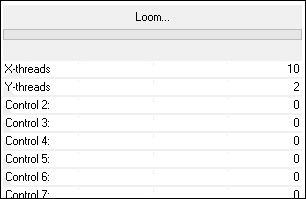
Effects - Plugins - <I.C.NET Software>
Filters Unlimited 2.0 -
Funhouse - Loom
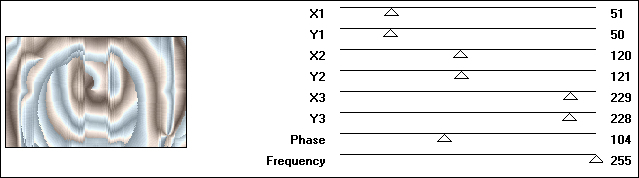
Effects - Plugins - VM Extravaganza -
Aura Detector
Layer Palette: Change the Blend
Mode of this Layer to Soft Light
and lower the Opacity to
50
05
Layers - New Raster Layer
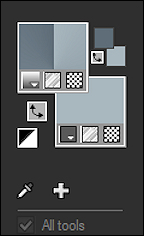
Materials Palette: Change the
settings of the Foreground Gradient
- Style: Linear
Fill the Layer with the Foreground
Gradient 
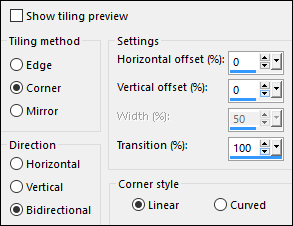
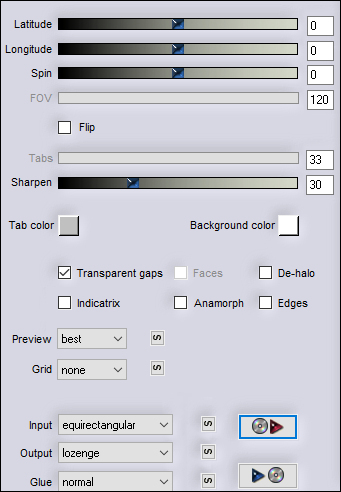
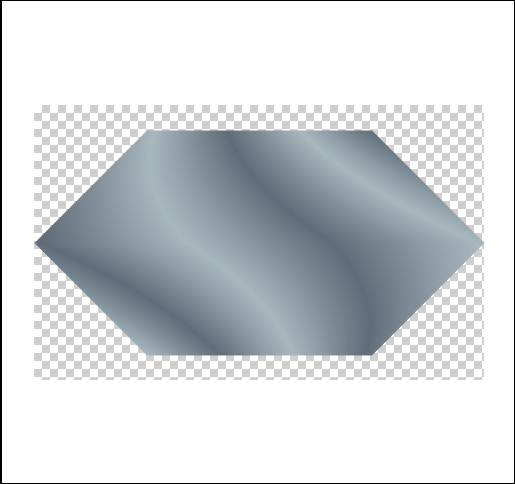
Effects - Plugins - Flaming Pear -
Flexify 2 - Preset - "Msb_Flexify 2
settings_19-8-12"
Note: If the Preset won't
work for you use these Settings:
06
Layers - Duplicate
Effects - Image Effects - Seamless
Tiling
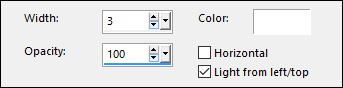
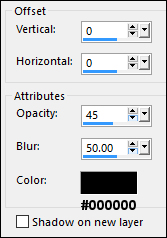
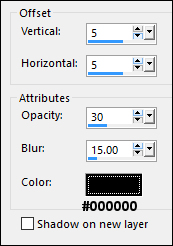
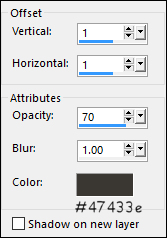
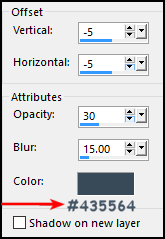
Effects - 3D Effects - Drop
Shadow

07
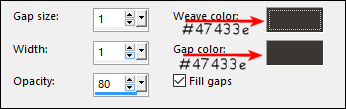
Effects - Texture Effects - Weave
color #47433e 
Layer Palette: Change the Blend
Mode to Dodge and lower the
Opacity to 50
Layers - Arrange - Move Down
Layer Palette: Click on the Top
Layer
Image - Resize - 60% - Resize All
Layers not checked
Image - Free Rotate
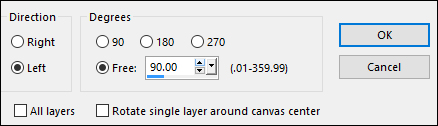
08
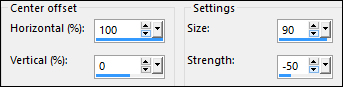
Layers - Duplicate
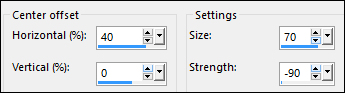
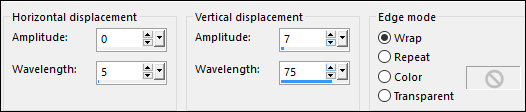
Effects - Distortion Effects -
Warp
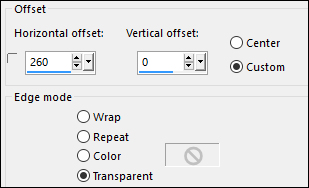
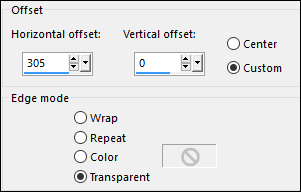
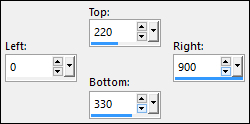
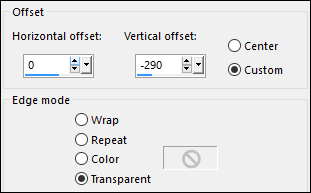
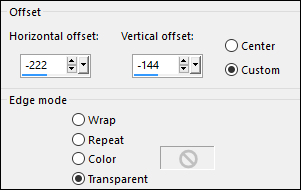
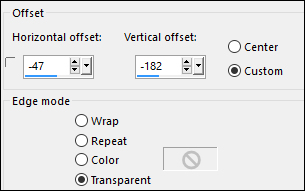
Effects - Image Effects - Offset
Layers - Duplicate
Image - Mirror - Mirror Horizontal (
Image - Mirror in previous PSP
Versions)
Layers - Merge - Merge Down
09
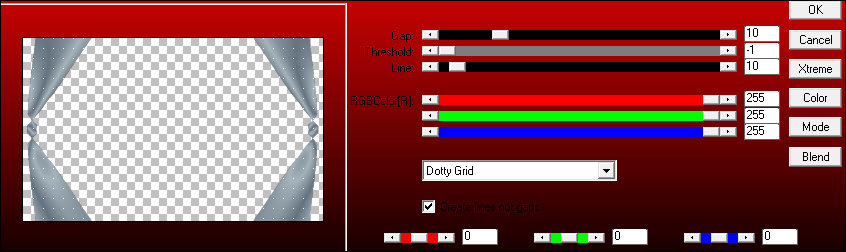
Effects - Plugins- AP 01 [Lines]
- SilverLining
Layer Palette: Lower the Opacity of
this Layer to 70
Effects - 3D Effects - Drop
Shadow
Layer Palette: Close this Layer by
clicking on the little eye and
activate the Layer below
Effects - Simple - Left Right Wrap
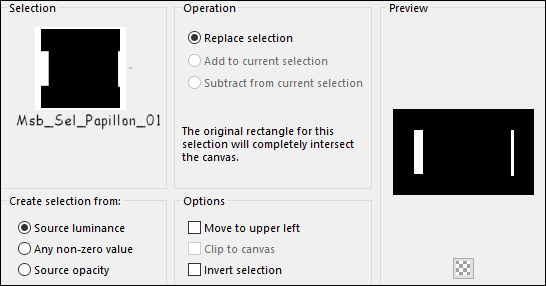
10
Selections - Load/Save - Load
Selection From Disk -
"Msb_Sel_Papillon_01"
Edit - Cut (Or hit Delete on
your keyboard)
Selections - Select None
Effects - 3D Effects - Drop
Shadow
Layer Palette: Change the Blend
Mode to Soft Light
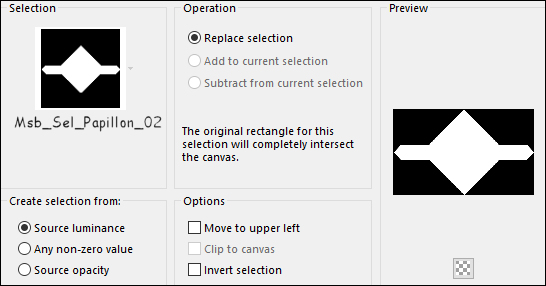
11
Layers - New Raster Layer
Selections - Load/Save - Load
Selection From Disk -
"Msb_Sel_Papillon_02"
Fill the Selection with the
Foreground Gradient
Layers - New Raster Layer
Maximize "NS_109_0709" from
tray
Edit - Copy
On your work image: Edit - Paste
- Paste Into Selection
Layer Palette: Change the Blend
Mode to Soft Light and lower
the Opacity to 78
Layers - Merge - Merge Down
Keep Selected
12
Layers - New Raster Layer
Materials Palette: Change the
Foreground Gradient back to Color -
#435564 
Fill the Layer with the
Foregroundcolor
Selections - Modify - Contract
-1px
Edit - Cut (or hit Delete on
your keyboard)
Selections - Select None
Layers - Merge - Merge Down
Layers - Duplicate
Layer Palette: Click on the layer
below (the original)
Effects - Plugins - mailto:It@lian Editors
Effect - Effetto Fantasma
Effects - Texture Effects - Blinds -
Color #ffffff 
Adjust - Sharpness - Sharpen
Layer Palette: Change the Blend
Mode to Overlay and lower the
Opacity to 72
13
Layer Palette: Click on the second
Layer from the Top
Image - Resize - 80% - Resize All
Layers - not checked
Effects - 3D Effects - Drop
Shadow
14
Maximize "BeautyMark~PAM"
from tray
Edit - Copy
On your work image: Edit -
Paste - Paste As New Layer
Image - Mirror - Mirror Horizontal (
Image - Mirror in previous PSP
Versions)
Image - Resize - 70% - Resize All
Layers - not checked
Effects - Image Effects - Offset

Layer Palette: Change the Blend
Mode to Luminance(Legacy)
and lower the Opacity to
20
15
Selection Tool (S) - Free Hand
Selection  - Point to Point

Draw a Selection around the eyebrows
outside the frame like this:
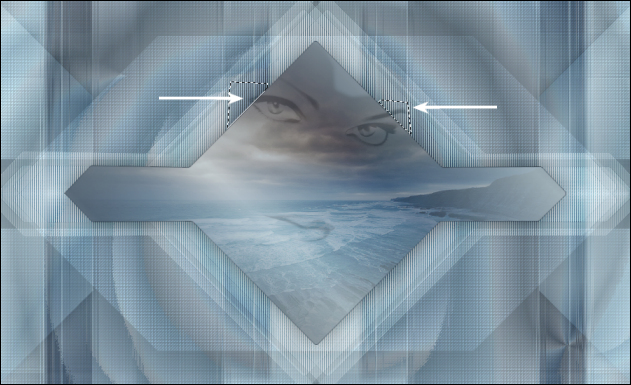
Edit - Cut (or hit Delete on
your keyboard)
Selections - Select None
16
Color Palette: Set your
Foregroundcolor to Fading White Gradient
(Corel_06_028) - Style: Linear

Layers - New Raster Layer
Selection Tool (S) - Custom
Selection 
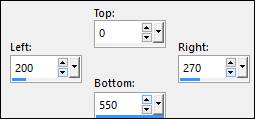
fill the Selection with the
Gradient 
Selections - Select None
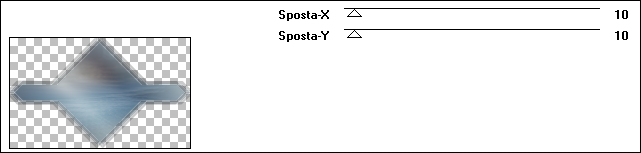
Effects - Distortion Effects
-Warp
Effects - Image Effects - Offset
Layers - Duplicate
Image - Mirror - Mirror Horizontal (
Image - Mirror in previous PSP
Versions)
Layers - Merge - Merge Down
Layer Palette: Change the Blend
Mode to Hue and lower the
Opacity to 84
17
Materials Palette: Change
the Foreground Gradient back to
Color - #677682
Backgroundcolor to - #a8b6be

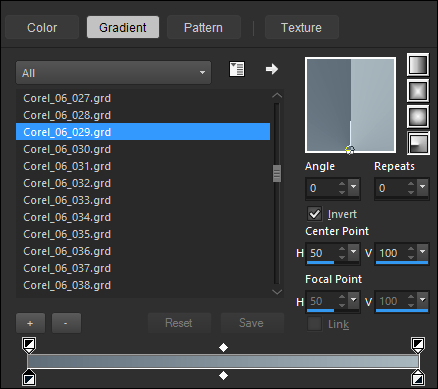
Color Palette: Set your
Foregroundcolor to Foreground/Background Gradient
(Corel_06_029) - Style: Radial
18
Layers - New Raster Layer
Effects - Plugins - Mehdi - Julia
World
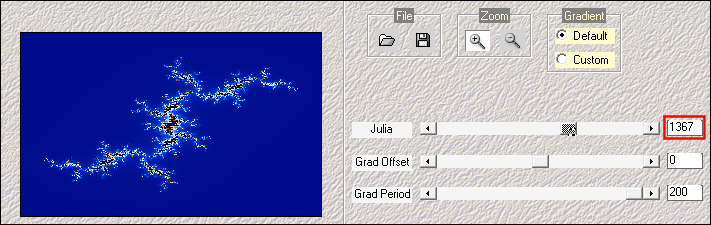
Note: If this plugin won't work
for you, use the Layer
"Msb_instelling-Julia-World" from
the Materials, delete the empty
Layer you just added first
Magic Wand : Click once anywhere
on the dark blue background
Selections - Modify - Select
Similar
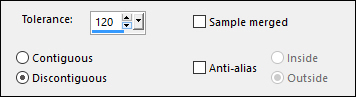
Click the Delete key on your keyboard
Selections - Select None
19
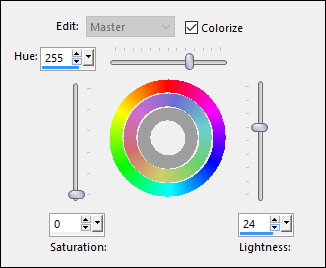
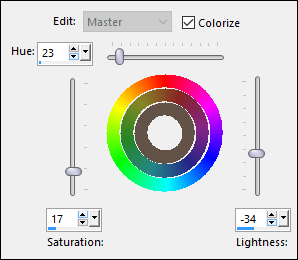
Adjust - Hue and Saturation -
Hue/Saturation/Lightness
Effects - Distortion Effects -
Wave
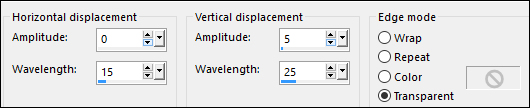
Image - Resize - 120% - Resize All
Layers - unchecked
Layers - Duplicate
Image - Mirror - Mirror Horizontal (
Image - Mirror in previous PSP
Versions)
Layers - Merge - Merge Down
20
Selections - Load/Save - Load
Selection From Disk -
"Msb_Sel_Papillon_03"
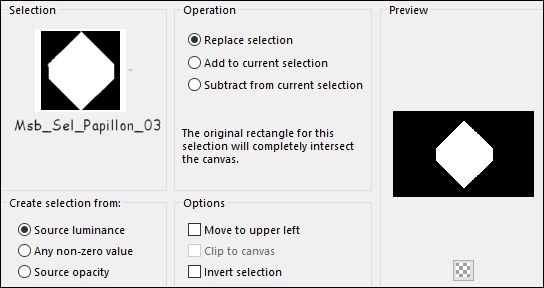
Edit - Cut (Or hit Delete on
your keyboard)
Selections - Select None
Layer Palette: Change the Blend
Mode to Soft Light and lower
the Opacity to 60
Effects - Edge Effects - Enhance
Effectd - 3D Effects - Drop
Shadow
21
Maximize "Msb_Tekst_22-8-12"
from tray
Edit - Copy
On your work image: Edit -
Paste - Paste As New Layer
Effects - Geometric Effects -
Skew

Effects - 3D Effects - Drop
Shadow

Adjust - Sharpness - Sharpen
Effects - Image Effects - Offset
Layer Palette: Change the Blend
Mode to Overlay and lower the
Opacity to 78
22
Edit - Paste - Paste As New Layer (
Tube is still in your PSP
memory)
Effects - 3D Effects - Drop
Shadow
Adjust - Sharpness - Sharpen
Effects - Geometric Effects -
Skew

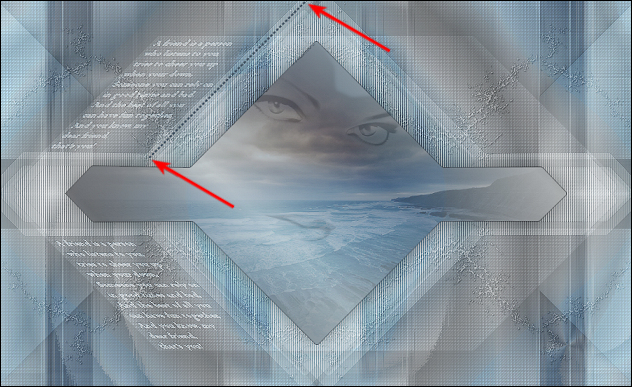
Move the text into place like
this:
Layer Palette: Change the Blend
Mode to Overlay and lower the
Opacity to 78
Layers - Merge - Merge Down
23
Materials Palette: Change
the Foreground Gradient back to
Color - #435564
Pen Tool (V): Line Style:
Corel_13_020 (Dashed or Dot in
older versions of PSP)

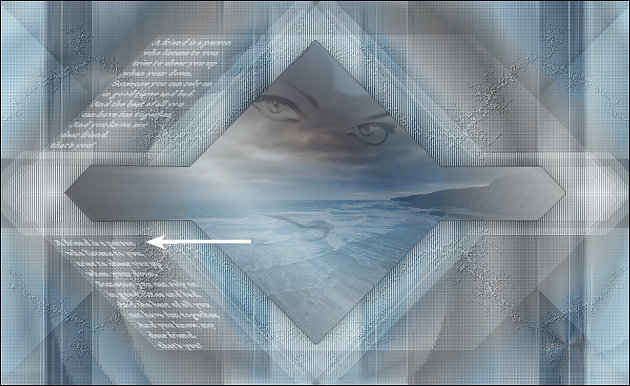
Holding down the Shift Key, draw a
line down like this:
Layer Palette: Right click and
Convert to Raster Layer
Draw another line across like this:
Layer Palette: Right click and
Convert to Raster Layer
Layers - Merge - Merge Down
24
Layers - Duplicate
Image - Mirror - Mirror Horizontal (
Image - Mirror in previous PSP
Versions)
Layers - Merge -Down
Layers - Duplicate
Image - Mirror - Mirror Horizontal (
Image - Mirror in previous PSP
Versions)
Image - Mirror - Mirror Vertical (
Image - Flip in previous PSP
Versions)
Layers - Merge Down
Effects - 3D Effects - Drop
Shadow
25
Layers - New Raster Layer
Selections - Load/Save - Load
Selection From Disk -
"Msb_Sel_Papillon_04"
Fill the Selection with - #ffffff

Effects - Plugins - Alien Skin - Eye
Candy 5 - Impact - Glass - Preset -
Clear
Selections - Select None
Layers - Duplicate
Move slightly to the Right like this:
Layers - Merge - Merge Down
Layers - Duplicate
Image - Mirror - Mirror Horizontal (
Image - Mirror in previous PSP
Versions)
Image - Mirror - Mirror
Vertical ( Image - Flip in previous
PSP Versions)
Move like this:
Layers - Merge - Merge Down
Effects - 3D Effects - Drop
Shadow
26
Layers - New Raster Layer
Selection Tool (S) - Custom
Selection
Fill the Selection with the
Foregroundcolor
Selections - Select None
Effects - Distortion Effects -
Wave
Effects - Image Effects - Offset
Layer Palette: Change the Blend
Mode to Soft Light and lower
the Opacity to 50
27
Layer Palette: Click on the Top
Layer and open it
Selections - Select All
Selections - Float
Selections - Defloat
Click on the layer below and hit
the Delete key twice
Click on the Fourth Layer from
the Top (The Lines)
Hit the Delete key twice
Selections - Select None
28
Click on the Top Layer
Maximize "Msb_tekst_Papillon"
from tray
Edit - Copy
On your work image: Edit - Paste
- Paste As New Layer
Effects - Image Effects - Offset
Effects - 3D Effects - Drop
Shadow
29
Maximize "_CBS_OrangeTransideButterfly"
from tray
Edit - Copy
On your work image: Edit -
Paste - Paste As New Layer
Image 0- Resize - 70% - Resize All
Layers - not checked
Image - Mirror - Mirror Horizontal (
Image - Mirror in previous PSP
Versions)
Effects - Image Effects - Offset

Adjust - Hue and Saturation -
Hue/Saturation/Lightness
30
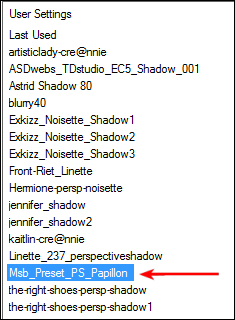
Effects - Plugins - Alien Skin -
Eye Candy 5 - Impact - Perspective
Shadow - Preset -
"Msb-Preset_PS_Papillon"
Layers - Duplicate
Image - Resize - 50% - Resize All
Layers - not checked
Effects - Image Effects - Offset
Layers - Merge - Merge All Flatten
31
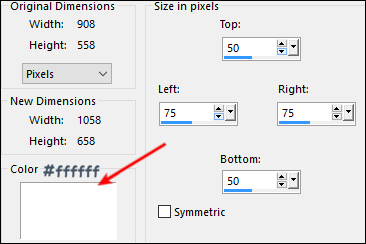
Image - Add Borders - Symmetric
checked - 1px -
Foregroundcolor- #435564
Image - Add Borders - Symmetric
checked - 2px - Backgroundcolor -
#ffffff
Image - Add Borders - Symmetric
checked - 1px - Foregroundcolor- -
#435564
Selections - Select All
Image - Add Borders - Symmetric -
not checked
Selections - Invert
32
Open the image saved in step#3
Edit - Copy
On your work image: Edit -
Paste - Paste Into Selection
keep selected
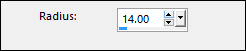
Adjust - Blur - Gaussian Blur
Selections - Invert
Effects - 3D Effects - Drop
Shadow
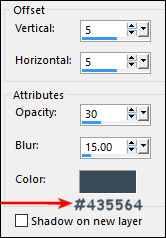
Effects - 3D Effects - Drop
Shadow
Selections - Select None
33
Maximize "Mary 0812-3" from
tray
Edit - Copy
On your work image: Edit - Paste
- Paste As New Layer
Image - Resize - 80% 0 Resize All
Layers - not checked

Adjust - Sharpness - Sharpen
Effects - 3D Effects - Drop
Shadow
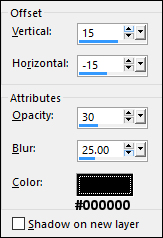
Image - Add Borders - Symmetric
checked - 1px -
Foregroundcolor- #435564
34
Optional:
Image - Resize - Width
900 Pixels - Resize all Layers checked
Add your name or watermark, save as JPG
file and you're done!
If
you wish you can post your result on my Face book Page