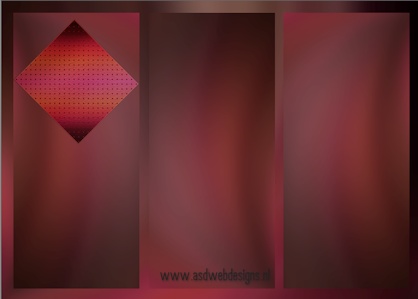
Image -
Mirror
Layers - Merge -
Merge Down - REPEAT ONCE!
Your work and
Layer Palette look like this
now:
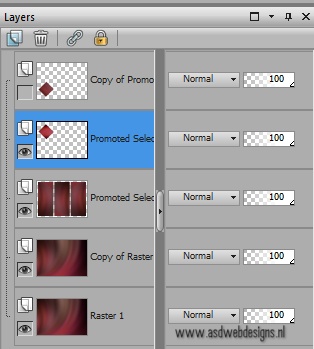
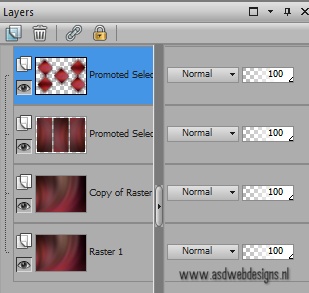
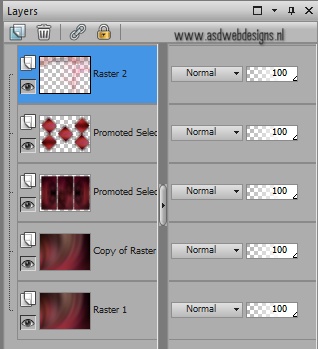
Layer Palette - Click on the third Layer from the
Bottom
Layers - New
Raster Layer
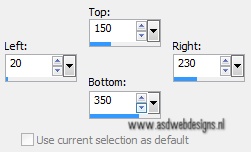
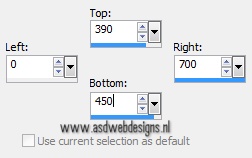
Selection Tool - Rectangle
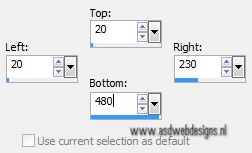
 - Custom Selection:

Fill the
Selection with the Backgroundcolor

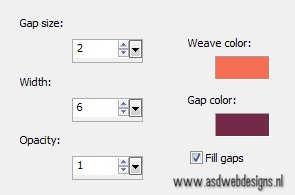
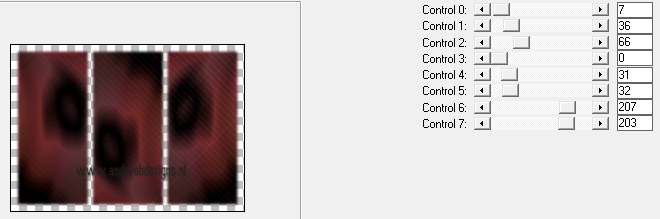
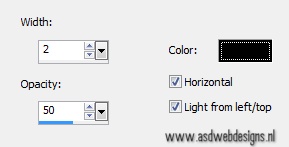
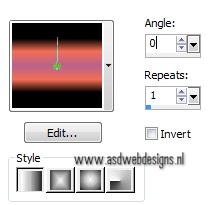
Effects - Texture Effects - Blinds - Color:
#000000 
Selections -
Select None
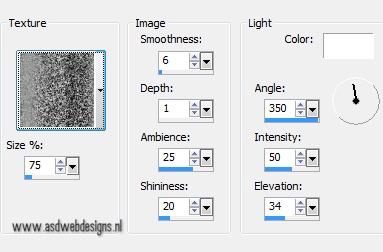
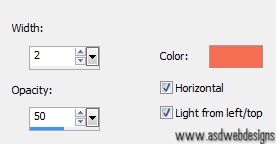
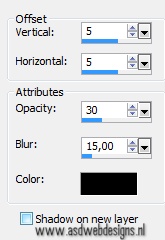
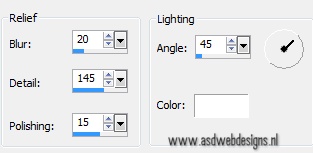
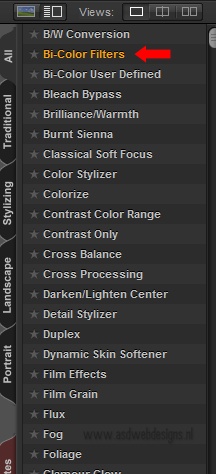
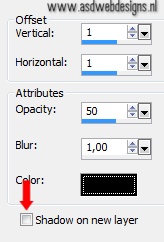
Effects 3D
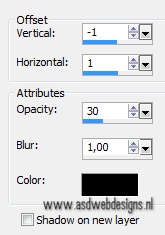
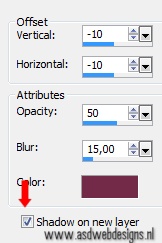
Effects - DropShadow - Color:
#000000
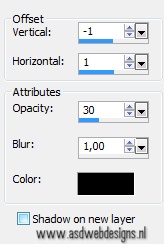
Effects 3D
Effects - DropShadow - Color:
#000000
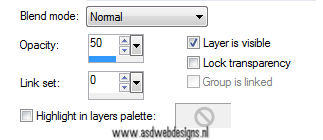
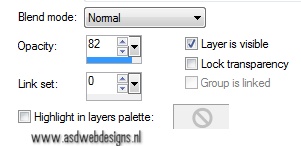
Layer Palette - Double click on this
Layer and set the Layer Opacity of
this layer to 82
23
Color
Palette: Set your Foregroundcolor
back to color
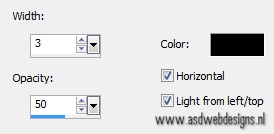
Pen Tool  - Mode:
Draw Lines and Poly Lines -
Create as Vector checked -
Linestyle
Corel_13_020-ruitvormig - Width
4
- Mode:
Draw Lines and Poly Lines -
Create as Vector checked -
Linestyle
Corel_13_020-ruitvormig - Width
4
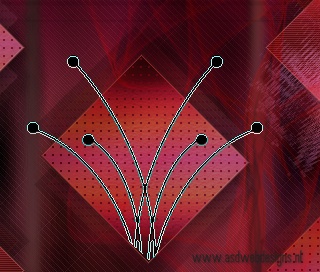
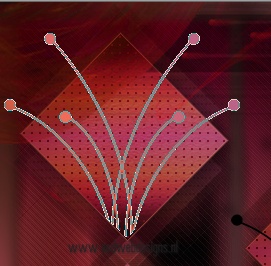
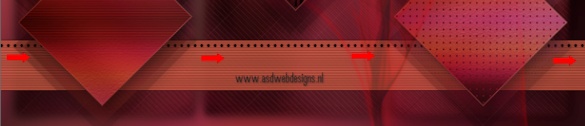
Hold down your Shift key and draw a
line from Right to Left like
this:
Layers - Convert to
Raster Layer
Layers -
Duplicate
Move down like
this:
Layers - Merge -
Merge Down
Adjust - Sharpness
- Sharpen
Layers - Merge -
Merge Down
24
Layer Palette - Click on the top
layer
Open
Tube "k@rine_dreams_Lady_Dreams_1777_Juin,_2011"
Edit - Copy
On your work image: Edit - Paste
as New Layer
Image - Resize - 65% - Resize all
layers not checked
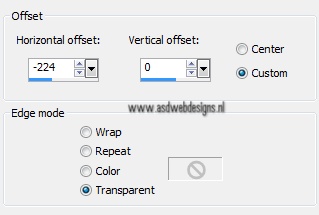
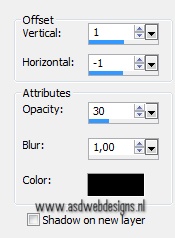
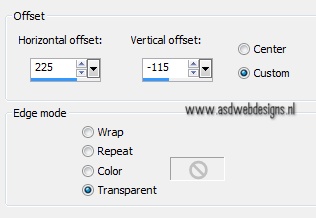
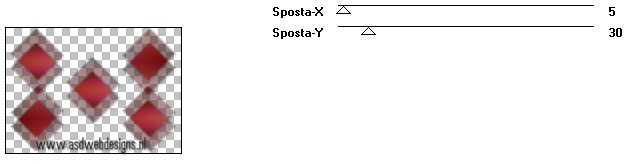
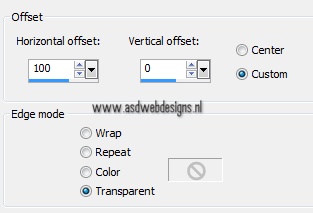
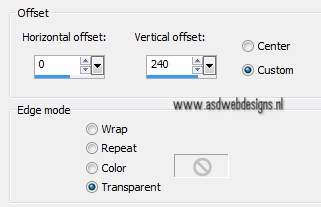
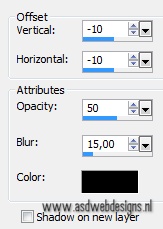
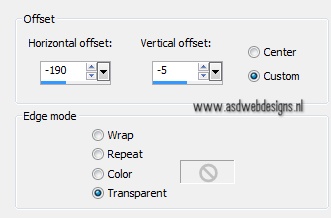
Effects - Image Effects -
Offset
Adjust -
Sharpness - Sharpen.
Effects 3D
Effects - DropShadow - Color:
#000000
25
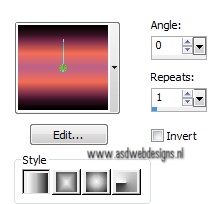
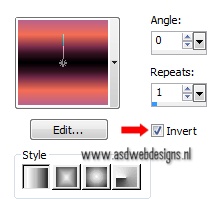
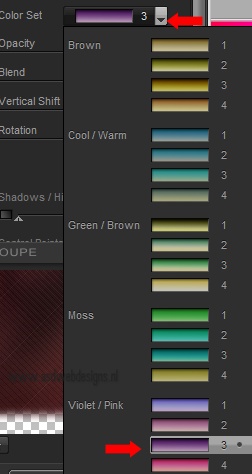
Color Palette: Swap
Materials. Your Foregroundcolor is now #000000. Set your
Backgroundcolor to the Msb_Gradient_30-6-11 Gradient with
these settings:
Text Tool  Font Broken Glass - Size
42 - Units: Pixels - Font
Style: Bold - Stroke Width 0 - Create
as: Vector
Font Broken Glass - Size
42 - Units: Pixels - Font
Style: Bold - Stroke Width 0 - Create
as: Vector
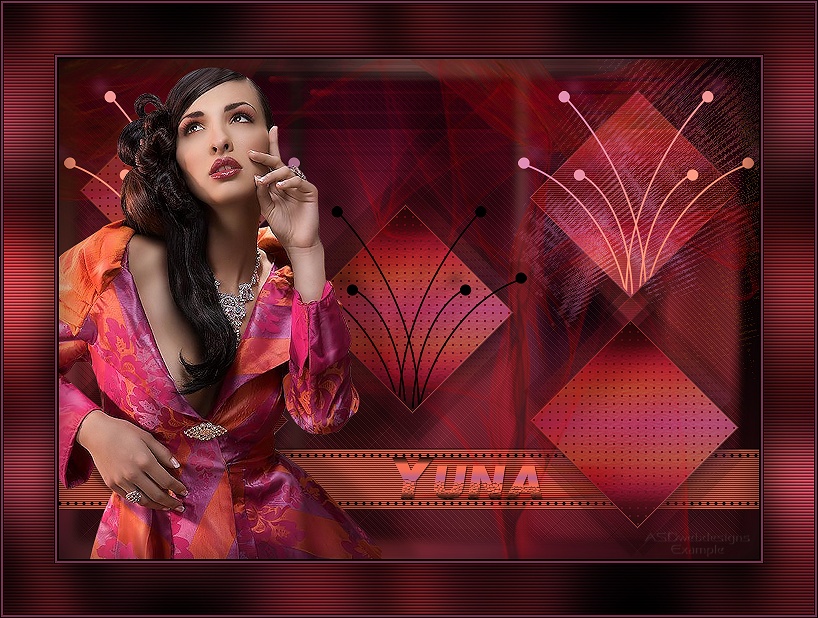
Type: Yuna
or your own text
Layers - Convert to Raster Layer
Effects 3D Effects
- DropShadow - Color: #000000
Layers -
Duplicate
Layer Palette - Click on the original text
layer
Effects - Distortion Effects - Wind - From
Left checked - Wind Strength:
100
Effects - Distortion Effects - Wind - From
Right checked - Wind Strength:
100
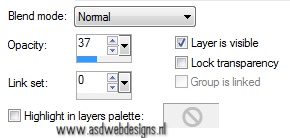
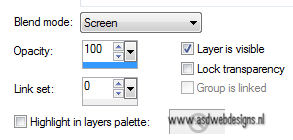
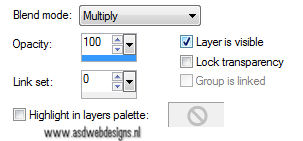
Layer Palette - Double click on this
Layer and set the Blend Mode to
"Multiply"
Color
Palette: Change the Backgroundcolor
to #732b49

Image - Add Borders - Symmetric
checked - 1 px - Foregroundcolor
Image - Add Borders - Symmetric
checked - 2 px -
Backgroundcolor
Image - Add Borders - Symmetric
checked - 1 px - Foregroundcolor
Set your Backgroundcolor
to #f56d53 and to the Msb_Gradient_30-6-11 Gradient with
these settings:
Selections -
Select All
Image - Add Borders - Symmetric
checked - 50 px - Foregroundcolor
Selections -
Invert
Fill with the
Background Gradient 
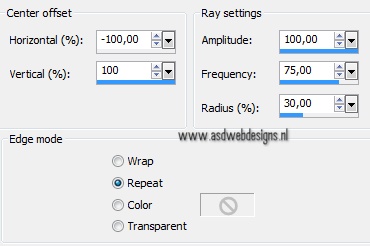
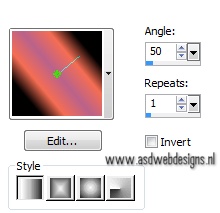
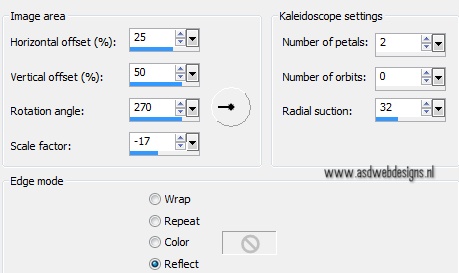
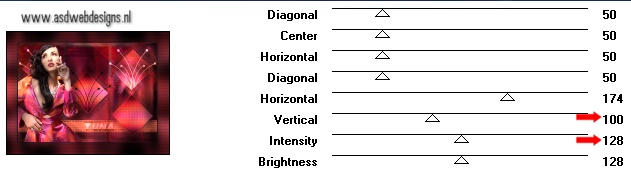
Effects - Reflection Effects -
Kaleidoscope
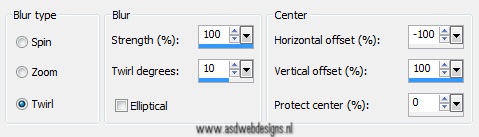
Adjust - Blur -
Gaussian Blur - 25
Effects - Texture Effects - Blinds - Color:
#000000
Effects - Plugins - Graphics
Plus - Cross Shadow
Selections -
Invert
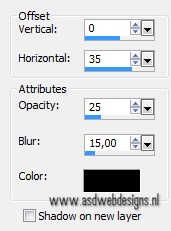
Effects 3D
Effects - DropShadow - Color:
#000000
Repeat with the Vertical and Horizontal
Offset to Minus 5
Selections -
Modify - Contract - 4 px
Selections -
Invert
Effects - 3D
Effects - Dropshadow - Color
#000000
Repeat with the Vertical and Horizontal
Offset to Minus 5
Selections -
Select None
27
Color Palette:
Set the Backgroundcolor back to
color and Change to #732b49
Image - Add Borders - Symmetric
checked - 1 px - Foregroundcolor
Image - Add Borders - Symmetric
checked - 2 px -
Backgroundcolor
Image - Add Borders - Symmetric
checked - 1 px - Foregroundcolor
Adjust -
Sharpness - Sharpen
28
Add
your name or watermark, save as JPG file and you're
done!