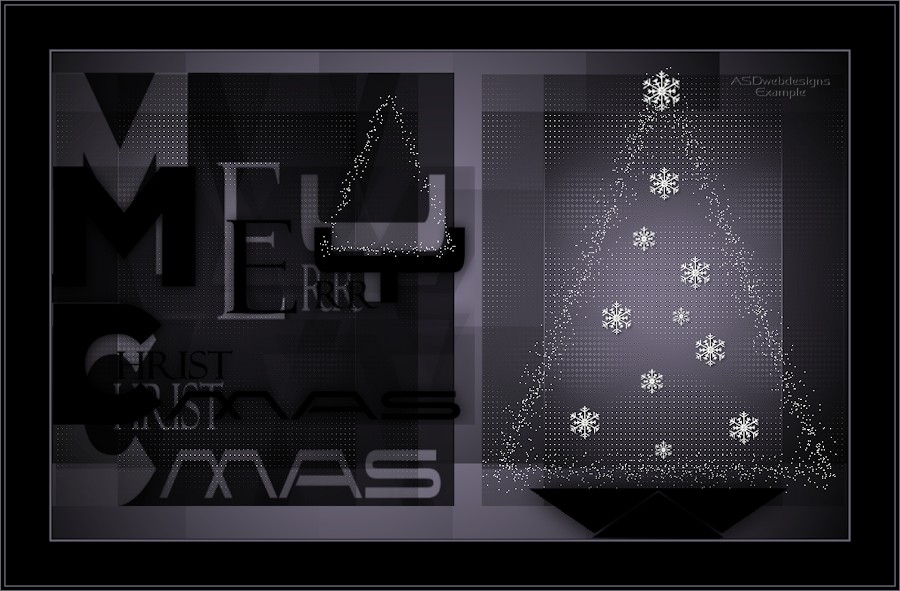
Open
a new transparent image of 900 x 550
px
Fill with the
Backgroundcolor 
Layers - New
Raster Layer
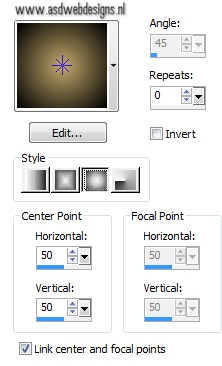
Fill with the
Gradient 
Effects - Plugins
- VM Distortion - Vision
Impossible
02
Layers - New
Raster Layer
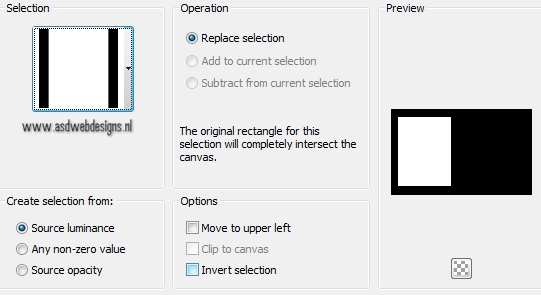
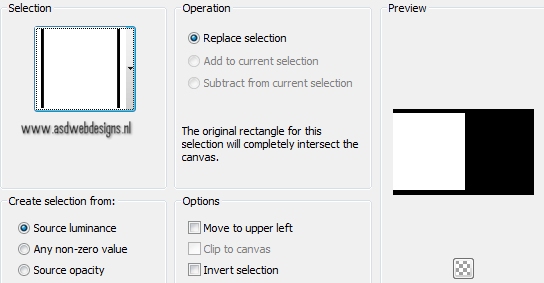
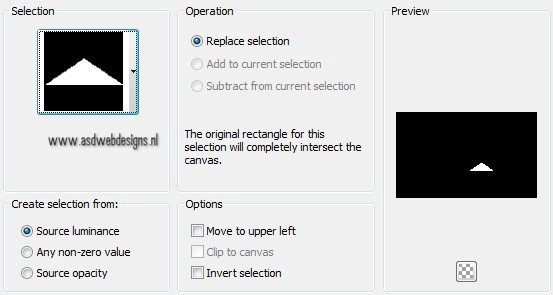
Selections -
Load/Save Selection - Load
Selection From Disk -
MDlessen-selectie
MDlessen-selectie109
Fill the
Selection with the Gradient
Effects - Plugins
- L en K landksiteofwonders -
L & K’s Zitah
Selections -
Select None
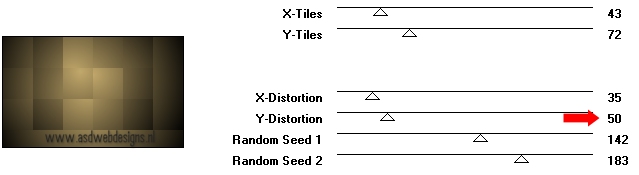
Effects - Plugins - Toadies - What
Are You? - X-dose 20 - Y-dose
20
Effects - Edge
Effects - Enhance
Layers -
Duplicate
Image -
Mirror
03
Layers - New
Raster Layer
Selections -
Load/Save Selection - Load Selection
From Disk -
MDlessen-selectie108
Fill with
the Backgroundcolor
Maximize Mask "Monaiekje mask
28" ( you
have minimized it tot tray )
Edit - Copy
Minimize to tray again, you need it
later.
On your work
image: Edit - Paste Into Selection
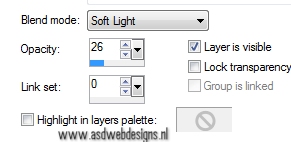
Layer Palette -
Double click on
this Layer and set the Blend Mode to
"Soft Light" and the Layer Opacity to
26
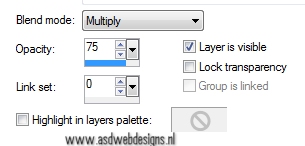
Layers -
Duplicate
Layer Palette -
Double click on
this Layer and set the Blend Mode to
"Multiply" and the Layer Opacity to
75
Selections -
Select None
04
Layers - New
Raster Layer
Fill with the Backgroundcolor
Layers - New Mask Layer - From Image
- Monaiekje mask
28
Layers - Merge - Merge Group
Effects 3D Effects -
DropShadow - Color: #000000
Image - Resize - 53% - Resize all
layers not checked
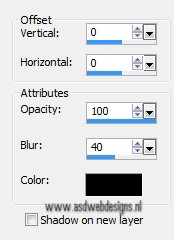
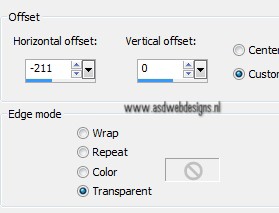
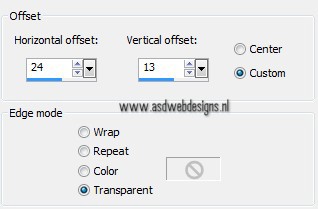
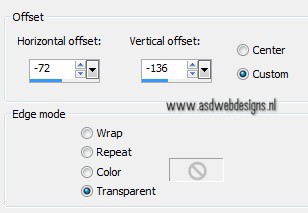
Effects - Image Effects -
Offset
Layers - Merge - Merge Visible
05
Color Palette: Set your
Foregroundcolor back to color and
change to #ffffff, lock the
Backgroundcolor
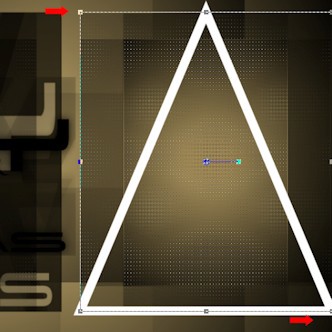
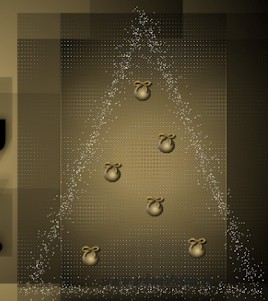
Preset Shape Tool  - Shape:
Triangle - Linestyle Solid
- Width
15
- Shape:
Triangle - Linestyle Solid
- Width
15
Draw a triangle like this, start at
the Top Left to the Bottom
Right:
Layers - Convert to Raster
Layer
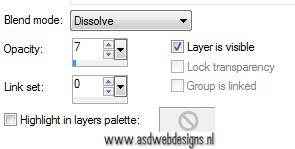
Layer Palette - Double click on this
Layer and set the Blend Mode to
"Dissolve" and the Layer Opacity
to 7
Effects 3D Effects -
DropShadow - Color: #ffffff
.jpg)
Image - Resize - 90% - Resize all
layers not checked
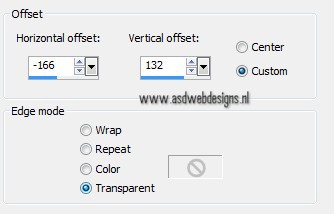
Effects - Image Effects -
Offset
06
Layers -
Duplicate
Image - Resize - 40% - Resize all
layers not checked
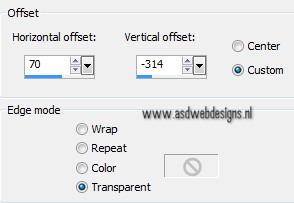
Effects - Image Effects -
Offset
Layer
Palette: Open the Backgroundcolor
Selections -
Load/Save Selection - Load Selection
From Disk -
MDlessen-selectie110
Layers - New
Raster Layer
Fill with the Backgroundcolor
.jpg)
Selections -
Select None
Layers -
Duplicate
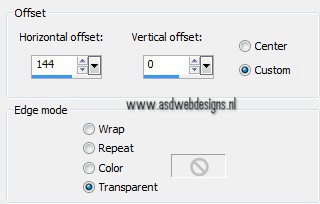
Effects - Image Effects -
Offset
07
Layers -
Duplicate
Image - Flip
Effects - Image Effects -
Offset
Layers - Merge - Merge Down - REPEAT
ONCE
Effects 3D Effects -
DropShadow - Color: #000000
Image - Flip
Effects - Image Effects -
Offset
08
Color Palette: Set your
Foregroundcolor back to #c2a86b
 and the same
Gradient as before
and the same
Gradient as before
Layers - New
Raster Layer
Selections -
Load/Save Selection - Load Selection
From Disk - MDlessen-selectie111
Fill the Selection with the Gradient
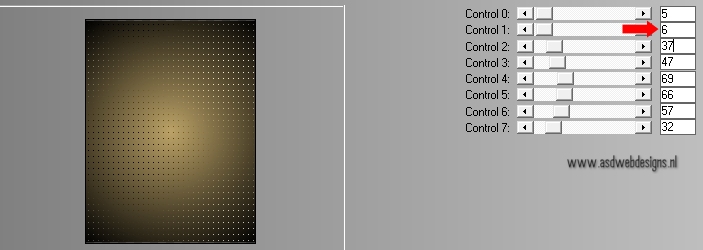
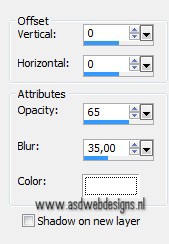
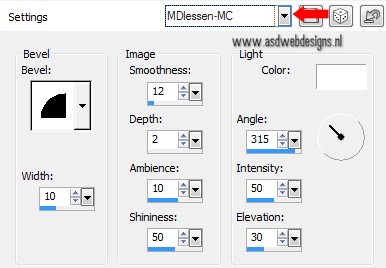
Effects - 3D Effects - Inner Bevel -
Preset "MDlessen-MC"
or fill in the settings
yourself
Effects - Plugins - Alien Skin Eye
Candy 5 Impact - Glass -
Settings Tab: Preset
Clear
Selections -
Select None
Image - Resize - 70% - Resize all
layers not checked
Effects 3D
Effects - DropShadow - Color:
#000000
09
Open Tube "GGBow_018"