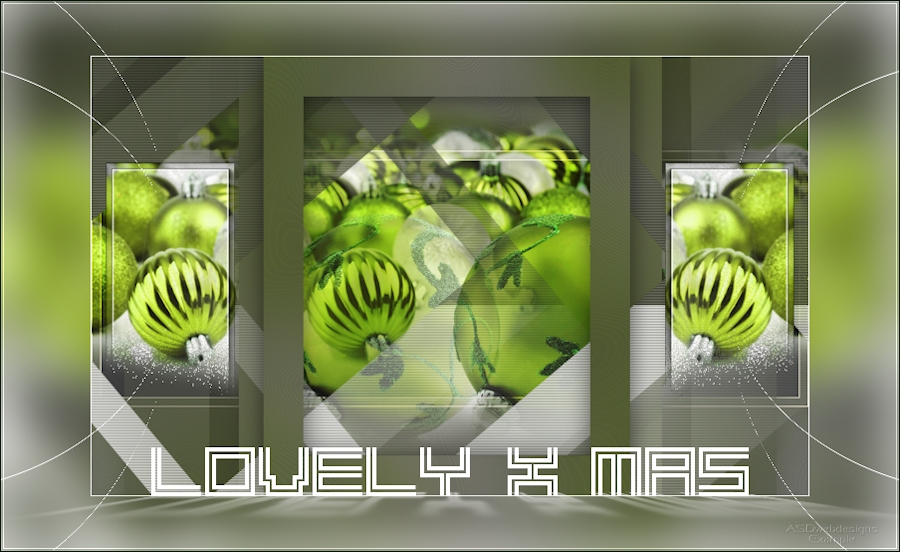
Open a New
Transparent image of 900 x 550 px
Fill with the
Foregroundcolor 
Selections -
Select All
Open Tube "Leny-kerst102"
Edit - Copy
On your work
image: Edit - Paste Into
Selection
Selections - Select
None
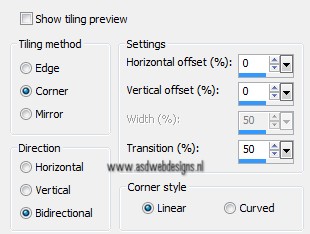
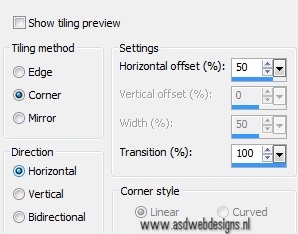
Effects - Image Effects - Seamless
Tiling
Adjust - Blur - Gaussian Blur -
45
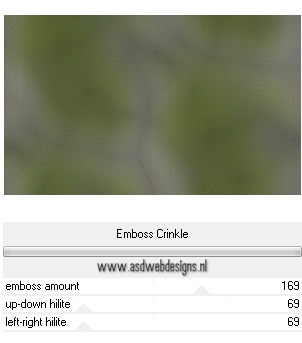
Effects - Plugins - <I.C.NET
Software> Filters Unlimited
– &<Bkg Designer sf10II>
- Emboss Crinkle
02
Layers - Duplicate
Effects - Plugins – VM Toolbox -
Seamless Tile
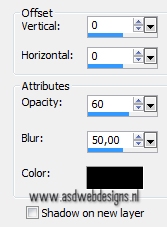
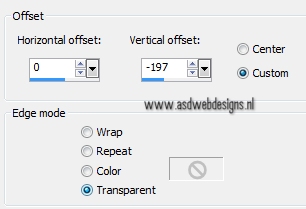
Effects 3D Effects -
DropShadow - Color: #000000 
03
Layer Palette - Close the top layer by
clicking on the little eye
Click on the Bottom layer
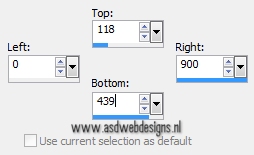
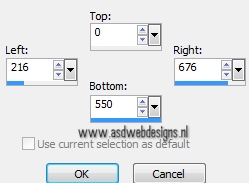
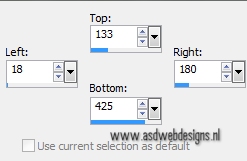
Selection Tool - Rectangle
 - Custom Selection:

Selections - Promote Selection to
Layer
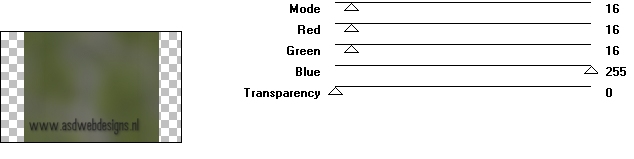
Fill the Selection with the
Foregroundcolor
Selections - Modify -
Contract -1 px
Edit - Cut
Selections - Modify -
Contract - 10 px
Fill the Selection with the
Foregroundcolor
Selections - Modify -
Contract - 1 px
Fill the Selection with the
Backgroundcolor  (Right Mouse Click)
Selections - Select None
04
Edit - Paste as New Layer ( Tube is
still in your PSP memory)
Effects - Image Effects - Seamless
Tiling
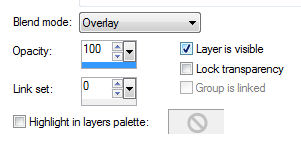
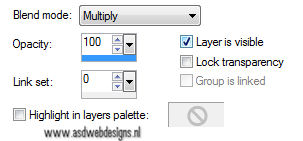
Layer Palette - Double click on this Layer and set
the Blend Mode to
"Overlay"
05
Layer Palette - Click on the top layer and
open it again
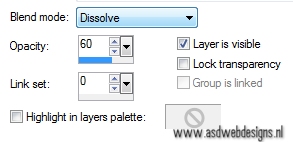
Effects - Plugins – It@lian Editors
Effect – Effetto
Fantasma
06
Layer Palette - Click on the Bottom layer
Selection Tool -
Rectangle - Custom Selection:
Selections - Promote Selection to
Layer
Layers - Arrange - Bring to
Top
Selections - Modify - Contract - 50
px
Edit - Cut
Keep selected
07
Layer Palette - Click on the Second layer from the
top
Edit - Cut
Keep selected
08
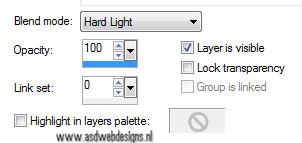
Layer Palette - Click on the Third layer from the top
( The Tube layer)
Layer Palette - Double click on this Layer and set
the Blend Mode to
"Hard Light"
Selections - Select
None
09
Layer Palette - Click on the top
layer
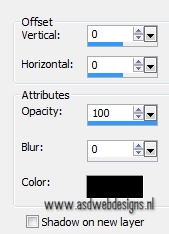
Effects 3D Effects -
DropShadow - Color: #000000
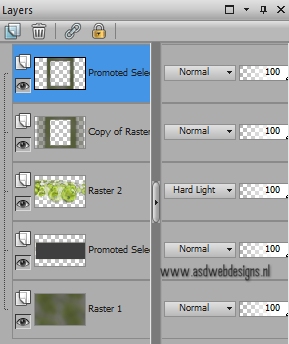
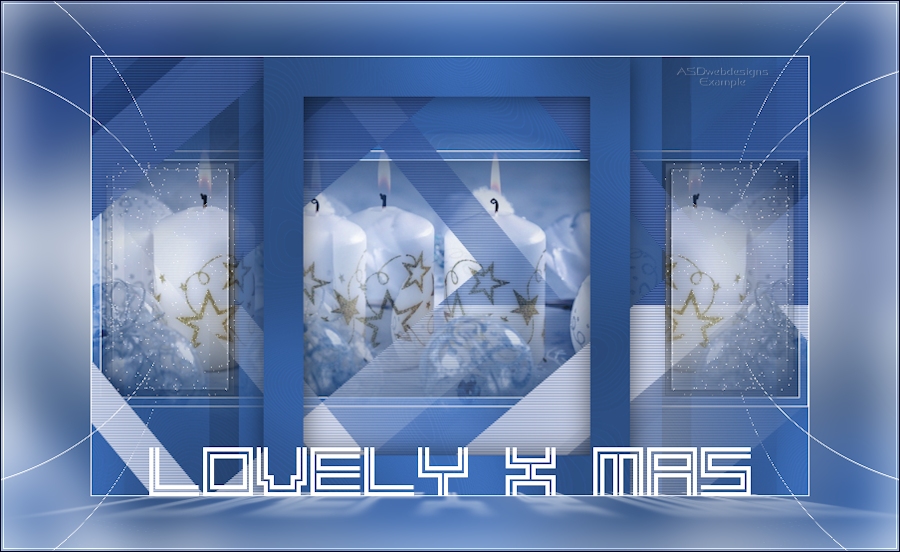
Your work and Layer Palette look
like this now: