Selections - Select All
Open Tube "Gerry-Lady 215 -
24 februari 2009"
Note: If
you are using tubes and colors of your
own, it is best to use this
tube for this step, otherwise the result will be
different. You can colorize it to match your
work.
Edit - Copy
On your work image: Edit -
Paste Into Selection
Selections - Select None
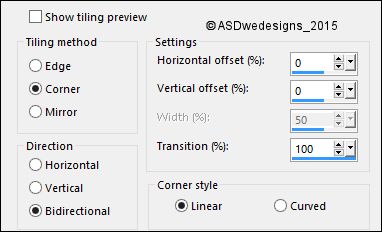
Effects - Image Effects - Seamless
Tiling
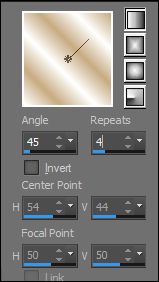
Adjust - Blur - Radial Blur
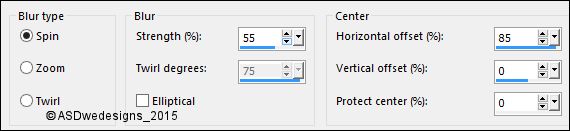
02
Layers
- Duplicate
Image - Mirror - Mirror Horizontal ( Image - Mirror in previous
PSP Versions)
Layer
Palette - Double click on this Layer and
set the Layer Opacity of this Layer
to 50
Layers - Merge - Merge Down
Effects - Image Effects - Seamless Tiling - Same settings as
before
03
Layers - Duplicate
Image -
Free Rotate - Right checked - 90° -
Both boxes
unchecked
Effects - Edge Effects - Enhance
Layer Palette - Double click on this Layer and set the
Blend Mode to "Overlay"
Layers - Merge - Merge Down
Effects - Plugins - Simple -
Blintz
04
Layers - Duplicate
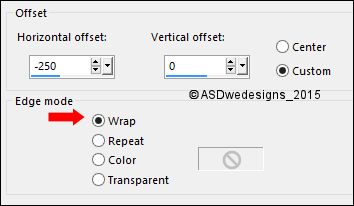
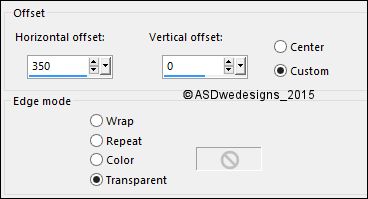
Effects - Image Effects - Offset
Layers - Duplicate
Image - Mirror - Mirror Horizontal ( Image - Mirror in previous
PSP Versions)
Layer
Palette - Double click on this Layer and
set the Layer Opacity of this Layer
to 50
05
Layer
Palette - Click on the Middle Layer (Copy of Raster
1)
Layer Palette - Double click on this Layer and set the
Blend Mode to "Overlay"
06
Layer
Palette - Click on the Bottom Layer
Selections - Load/Save Selection - Load Selection From Disk -
MDlessen-selectie32
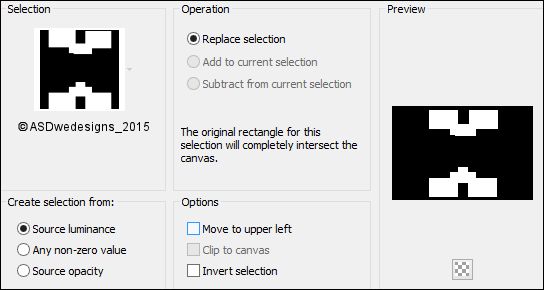
Selections - Promote Selection to Layer
Effects -
Texture Effects - Blinds - Color: #ffffff 
Selections - Select None
Effects - Plugins - VM Toolbox -
Zoom Blur - Amount 39 - Adjust 60
07
Layers - Arrange - Bring to Top
Layer Palette - Double click on this Layer and set the
Blend Mode to "Soft Light"
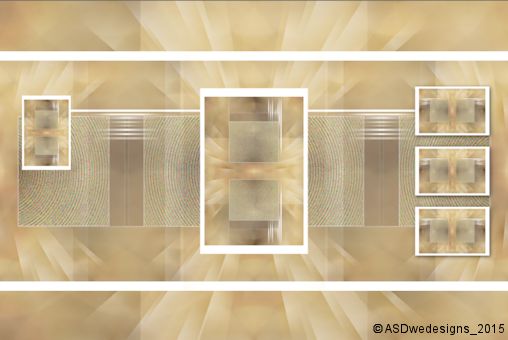
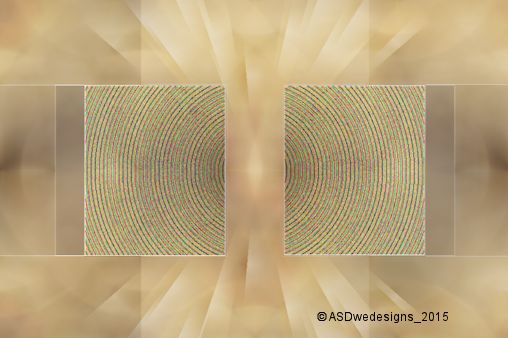
Layers - Merge - Merge Visible
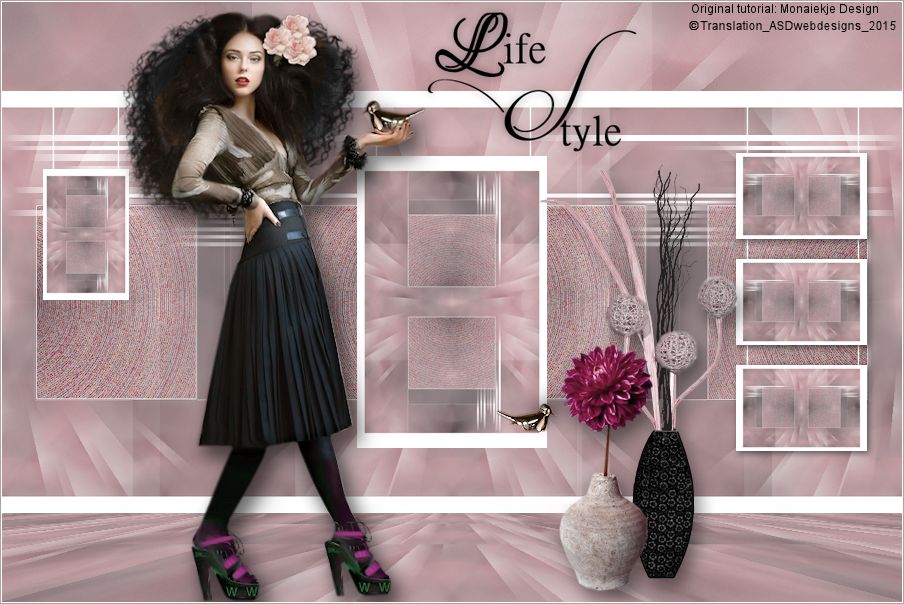
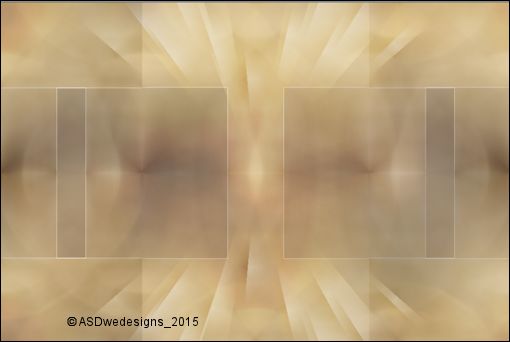
Your work looks like this now:
08
Color Palette: Set the Foreground Gradient back to color
Window - Duplicate (or shift+D) -
Minimize to tray ( I always also save as PSP
file) and go back to the
original
Selections - Load/Save Selection - Load Selection From Disk -
MDlessen-selectie33
Selections - Promote Selection to Layer
Selections -
Modify - Expand - 1 px
Fill the Selection with the Foregroundcolor
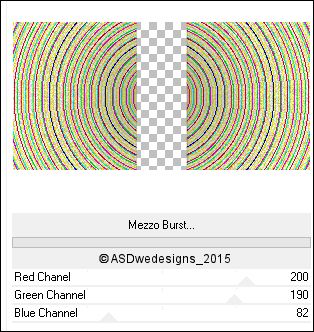
Effects - Plugins - <I.C.NET
Software> - Filters Unlimited 2.0 - Andrew's
Filter 3 - Mezzo Burst
Layer Palette - Double click on this Layer and set the
Blend Mode to "Hard Light" and the Layer Opacity to
50
Keep selected!
09
Layers - Duplicate
Layer Palette - Double click on this Layer and set the
Blend Mode to "Multiply" and the Layer Opacity to
100
Selections - Modify - Select Selection
Borders - Inside checked - Anti-alias
NOT checked - Border width: 1
Layers
- New Raster Layer
Fill the Selection with the Foregroundcolor (Zoom in if need to)
Selections - Select None
Layers - Merge - Merge All (Flatten)
Your work looks like this now:
10
Layers - New Raster
Layer
Selections - Load/Save Selection - Load Selection From Disk -
MDlessen-selectie34
Fill the Selection with the Foregroundcolor
Selections - Select None
Effects -
Distortion Effects - Wind - From Left checked -
Wind Strength: 100
11
Layers - Duplicate
Image - Mirror - Mirror Horizontal ( Image - Mirror in previous
PSP Versions)
12
Image -
Add Borders - Symmetric not checked -
Foregroundcolor
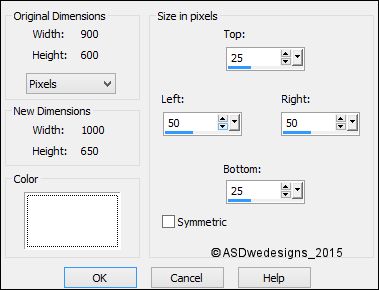
Image - Resize
- 65% - Resize all Layers
checked
Edit - Copy
Do not close, you need it again
13
Maximize the image you minimized to tray in
Step 8. this will be your main work image now.
Edit - Paste As New Layer
Effects - Image Effects - Seamless Tiling
14
Go back to the smaller image
Image -
Resize - 45% - Resize all Layers
checked
Edit - Copy
Go back to the main work image
Edit - Paste As New Layer
Image -
Free Rotate - Right checked - 90° -
Both boxes
unchecked
15
Edit
- Paste As New Layer (Image is still in your PSP memory)
Image -
Resize - 45% - Resize all Layers not
checked
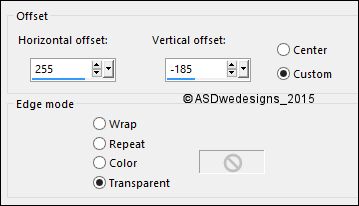
Effects - Image Effects - Offset
16
Layers - Duplicate
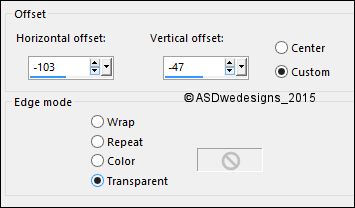
Effects - Image Effects - Offset
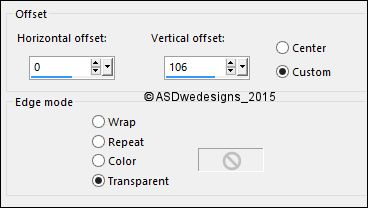
17
Layers - Duplicate
Effects - Image Effects - Offset
Layers - Merge - Merge Down
Edit - Repeat Layer Merge Down
Effects - 3D Effects - Drop Shadow
- Vertical 2 - Horizontal 2 -
Opacity 55 - Blur - 10 Color -
#000000 
18
Layer
Palette - Click on the Second Layer from the Top (Raster
2)
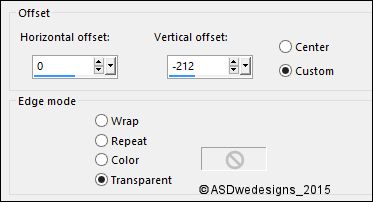
Layers - Duplicate
Image -
Resize - 45% - Resize all Layers not
checked
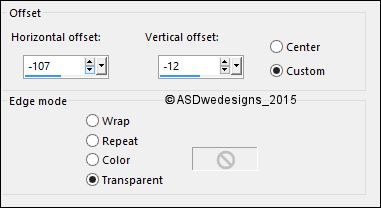
Effects - Image Effects - Offset

Effects - 3D Effects -
Drop Shadow - Vertical 2 -
Horizontal 2 - Opacity 55 -
Blur - 10 Color -
#000000
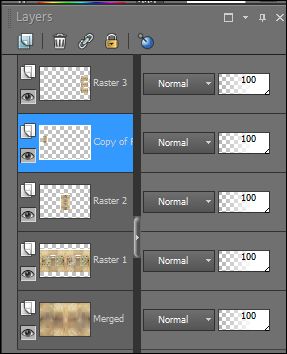
Your work and Layer Palette look like this now:
19
Layer
Palette - Click on the Bottom Layer (Merged)
Selections - Load/Save Selection - Load Selection From Disk -
MDlessen-selectie35
Effects - Plugins - MuRa's Meister -
Perspective Tiling

Selections - Select None
20
Layer
Palette - Click on the Top Layer (Raster 3)
Pen
Tool  - Mode: Draw Lines and Poly
Lines - Create on Vector
checked - Linestyle Solid - Width
2
- Mode: Draw Lines and Poly
Lines - Create on Vector
checked - Linestyle Solid - Width
2

Draw while holding down you Shift Key 6 lines like this:
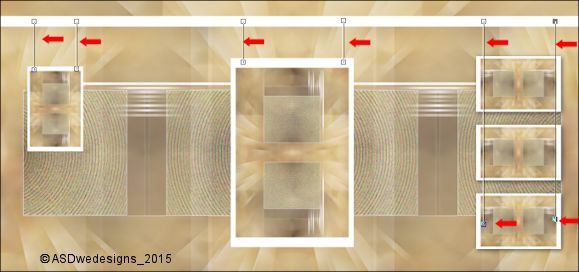
Layers - Convert To Raster Layer
Layers - Arrange - Move Down
21
Layers - New Raster Layer
Selections - Load/Save Selection - Load Selection From Disk -
MDlessen-selectie34
Fill the Selection with the Foregroundcolor
Selections - Select None
Effects -
Distortion Effects - Wind - From Left checked -
Wind Strength: 100
22
Layers - Duplicate
Image - Mirror - Mirror Horizontal ( Image - Mirror in previous
PSP Versions)
Layers - Merge - Merge Down
Layers - Arrange - Move Down
Edit
- Repeat Arrange Layer
Layers - Merge - Merge All (Flatten)
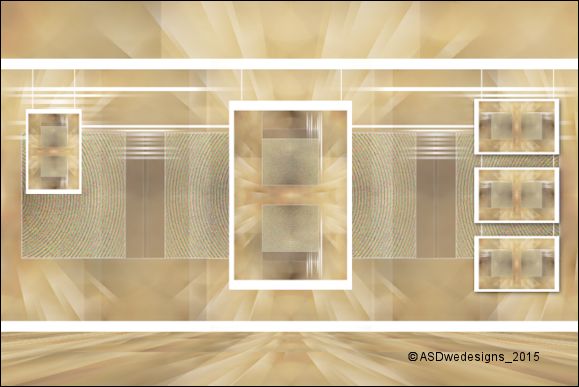
Your work looks like this now:
23
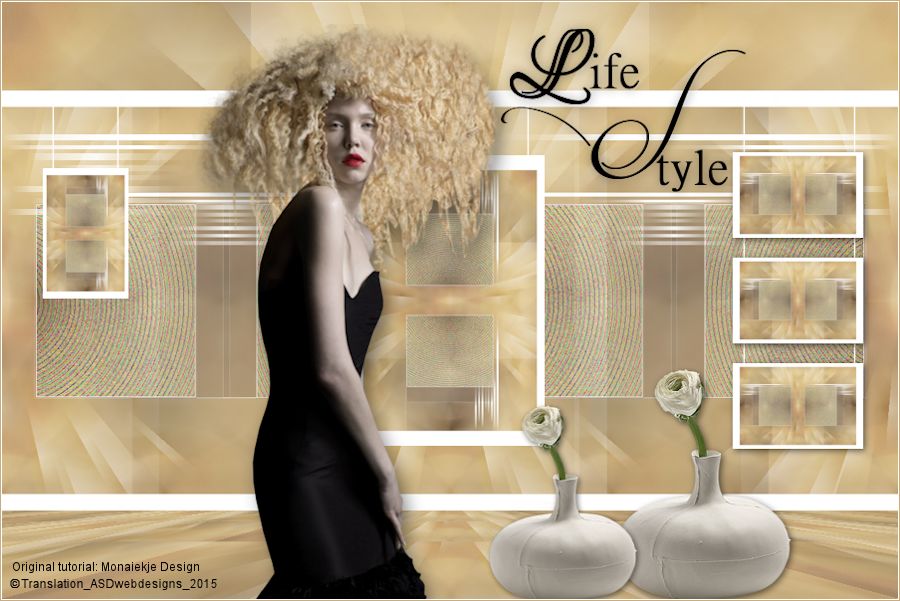
Open Tube "SvB Vaas met
Ranonkel"
Edit - Copy
On your work image: Edit - Paste
As New Layer
Image - Resize - 45% - Resize all
Layers not checked
Effects - Image Effects - Offset
Effects - 3D Effects - Drop Shadow
- Vertical 2 - Horizontal 2 -
Opacity 55 - Blur - 10 Color -
#000000
24
Layers - Duplicate
Image - Resize - 85% - Resize
all Layers not checked
Effects - Image Effects - Offset
25
Open Tube "Gerry-Lady 215 -
24 februari 2009"
Edit - Copy
On your work image: Edit - Paste
As New Layer
Image - Resize - 90% -
Resize all Layers not checked
Image - Mirror - Mirror Horizontal ( Image - Mirror in previous
PSP Versions)
Effects - Image Effects - Offset
Effects - 3D Effects - Drop Shadow
- Vertical 10
- Horizontal 6 - Opacity
45 - Blur -
25
Color - #000000
26
Open Tube
"Tekst-Monaiekje-LifeStyle"
Edit - Copy
On your work image: Edit - Paste
As New Layer
Move where you like it.
27
Image -
Add Borders - Symmetric checked - 1 px -
Foregroundcolor
Optional:Image - Add Borders - Symmetric
checked - 1 px - Backgroundcolor 
28