Open a
new transparent image of 900 x 600 px
Fill with the Foregroundcolor

Layers - New Raster Layer
Fill with the Backgroundcolor 
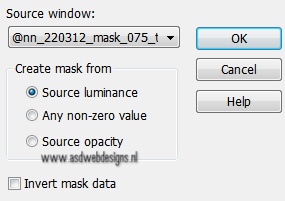
Layers - New
Mask Layer - From Image -
@nn_220312_mask_075_tdstudio
Layers - Merge -
Merge Group
Layers - Merge - Merge all (Flatten)
02
Layers - Duplicate
Image - Mirror
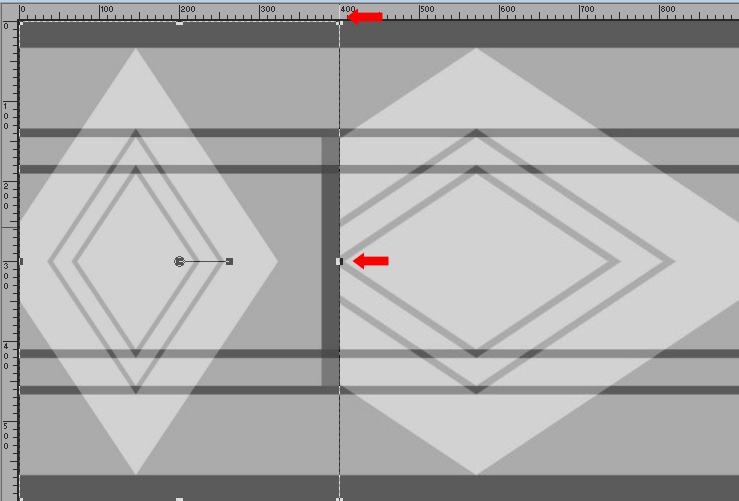
View - Rulers
Hit the K or D Key of your Keyboard (Depending on your PSP
version)
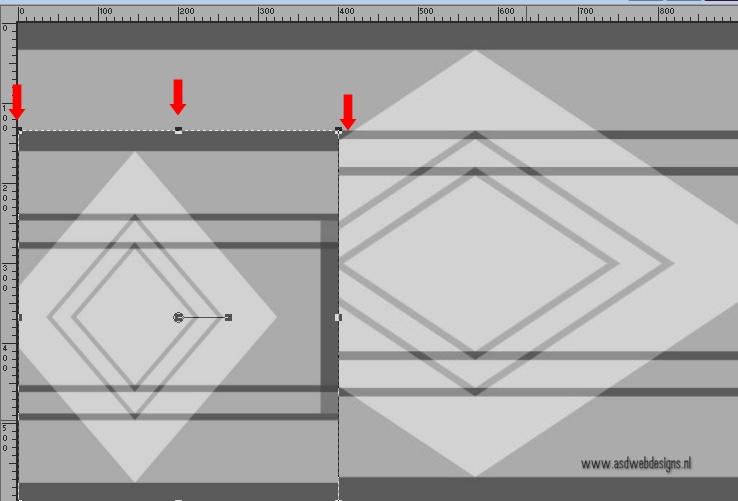
Move the Right middle node to 400 px like this
Next Move the Top Middle node Down to about 130 px, to the line
of the mask
Next move the Bottom Middle node up to about 470 px, again to
the line of the mask
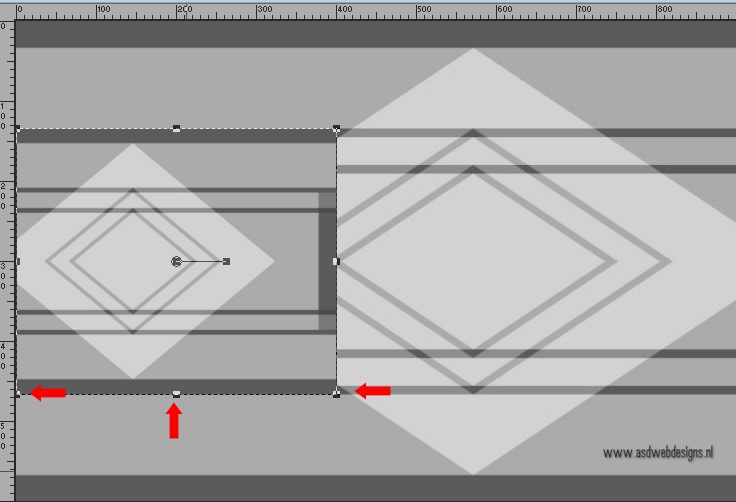
Hit the M Key of your Keyboard to remove the Nodes
View - Rulers
Image -
Free Rotate - Left checked - 90°
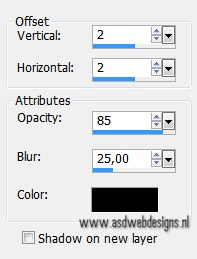
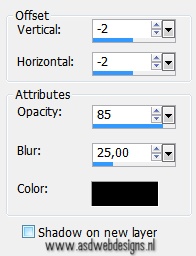
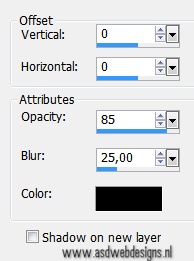
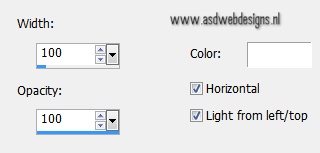
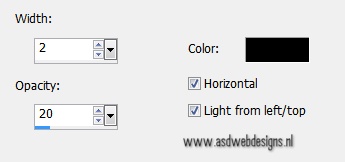
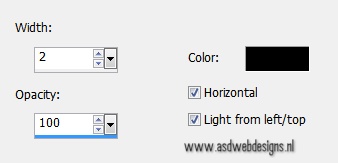
Effects 3D Effects - DropShadow -
Color: #000000 
Repeat
with the Vertical and Horizontal Offset to Minus
2
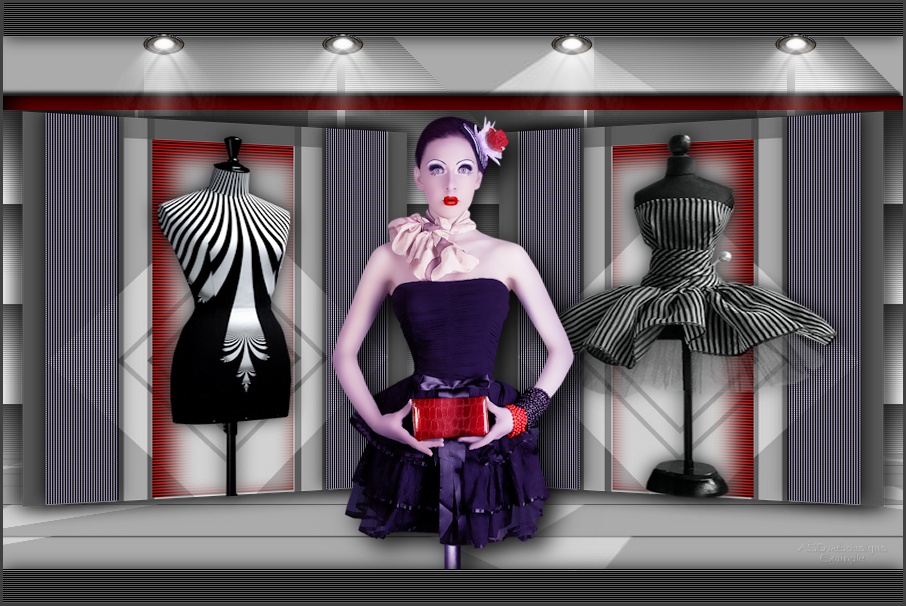
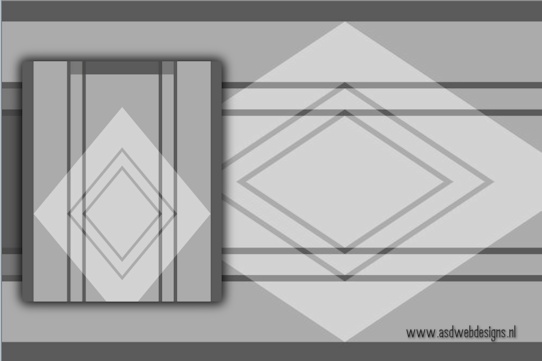
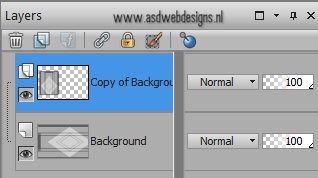
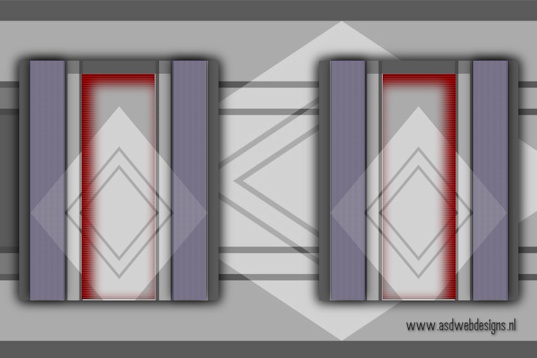
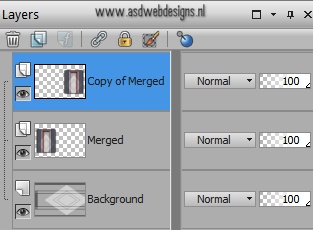
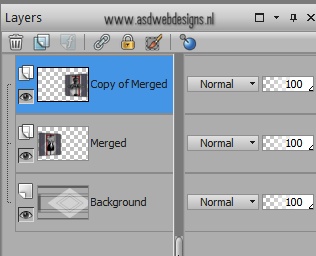
Your work and Layer Palette look like this now:
03
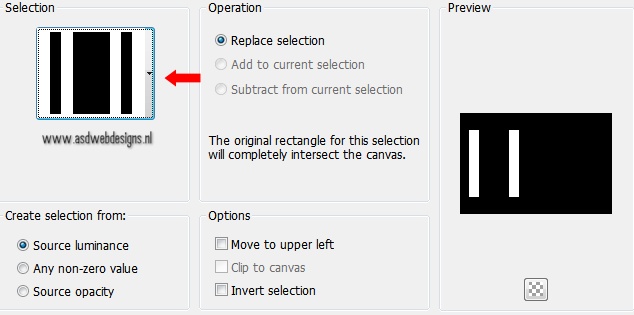
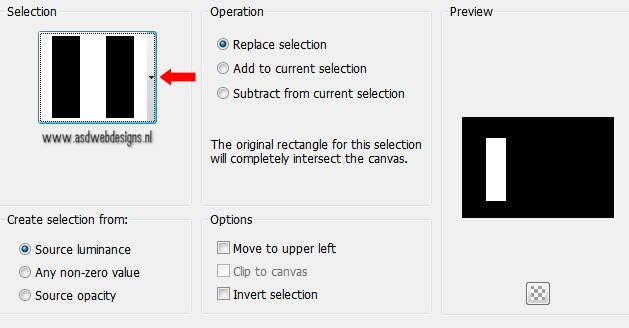
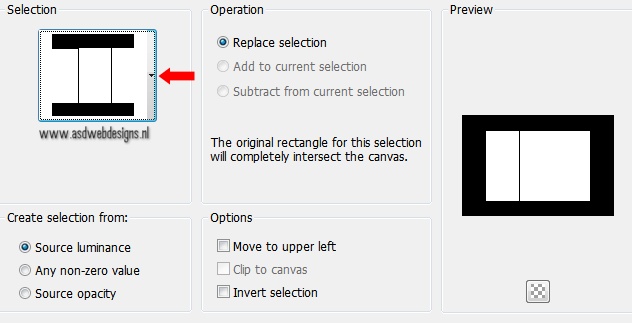
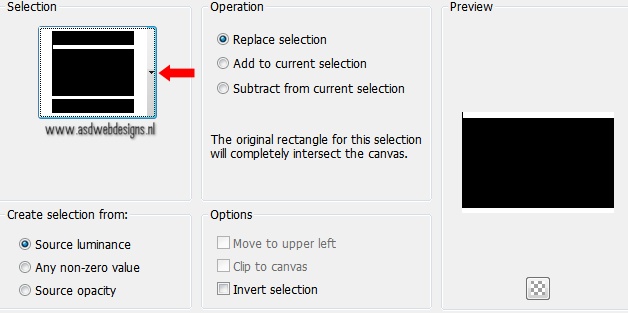
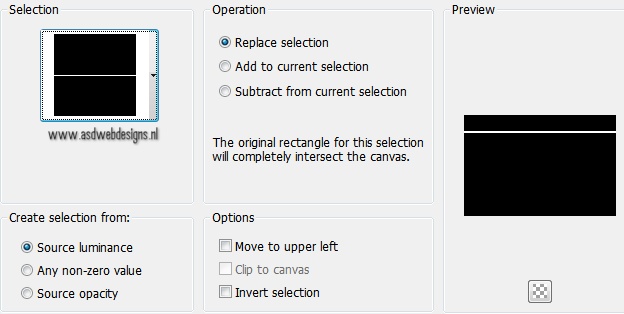
Selections - Load/Save Selection - Load Selection From Disk -
MDlessen-selectie71
Selections - Promote Selection to Layer
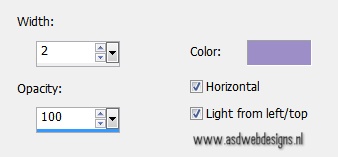
Effects - Texture Effects - Blinds - Color: #9d8ec7 
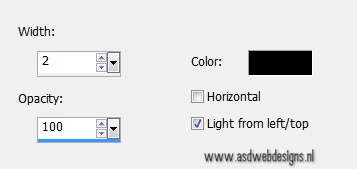
Effects - Texture Effects - Blinds - Color: #000000
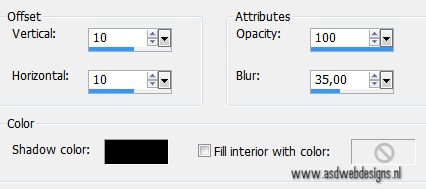
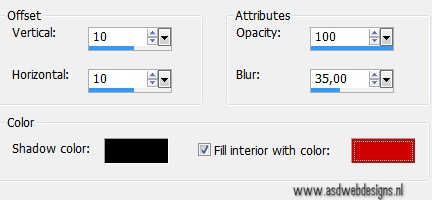
Effects 3D Effects - DropShadow -
Color: #000000
04
Layer
Palette - Click on the Bottom Layer
Selections - Load/Save Selection - Load Selection From Disk -
MDlessen-selectie 72
Selections - Promote Selection to Layer
Layers - Arrange - Bring to Top
Effects 3D Effects - Cutout - Color #000000
Effects - Texture Effects - Blinds - Color: #d00000

Layers - Duplicate
Selections - Select None
05
Layer Palette: Close the Bottom Layer by clicking on the little
eye
The Top layer is still active
Layers - Merge - Merge Visible
Layers - View - All
Layers - Duplicate
Image - Mirror
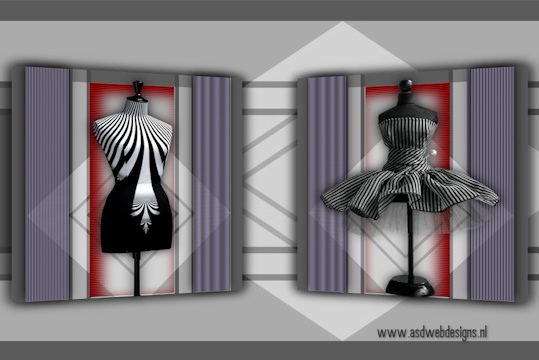
Your work and Layer Palette look like this now:
06
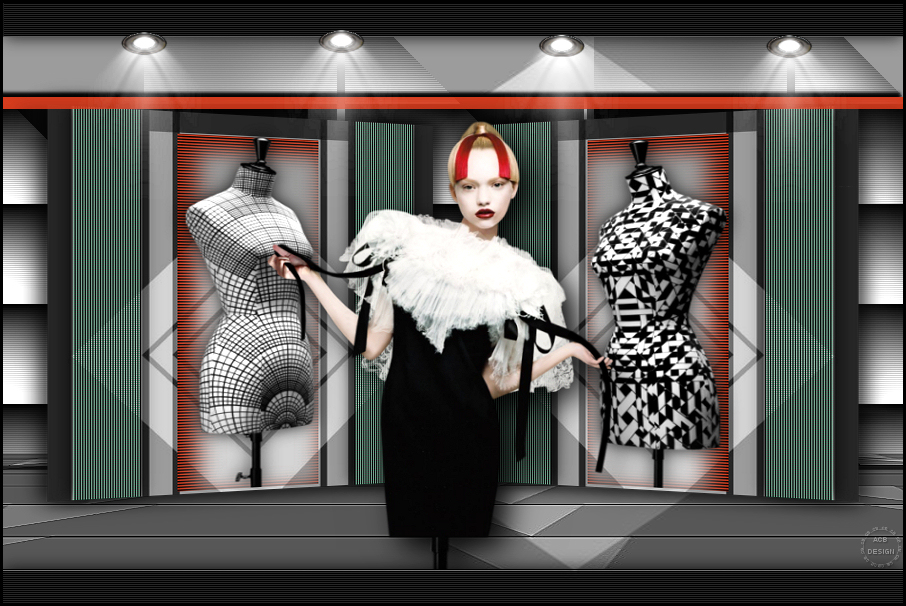
Open
Tube "Mary
0512-33"
Edit - Copy
On your work image: Edit - Paste
as New Layer
Image - Resize - 43% - Resize all Layers not checked
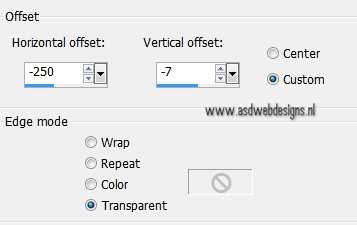
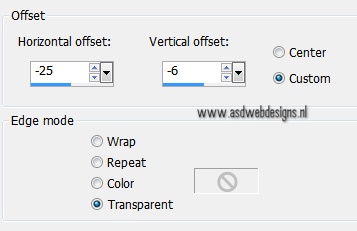
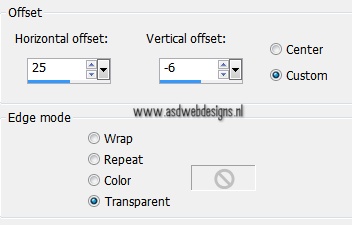
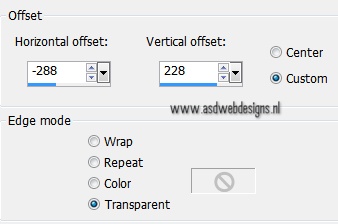
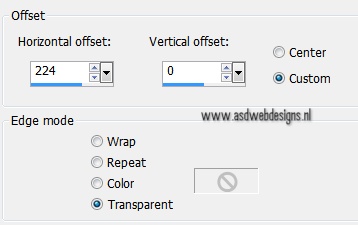
Effects - Image Effects - Offset
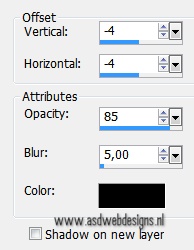
Effects 3D Effects - DropShadow - Color: #000000
Layers - Arrange - Move Down
Layers - Merge - Merge Down
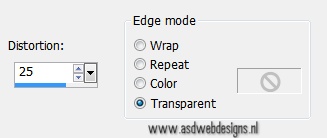
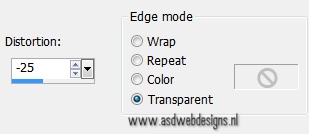
Effects - Geometric Effects - Perspective Horizontal
Effects - Image Effects - Offset
07
Layer Palette - Click on the top Layer
Open
Tube "Mary
0412-85"
Edit - Copy
On your work image: Edit - Paste
as New Layer
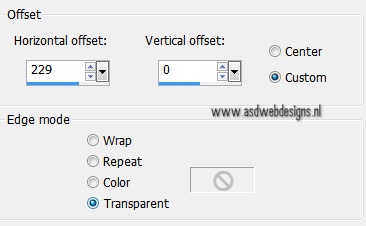
Image - Resize - 60% - Resize all Layers not checked
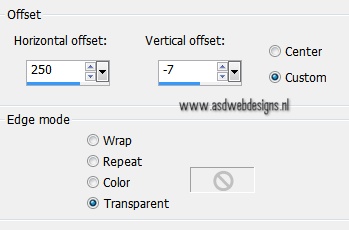
Effects - Image Effects - Offset
Effects 3D Effects - DropShadow - Color: #000000
Layers - Merge - Merge Down
Effects - Geometric Effects - Perspective Horizontal
Effects - Image Effects - Offset
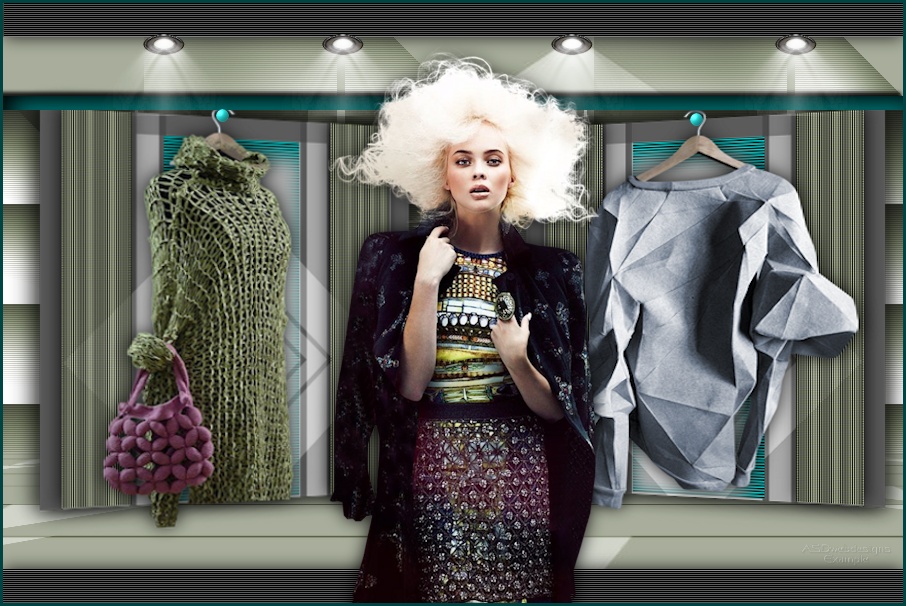
Your work and Layer Palette look like this now:
08
Layer
Palette - Click on the Bottom Layer
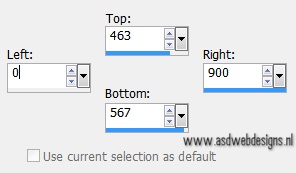
Selection Tool - Rectangle
 - Custom Selection:

Selections - Promote Selection to Layer
Selections - Select None
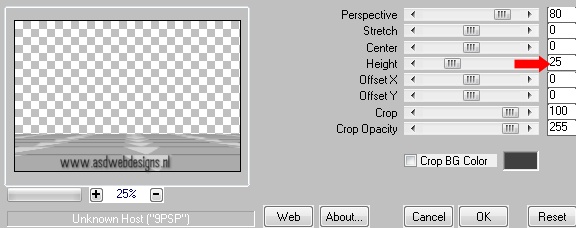
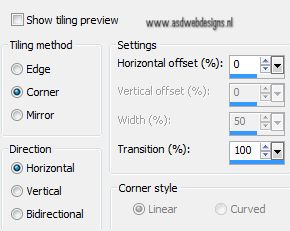
Effects - Plugins - MuRa's Meister -
Perspective Tiling
Effects - Edge Effects - Enhance
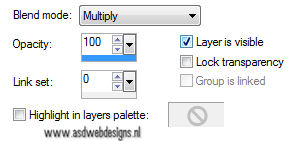
Layer Palette - Double click on this Layer and set
the Blend Mode to "Multiply"
09
Layer Palette - Click on the Bottom Layer
Selections - Load/Save Selection - Load Selection From Disk -
MDlessen-selectie74
Selections - Promote Selection to Layer
Fill the Selection with the Backgroundcolor (Right Mouse Click)
Keep Selected