Effects -
Distortion Effects - Pixelate
Selections -
Load/Save Selection - Load Selection From Disk -
MD-lessen-selectie92
Selections -
Promote Selection to Layer
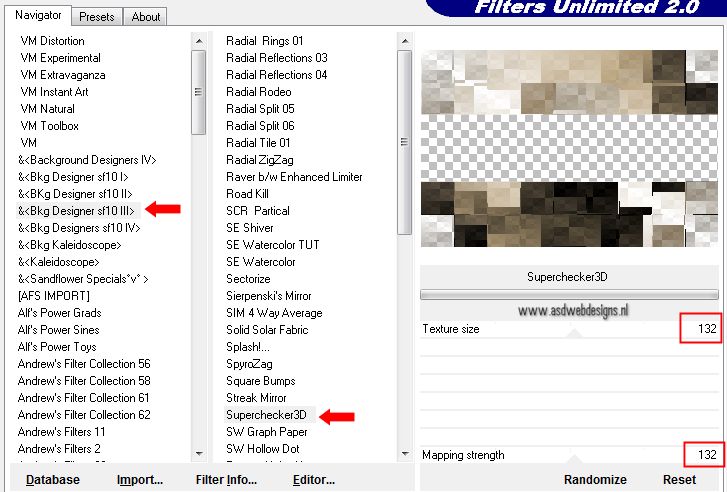
Effects - Plugins
– &<Bkg Designer sf10III> - superchecker 3D
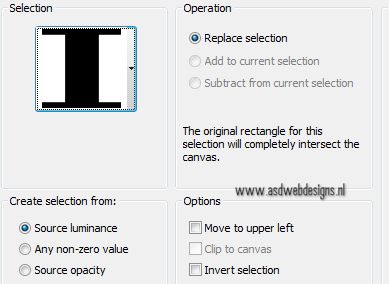
Selections -
Select None
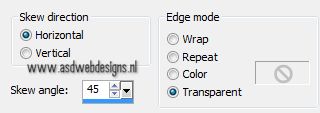
Effects -
Geometric Effects - Skew
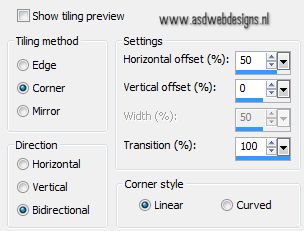
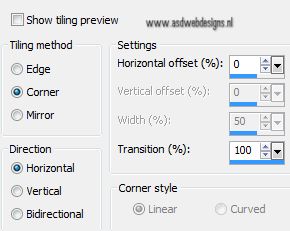
Effects - Image
Effects - Seamless Tiling
03.
Layer Palette: Set your
Foregroundcolor back to Color and change to #ffffff 
Layers - New Raster
Layer
Selections -
Load/Save Selection - Load Selection From Disk -
MD-lessen-selectie91
Fill the Selection
with the Foregroundcolor
Effects - Plugins
– CPK designs - Screening
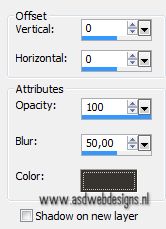
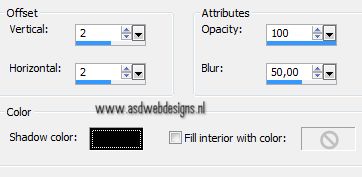
Effects 3D
Effects - DropShadow - Color: #383431 
Selections -
Select None
Effects - Plugins
– Toadies – What Are You? - 20 - 20
Effects - Edge
Effects - Enhance
04.
Selections -
Load/Save Selection - Load Selection From Disk - Same selection
- MD-lessen-selectie91
Layers - New
Raster Layer
Fill with the
Foregroundcolor
Selections -
Select None
Effects - Plugins
– Simple – Centre Tile
Effects - Plugins
– Simple – Pizza Slice Mirror
Effects - Plugins
– Simple – Quick Tile
Effects - Plugins
– Simple – 4 Way Average
05.
Layers -
Duplicate
Effects - Image
Effects - Seamless Tiling
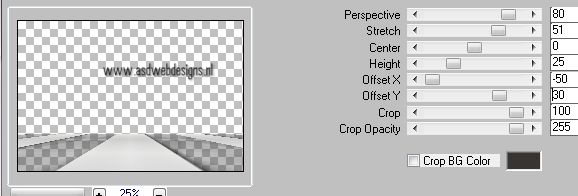
Effects - Plugins - Alien Skin Eye
Candy 5 - Impact - Perspective
Shadow - Settings Tab: Dropshadow,Blurry.
06.
Layers -
Duplicate
Effects - Plugins
– Mura’s Meister – Perspective Tiling
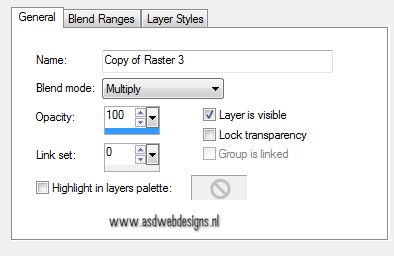
Layers - Arrange - Move Down
Layer Palette - Double click on this
Layer and set the Blend Mode to
"Multiply"-
07.
Layers -
Duplicate
Layer Palette - Click on the Fourth layer from
the top
Layers -
Duplicate
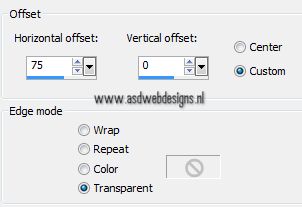
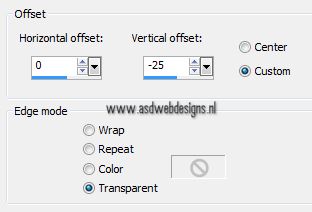
Effects - Image
Effects - Offset
Effects - Image
Effects - Seamless Tiling
Effects - Plugins
– CPK designs – Old Colorize
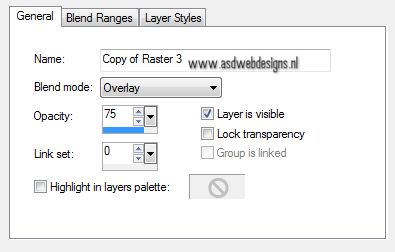
Layer Palette - Double click on this Layer and
set the Blend Mode to "Overlay" and
the Layer Opacity to 75
Selections -
Load/Save Selection - Load Selection From Disk -
MD-lessen-selectie93
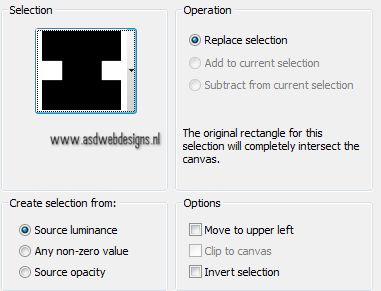
Selections -
Promote Selection to Layer
Selections -
Select None
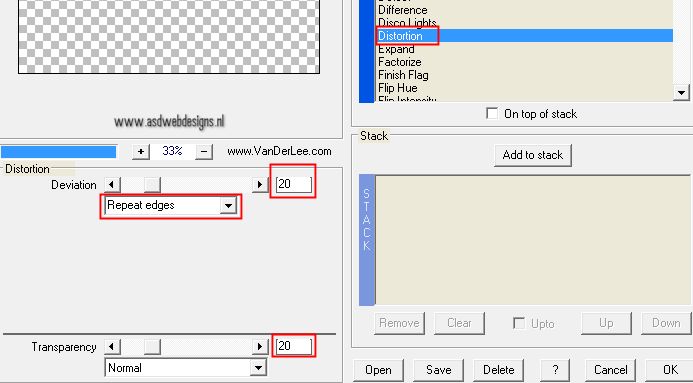
Effects - Plugins
– VanDerLee Unplugged X – Distortion
Effects – Edge
Effects - High-pass
Adjust - Sharpness - Sharpen More
09.
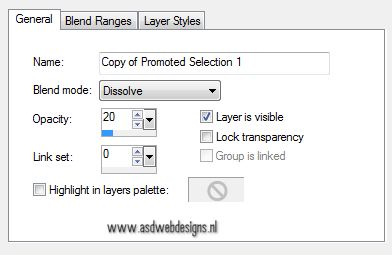
Layers -
Duplicate
Image -
Flip
Layer Palette - Double click on this Layer and
set the Blend Mode to "Dissolve" and
the Layer Opacity to 20
10.
Selections -
Load/Save Selection - Load Selection From Disk -
MD-lessen-selectie95
Edit -
Cut
Selections -
Load/Save Selection - Load Selection From Disk -
MD-lessen-selectie94
Keep
selected
11.
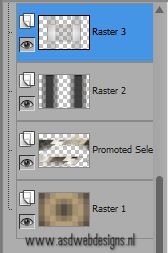
Layer Palette - Click on the Fourth layer from
the bottom
Selections -
Promote Selection to Layer
Layers - Arrange - Bring to Top
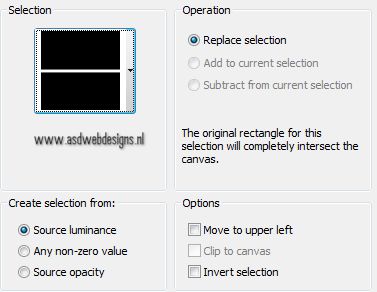
Selections -
Modify - Contract - 30 px
Layers - New
Raster Layer
Effects 3D Effects - Cut Out - Color
#000000 
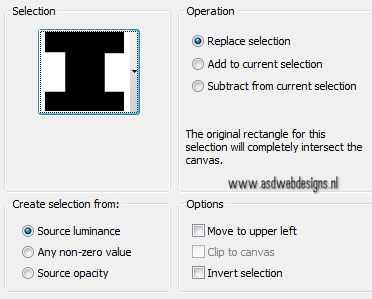
Selections -
Modify - Contract - 30 px
Keep
selected
12.
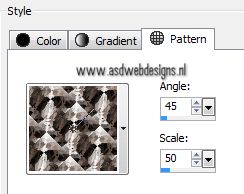
Open Pattern
"patroon MD" - Minimize to tray and go back to your main
image
Color Palette: Set
your Backgroundcolor to Pattern "patroon MD"
Layers -
New Raster Layer
Fill the
Selection with the Background Pattern (Right Mouse
Click)
Effects - Plugins - Alien Skin Eye
Candy 5 - Impact - Glass -
Settings Tab: Preset
Clear
Selections -
Select None
Layers - Merge -
Merge Down
Effects - Texture Effects - Weave - Weave
Color #ffffff - Gap Color #000000
Layers - Merge - Merge
Down
Effects - Plugins - Alien Skin Eye
Candy 5 - Impact - Perspective
Shadow - Settings Tab: Dropshadow,High.
13.
Open Tube "deco MD Deniza"
Edit - Copy
On
your work image: Edit - Paste As New
Layer
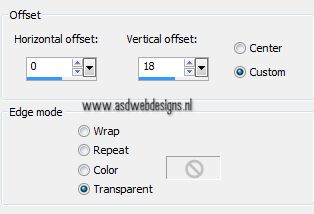
Effects - Image Effects - Offset
Effects - Plugins - Alien Skin Eye
Candy 5 - Impact - Perspective
Shadow - Settings Tab: Dropshadow,Low.
14.
Image - Add Borders - Symmetric
checked - 1 px - Backgroundcolor
Layers -
Duplicate
Image - Resize - 85% - Resize all
layers not checked
Effects - Plugins - Alien Skin Eye
Candy 5 - Impact - Perspective
Shadow - Settings Tab: Dropshadow,High.
15.
Layers -
Duplicate
Image - Free Rotate
Layers - Arrange - Move Down
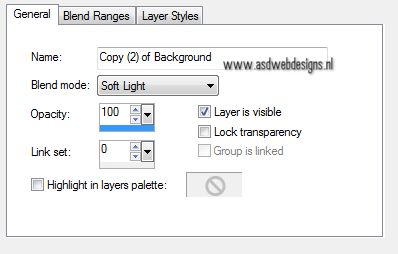
Layer Palette - Double click on this
Layer and set the Blend Mode to
"Soft Light"
16.
Layer Palette - Click on the Bottom layer
Adjust - Blur - Gaussian Blur - 20
Layer Palette - Click on the top
layer
17.
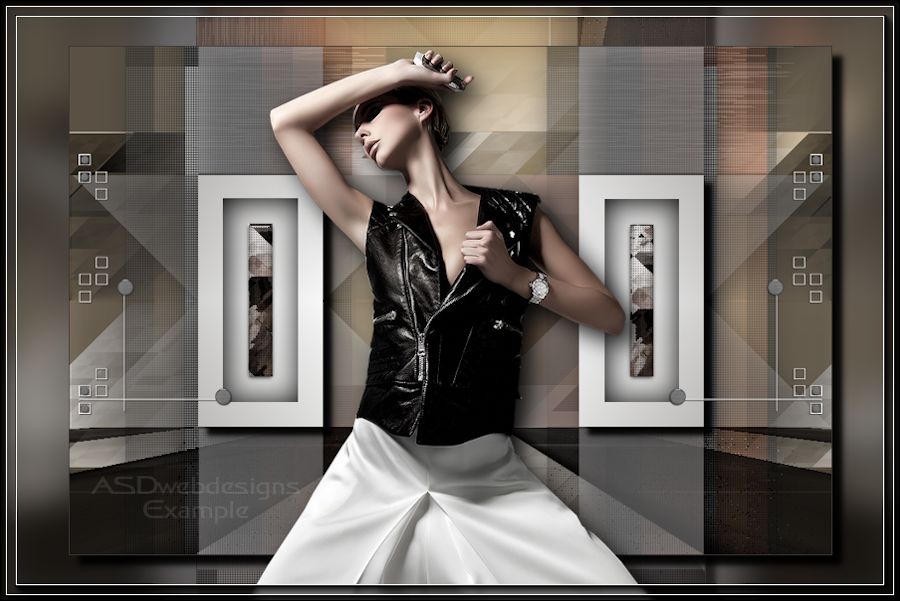
Open Tube "Athe-FM237"
Edit - Copy
On
your work image: Edit - Paste As New
Layer
Image - Resize - 85% - Resize all
layers not checked
Effects - Image
Effects - Offset
Effects - Plugins - Alien Skin Eye
Candy 5 - Impact - Perspective
Shadow - Settings Tab:
Dropshadow,Blurry.
18.
Image - Add Borders - Symmetric
checked - 1 px - Backgroundcolor
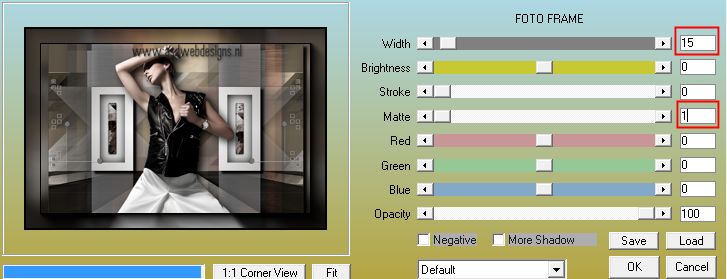
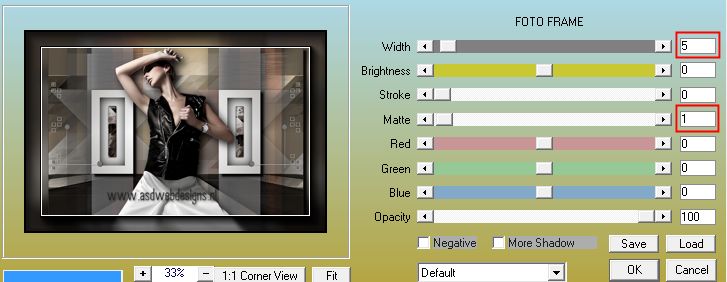
Effects - Plugins
– AAA frames – Foto Frame
Effects - Plugins – AAA
frames – Foto Frame
19.
Image - Resize - Width 800 Pixels -
Resize all layers checked
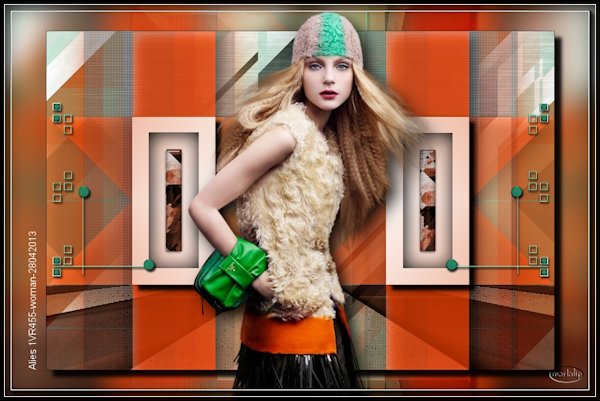
Add your name or
watermark, save as JPG file and you're done!
If you wish you
can post your result on my Facebook Page