The tutorial:
01
Open a New Transparent image of
900 x 600 px
Fill with the Gradient

Selections - Select
All
Open
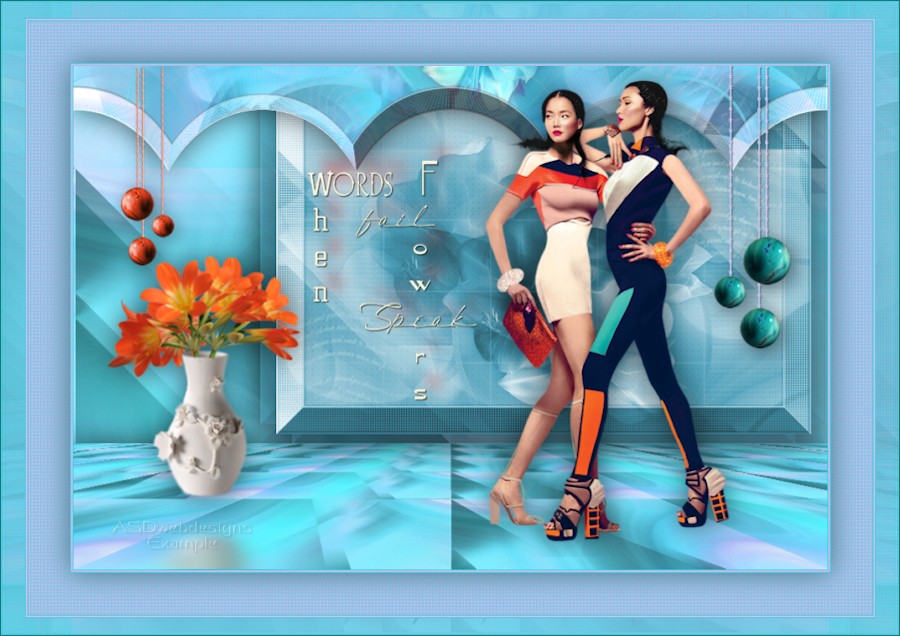
Tube "devil_may_care_by_stanislavmironov_tubed_by_thafs"
Edit - Copy
On your work image: Edit -
Paste Into Selection
Selections - Select None
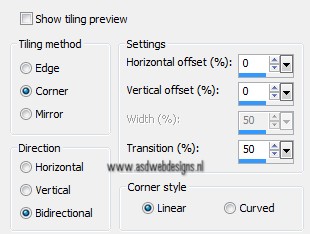
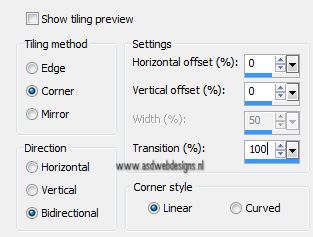
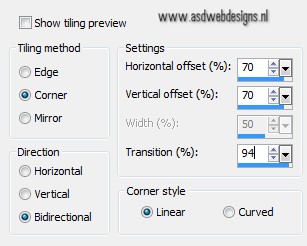
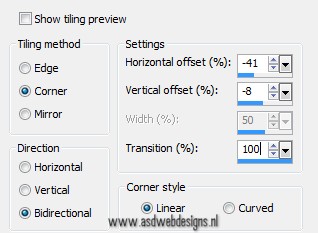
Effects - Image Effects - Seamless
Tiling
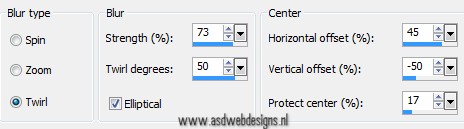
Adjust - Blur -
Radial Blur
Effects -
Distortion Effects - Twirl - 185°
Effects - Image Effects - Seamless
Tiling
Layers - Duplicate
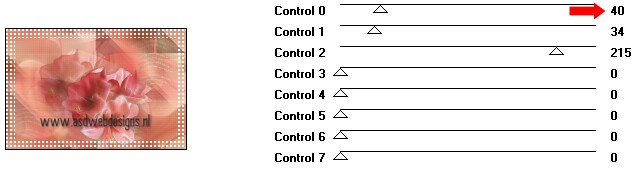
Effects - Plugins - Filter Factory A
- Holidays in Egypt
Effects - Image Effects - Seamless
Tiling
Effects -
Image Effects - Seamless Tiling
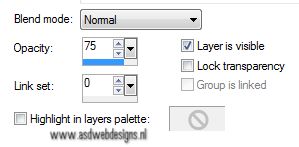
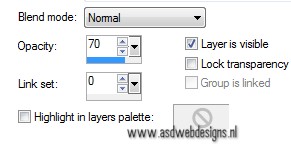
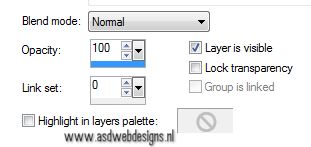
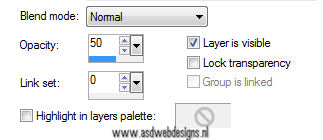
Layer Palette - Double click on this
Layer and set the Layer Opacity of
this layer to 75
Layers - Merge
- Merge Down
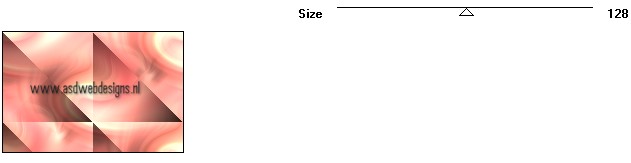
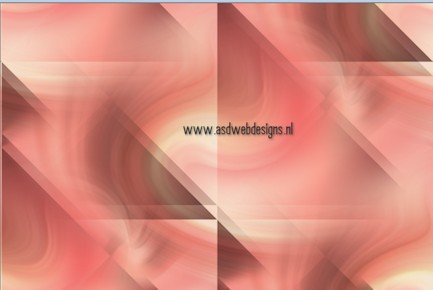
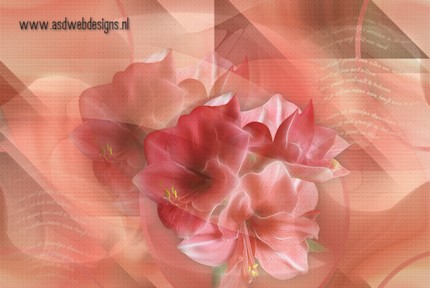
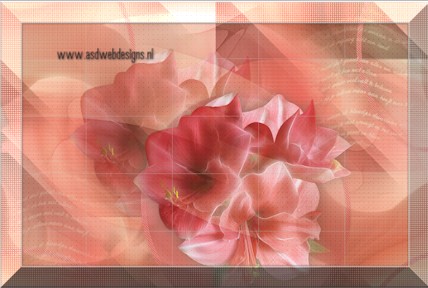
Your work looks like this
now:
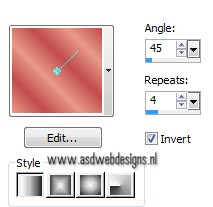
Color Palette - Change your
Backgroundcolor to #ffffff
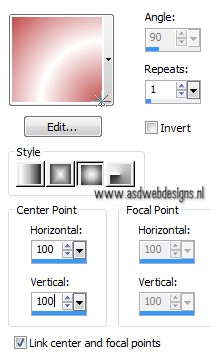
 and change your
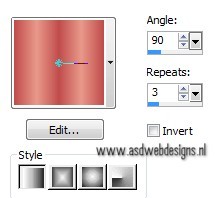
Foreground Gradient to Style
Sunburst
and change your
Foreground Gradient to Style
Sunburst
Layers
- New Raster Layer
Fill with the
Gradient 
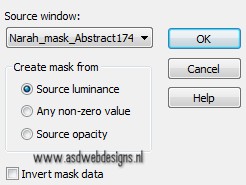
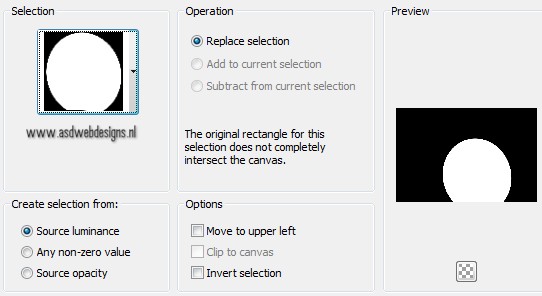
Layers - New Mask Layer - From Image
-
Narah_mask_Abstract174
Layers - Merge
- Merge Group
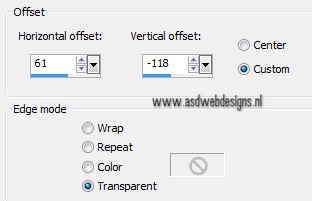
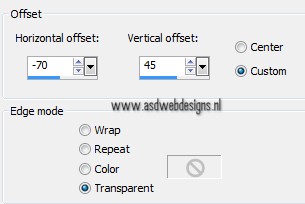
Effects - Edge
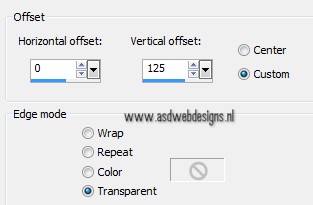
Effects - Enhance
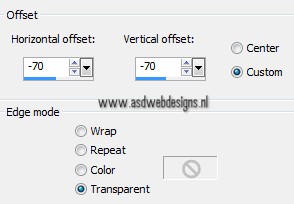
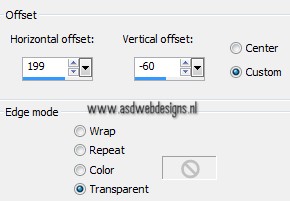
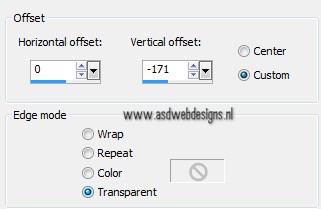
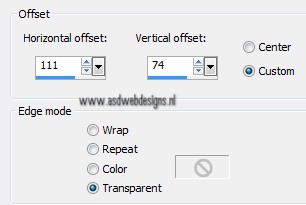
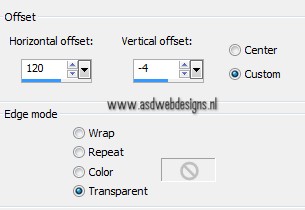
Effects - Image Effects -
Offset
04
Layers - Duplicate
Image - Mirror
Image - Flip
Layers - Merge
- Merge Down
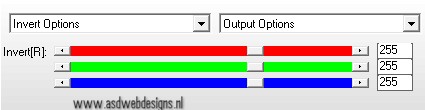
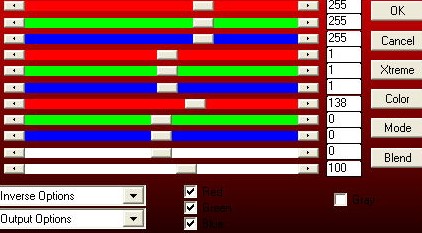
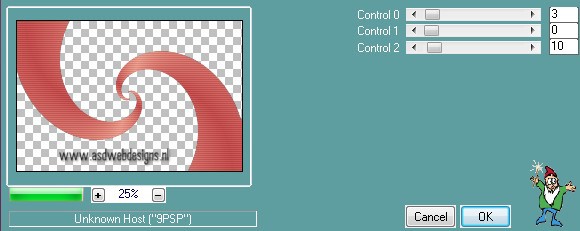
Effects - Plugins - AP [Color]
- Color - Inverse Time
Note: If you are
having a different
version, use these
settings:
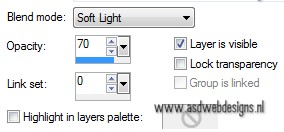
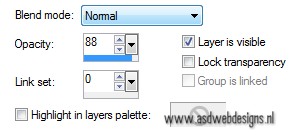
Layer Palette
- Double click on this Layer and set
the Blend Mode to
"Soft Light" and the Layer Opacity to
70
05
Open Tube
"Msb_Deco_12-5-13_01"
Edit -
Copy
On your work image:
Edit - Paste As New Layer
Effects - Image Effects -
Offset
Layers - Duplicate
Image - Mirror
Image - Flip
Layers - Merge - Merge
Down
Effects - Plugins - Carolaine and
Sensibility - CS-HLines
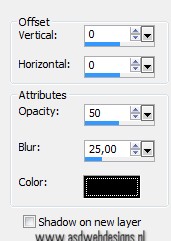
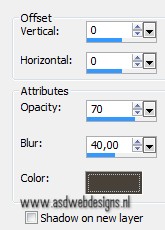
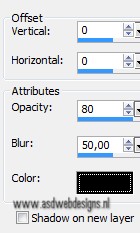
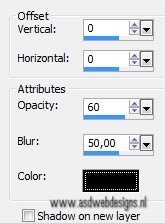
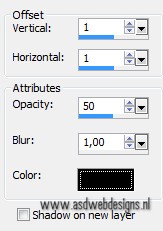
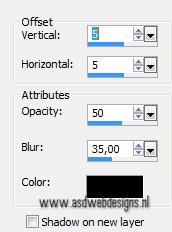
Effects 3D Effects -
DropShadow - Color: #000000
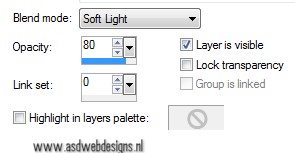
Layer Palette - Double click on this
Layer and set the Blend Mode to
"Soft Light" and the Layer
Opacity to 80
07
Color Palette - Change your
Backgroundcolor to #e89989
 and change your
Foreground Gradient to Style
Linear
and change your
Foreground Gradient to Style
Linear
Layers - New Raster Layer
Selections - Load/Save Selection
- Load Selection From Disk -
Msb_Sel_Words_01
Fill the
Selection with the Gradient

Keep selected
08
Color Palette -
Change your Foregroundcolor back
to color #c14c4c 
Layers - New Raster
Layer
Fill the Selection
with the Foregroundcolor
Selections -
Modify - Contract - 10 px
Edit - Cut
Selections - Select
None
09
Layers - Duplicate
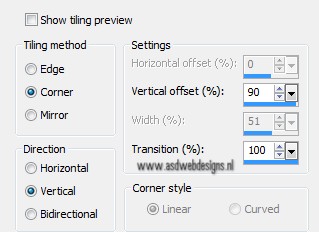
Effects - Image Effects - Seamless
Tiling
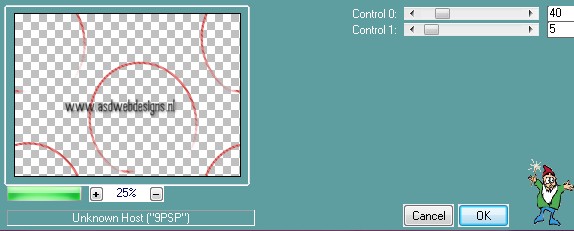
Effects - Plugins -
Carolaine and Sensibility -
CS-DLines
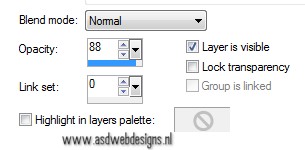
Layer Palette - Double click on this
Layer and set the Layer Opacity of
this layer to 88
Layers - Merge - Merge
Down
Your work looks
like this now
10
Open Tube
"kTs_EF180"
Edit -
Copy
On your work image:
Edit - Paste As New Layer
Image - Resize -
75% - Resize all layers not
checked
Effects - Image Effects -
Offset
11
Layers - Duplicate
Effects - Image
Effects - Seamless
Tiling
Layers -
Arrange - Move Down
Layer Palette - Double click on this
Layer and set the Layer Opacity of
this layer to 70
12
Layer Palette
- Click on the top layer
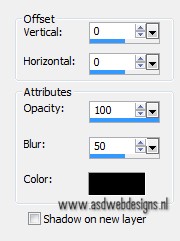
Effects 3D Effects -
DropShadow - Color: #48413a

Layers - Merge - Merge Down -
REPEAT TWO TIMES
Layer Palette - Double click on this
Layer and set the Layer Opacity of
this layer to 88
Adjust - Sharpness - Sharpen
13
Open Tube
"Msb_Deco_12-5-13_02"
Edit -
Copy
On your work image:
Edit - Paste As New Layer
Effects - Image Effects -
Offset
Layers - Duplicate
Image - Mirror
Image -
Flip
Layers - Merge - Merge
Down
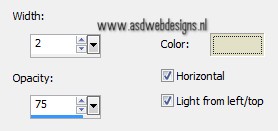
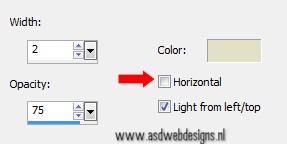
Effects -
Texture Effects - Blinds - Color: #e3e1c5

Effects -
Texture Effects - Blinds - Color: #e3e1c5
Layer Palette - Double click on this
Layer and set the Blend Mode to
Multiply and the Layer Opacity
to 70
Color Palette -
Change your Foregroundcolor
to #e3e1c5
Layers - New Raster
Layer
Fill with the
Foregroundcolor
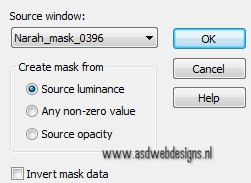
Layers - New Mask Layer - From Image
- Narah_mask_0396
Layers - Merge - Merge Group
16.
Layers
- Duplicate
Image
- Mirror
Image - Flip
Layers - Merge - Merge
Down
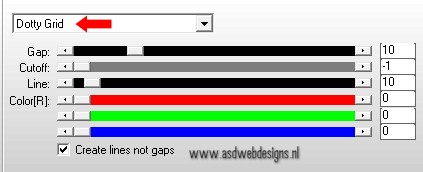
Effects - Plugins - AP [Lines] - Lines -
SilverLining - Dotty Grid
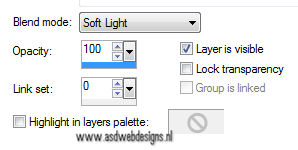
Layer Palette - Double click on
this Layer and set the Blend
Mode to "Soft Light"
Layers - Arrange - Move
Down
17.
Layer Palette - Click on the top
layer
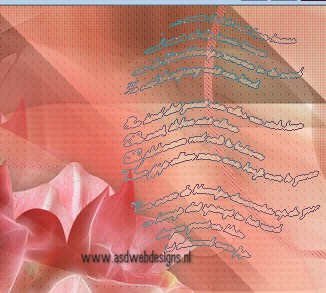
Layers - New Raster Layer
Paint Brush Tool  - "Msb_Brush_Text_15-5-13" - Size: 360 -
Step: 32 - Density: 100 -
Rotation: 0 - Opacity: 100 - Blend
Mode: Normal - Continuous not
checked - Wet look paint checked
- "Msb_Brush_Text_15-5-13" - Size: 360 -
Step: 32 - Density: 100 -
Rotation: 0 - Opacity: 100 - Blend
Mode: Normal - Continuous not
checked - Wet look paint checked
Stamp with the Foregroundcolor
in the Top Right
Corner of your image, like
this
Layer Palette - Double click on this
Layer and set the Blend Mode to
"Soft Light"
Layers - Duplicate
Effects - Image Effects - Seamless
Tiling
Effects 3D Effects -
DropShadow - Color: #000000 
Layer Palette - Double click on this
Layer and set the Blend Mode to
"Normal"
Your work looks like this
now
19.
Layer
Palette - Click on the Bottom layer
Layers - Duplicate
Layer Palette - Lock
the bottom layer by clicking on the
little eye
Layers - Merge - Merge Visible
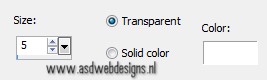
Effects - Plugins - (AFS IMPORT) -
sqborder2
Selections - Select All
Selections - Modify
- Contract - 45 px
Selections - Invert
Selections -
Promote Selection to Layer
Effects 3D
Effects - Chisel - Color #ffffff
Selections - Select None
Layers - Merge - Merge
Down
20.
Layers - New Raster
Layer
Fill with the
Foregroundcolor
Selections - Select
All
Selections - Modify
- Contract - 1 px
Edit - Cut
Selections -
Invert
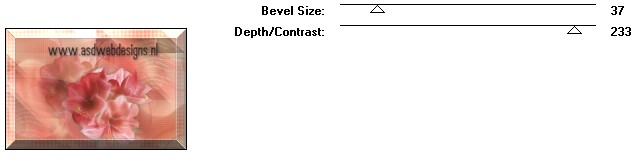
Effects 3D
Effects - Chisel - Color #ffffff
Selections - Select None
Layers - Merge - Merge Down
21.
Layers - Duplicate
Effects - Plugins - Render - ButtonMaker
Square
Layers - Duplicate
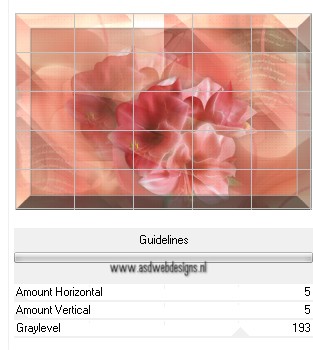
Effects - Plugins - <ICNET
Software> - Filters
Unlimited - Pattern Generators -
Guidelines
Selections - Load/Save Selection
- Load Selection From Disk -
Msb_Sel_Words_02
Edit - Cut
Selections - Select None
Layer Palette - Double click on this
Layer and set the Layer Opacity of
this layer to 50
Layers - Merge
- Merge Visible
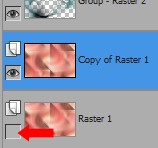
Layer Palette: Open the
Backgroundlayer
Your work and Layer Palette look
like this now:
You are on the Top
Layer
Image - Resize -
71% - Resize all layers not
checked
Layers - Duplicate
Effects -
Plugins - Toadies - What Are You? -
X-dose 11 - Y-dose 11
Layers - Arrange - Move Down
Effects 3D Effects -
DropShadow - Color #000000
23.
Layer Palette: Click on
the Top Layer
Layers - Duplicate
Layer Palette: Close
the Top Layer By Clicking on the
little eye
Layer Palette
- Click on the second layer from the top
Layers - Merge - Merge
Down
Effects - Image Effects -
Offset
Effects 3D Effects -
DropShadow - Color #000000
24.
Layer Palette: Click on
the Top Layer and open it
again
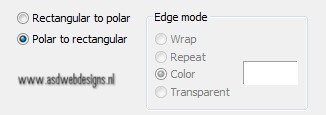
Effects -
Distortion Effects - Polar Coordinates
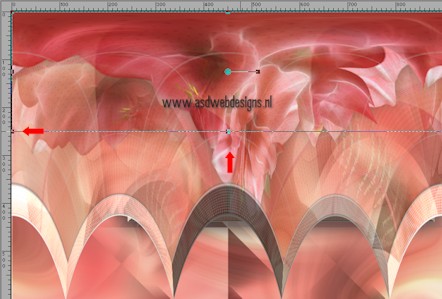
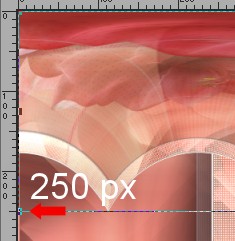
View Rulers
Hit the K key of
your Keyboard and pull the Bottom
node to left 250 px
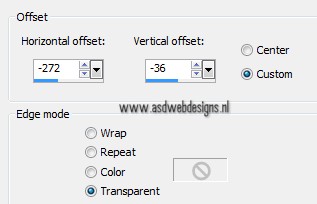
Effects - Image Effects -
Offset
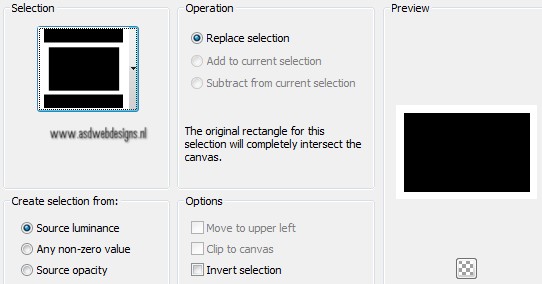
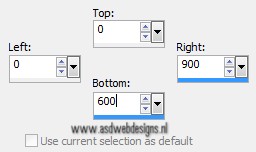
Selection Tool
- Rectangle  - Custom Selection:
Image - Crop to
Selection
Effects 3D Effects -
DropShadow - Color: #000000
25.
Layer Palette
- Click on the Bottom layer
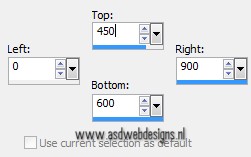
Selection
Tool - Rectangle - Custom Selection:
Selections - Promote
Selection to
Layer
Effects - Plugins - MuRa’s Meister -
Perspective Tiling
Selections - Select None
Effects 3D Effects -
DropShadow - Color: #000000
Layer Palette
- Click on the top layer
Open
Tube "Msb_Text_15-5-13_02"
Edit - Copy
On your work image: Edit - Paste
as New Layer
Image - Resize - 73% - Resize all
layers not checked
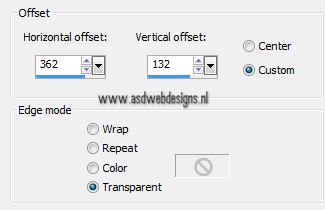
Effects - Image Effects -
Offset
Effects 3D Effects -
DropShadow - Color: #000000
Layers - Duplicate
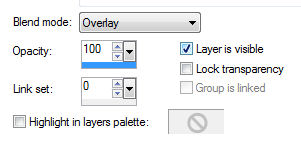
Layer Palette - Double click on this
Layer and set the Blend Mode to
"Overlay"
Layers - Merge - Merge
Down
Effects -
Plugins - Alien Skin Eye Candy 5 -
Impact - Perspective Shadow -
Settings Tab: Preset
Msb_Preset_AS_IMP_PS_15-5-13
27.
Open
Tube "Msb_Ball_21-5-13_01"
Edit - Copy
On your work image: Edit - Paste
as New Layer
Effects - Image Effects -
Offset
Image - Resize
- 70% - Resize all layers not
checked
Image - Mirror
Effects - Image Effects -
Offset
Layers - Merge - Merge
Down
Effects 3D Effects -
DropShadow - Color: #000000
29.
Open
Tube "devil_may_care_by_stanislavmironov_tubed_by_thafs"
Edit - Copy
On your work image: Edit - Paste
as New Layer
Image - Resize - 77% - Resize all
layers not checked
Image - Free Rotate - Left -
Free - 3°
Image - Mirror
Effects - Image Effects -
Offset
Adjust - Sharpness -
Sharpen
Effects 3D Effects -
DropShadow - Color: #000000
30.
Open
Tube "flowers_64_bycrealine"
Edit - Copy
On your work image: Edit - Paste
as New Layer
Image - Resize - 70% - Resize all
layers not checked
Effects - Image Effects -
Offset
Adjust - Sharpness -
Sharpen
Effects 3D Effects -
DropShadow - Color: #000000
Effects -
Plugins - Alien Skin Eye Candy 5 -
Impact - Perspective Shadow -
Settings Tab: Preset
Msb_Preset_AS_PS_Words
31.
Color Palette: Set your
Foregroundcolor to
#c14c4c
and your Backgroundcolor
#e3e1c5
Image - Add Borders - Symmetric
checked - 1 px -
Foregroundcolor
Image - Add Borders -
Symmetric checked - 2 px -
Backgroundcolor
Image
- Add Borders - Symmetric checked - 1 px -
Foregroundcolor
Selections
- Select All
Image
- Add Borders - Symmetric checked - 50 px -
Backgroundcolor
Effects 3D Effects -
DropShadow - Color: #000000
Selections - Invert
Selections -
Promote Selection to Layer
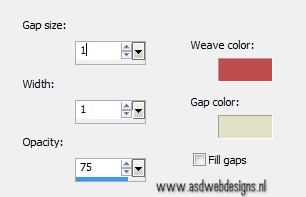
Effects -
Texture Effects - Weave - Weave Color
#c14c4c - Gap Color
#e3e1c5
Selections - Select None
32.
Image - Add
Borders - Symmetric checked - 1 px -
Foregroundcolor
Image - Add Borders -
Symmetric checked - 2 px - Backgroundcolor
Image
- Add Borders - Symmetric checked - 1 px -
Foregroundcolor
Layers - Duplicate
Image - Resize
- 95% - Resize all layers not
checked
Adjust - Sharpness -
Sharpen
Layer Palette
- Click on the Bottom layer
Effects -
Plugins - Toadies - What Are You? -
X-dose 20 - Y-dose 20 -
REPEAT ONCE!!
33.
Image - Add
Borders - Symmetric checked - 1 px -
Foregroundcolor
Image - Resize
- Width 900 Pixels - Resize all layers
checked
Add
your name or watermark, save as JPG file and you're
done!
If you wish
you can post your result on my Facebook Page