The tutorial:
01
Open a
new transparent image of 900 x 600 px
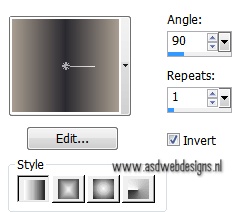
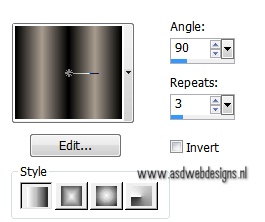
Fill with the Gradient

Layers - New Raster Layer
Selections - Select
All
Open
Tube "Mary 0912-96"
Note:
If you are using tubes and colors of
your own, it
is best to use the tube provided in the Materials for
this step, otherwise the result will be different. You
can colorize it to match your work.
Edit - Copy
Minimize to tray, you need it later
On your work image: Edit - Paste
into Selection
Selections - Select
None
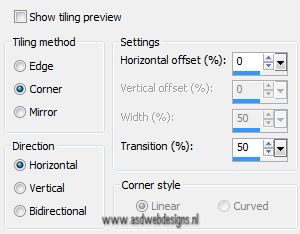
Effects -
Image Effects - Seamless Tiling
Layers - Merge - Merge
Down
02
Layers - Duplicate
Image - Flip
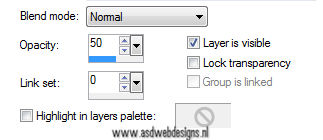
Layer Palette -
Double click on this Layer and set
the Layer Opacity of this Layer to
50
Layers -
Merge - Merge Down
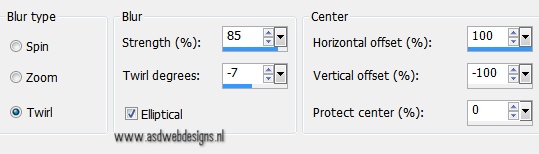
Adjust -
Blur - Radial Blur
03
Layers - Duplicate
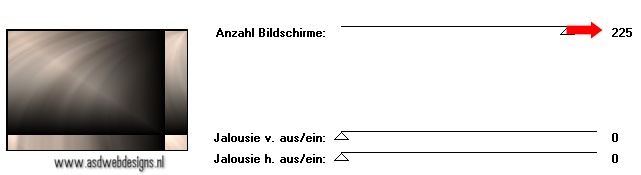
Effects - Plugins - °v°
Kiwi's Oelfilter -
Videowand
Layers - Duplicate
Image - Mirror
Image -
Flip
Layer Palette -
Double click on this Layer and set
the Layer Opacity of this Layer to
50
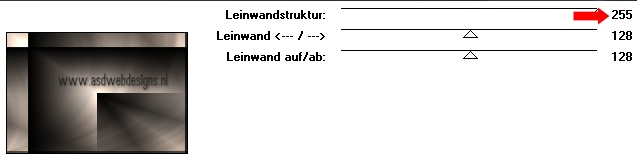
Effects - Plugins - °v°
Kiwi's Oelfilter -
Leinwand
04
Layers -
Duplicate
Image - Mirror
Image - Flip
Layers - Merge - Merge
Down
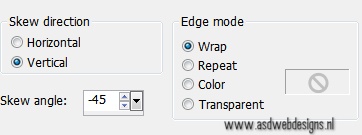
Effects -
Geometric Effects - Skew
Layers - Merge
- Merge Visible
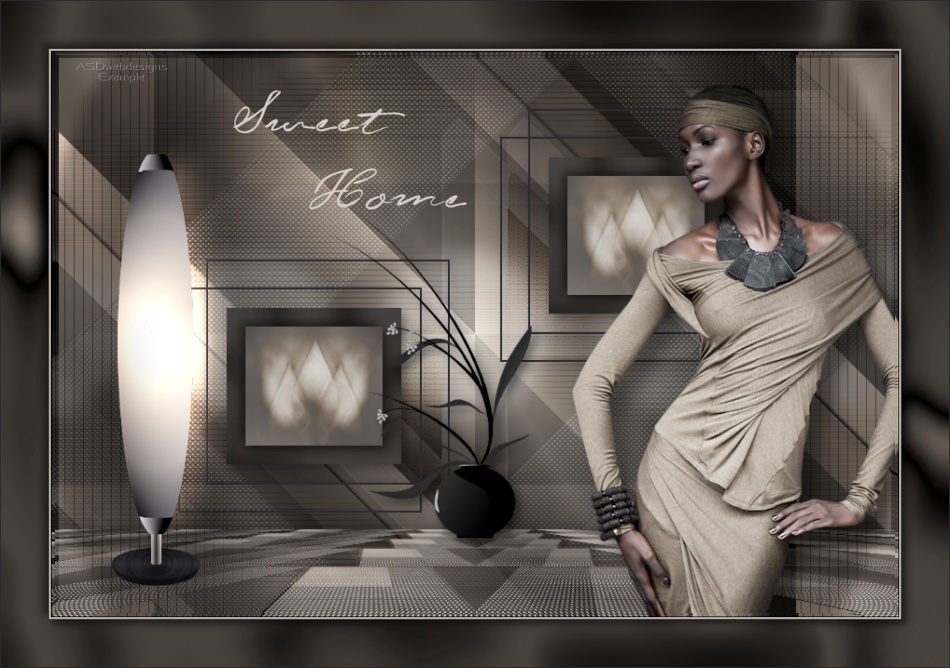
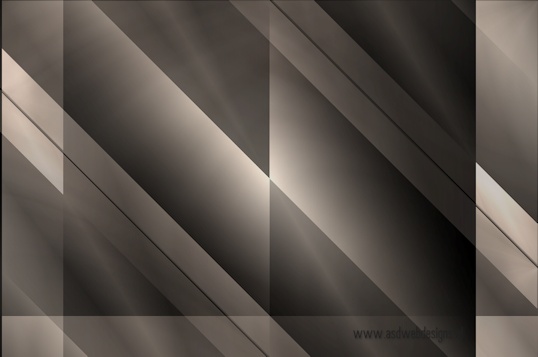
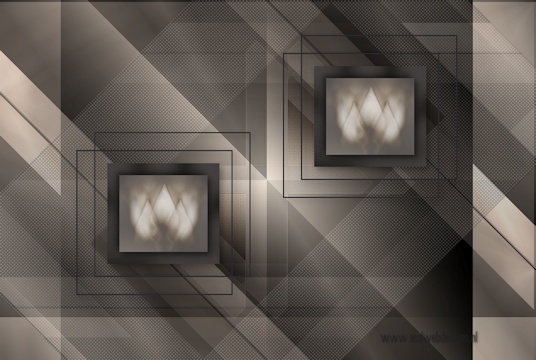
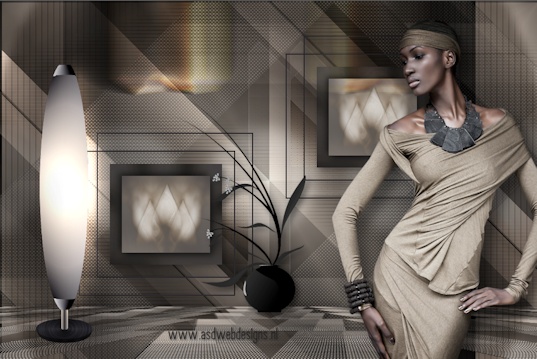
Your work looks like
this now:
05
Window - Duplicate (or shift+D) -
Minimize to tray (I always also save as
PSP File) and go back to the
original
Layers -
Duplicate
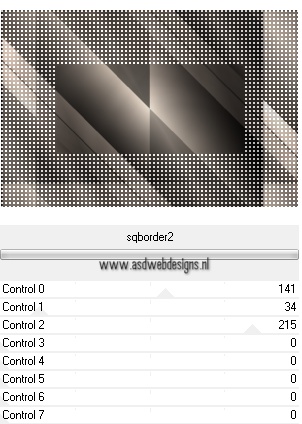
Effects -
Plugins - <I.C.NET Software>
Filters Unlimited -
[AFS Import] - sqborder
2
Image - Free
Rotate - Left checked - Free -
45°
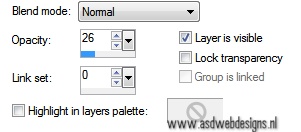
Layer Palette
- Double click on this Layer and set
the Layer Opacity of this Layer to
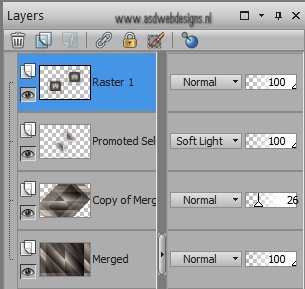
26
06
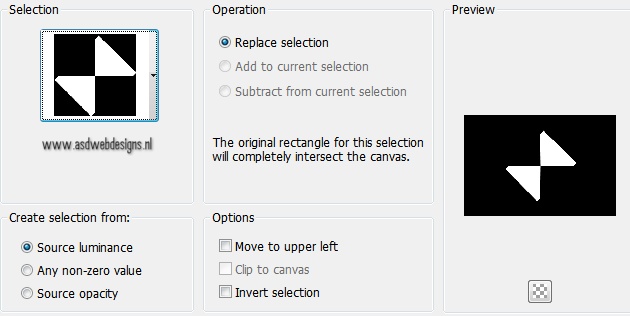
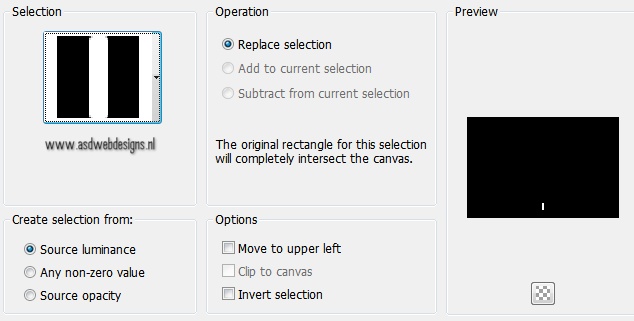
Selections -
Load/Save Selection - Load Selection
From Disk - Msb_Sel_Sweet
Home_01
Selections - Promote Selection to
Layer
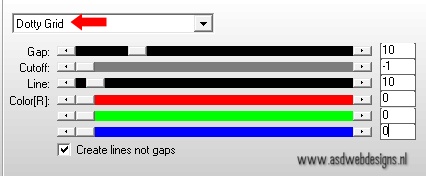
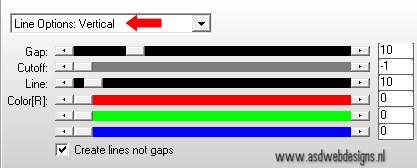
Effects -
Plugins - AP [Lines] - Lines - Silverlining
Selections - Select None
Effects -
Plugins - <I.C.NET Software> -
Toadies - What Are You? - X-dose
20 - Y-dose 20
Note: Use
this filter through FiltersUnlimited
otherwisethe result will be different.
Adjust - Sharpness
- Sharpen More
Layer Palette - Double click on this Layer
and set the Blend Mode to "Soft
Light"
07
Color Palette: Set
the Foregroundcolor back to gradient
and change to
#2b2a30 
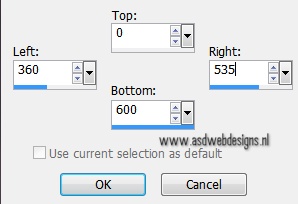
Layers - New Raster Layer
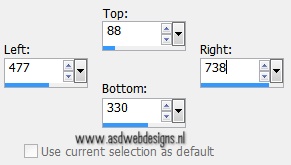
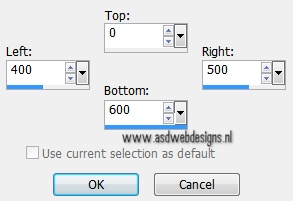
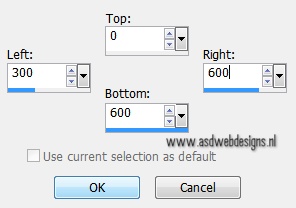
Selection Tool
- Rectangle  - Custom Selection:

Fill the SElection
with the Foregroundcolor
Selections -
Modify - Contract - 2 px
Edit - Cut (Or hit
the Delete Key of your Keyboard)
Selections - Select None
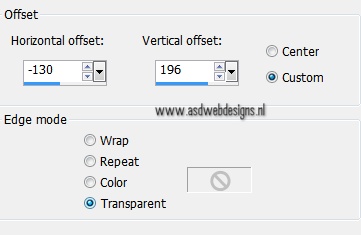
08
Layers - Duplicate
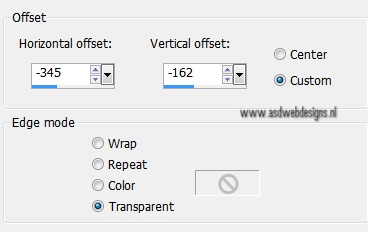
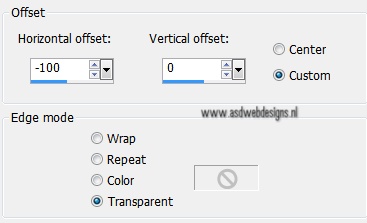
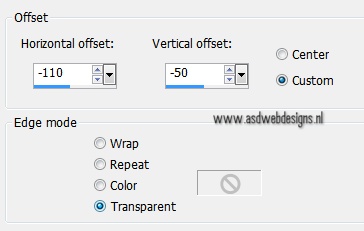
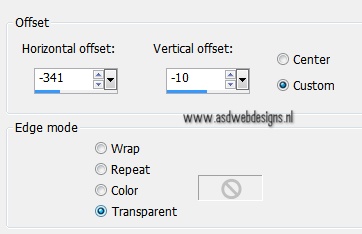
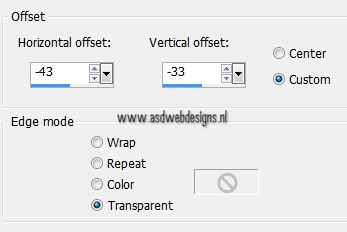
Effects -
Image Effects - Offset
Layers - Merge - Merge
Down
09
Color Palette: Set your
Foregroundcolor to Foreground/Background
Gradient (Corel_06_029) - same settings as
before
Layers - New Raster
Layer
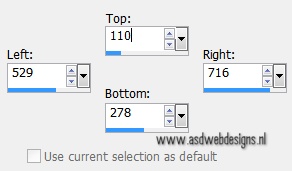
Selection Tool
- Rectangle - Custom Selection:
Fill the Selection
with the Gradient 
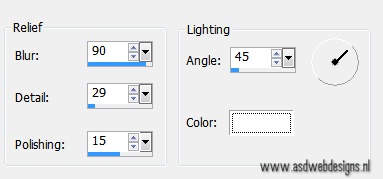
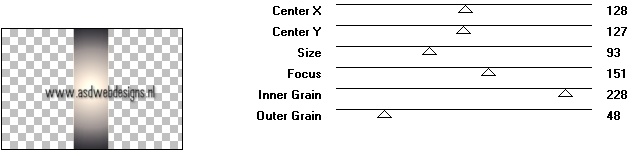
Effects -
Texture Effects - Polished Stone - Color #ffffff

Selections -
Modify - Contract - 20 px
Edit - Cut (Or hit the Delete Key of
your Keyboard)
Layers - New Raster Layer
Fill
the Selection with the Gradient
Adjust - Blur -
Gaussian Blur - 20
Keep Selected!
10
Layers - New
Raster Layer
Open Tube
"Abstract
RF-abstract21"
Edit - Copy
On your work image: Edit - Paste
into Selection
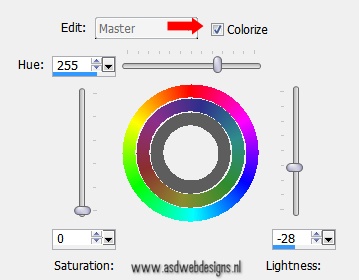
Adjust - Hue and Saturation -
Colorize - Hue 23 - Saturation
32
Note: If you
use your own colors you might need
to adjust these settings
Adjust - Hue
and Saturation - Vibrancy - Strength 60 (only
available for PSP 13 and higher
versions)
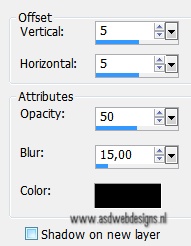
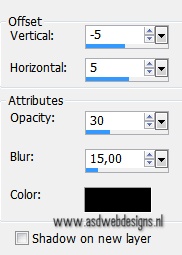
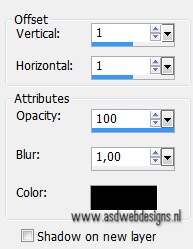
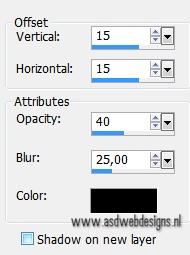
Effects
3D Effects - DropShadow - Color: #000000

Repeat with the Vertical and Horizontal
Offset to Minus 5
Selections - Select None
Layers - Merge - Merge Down
Edit - Repeat Layer Merge Down
Effects 3D Effects - DropShadow -
Color: #000000
11
Layers - Duplicate
Effects - Image Effects -
Offset
Layers - Merge - Merge
Down
Your work and Layer Palette look like this
now:
12
Layers - New Raster Layer
Selection Tool
- Rectangle - Custom Selection:
Selections -
Modify - Feather - 35
Fill the Selection
with the Gradient
Selections - Select None
Effects
- Distortion Effects - Warp
Effects - Image Effects -
Offset
Effects -
Plugins - AP [Lines] - Lines - Silverlining
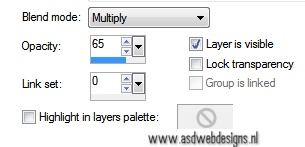
Layer Palette - Double click on this Layer and set
the Blend Mode to "Multiply" and the Layer Opacity to
65
Layers - Duplicate
Image - Mirror
13
Layer Palette
- Click on the Second Layer from the
Bottom
Selection Tool
- Rectangle - Custom Selection:
Selections - Promote Selection to
Layer
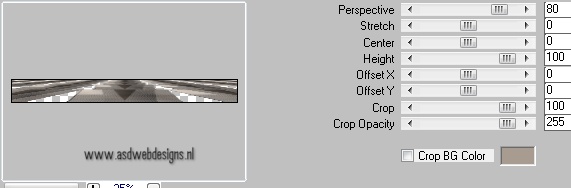
Effects -
Plugins - MuRa's Meister -
Perspective Tiling
Selections - Select None
Effects
3D Effects - DropShadow - Color: #000000
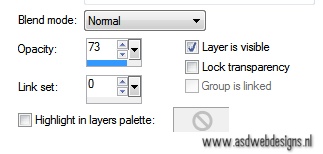
Layer Palette
- Double click on this Layer and set
the Layer Opacity of this Layer to
73
14
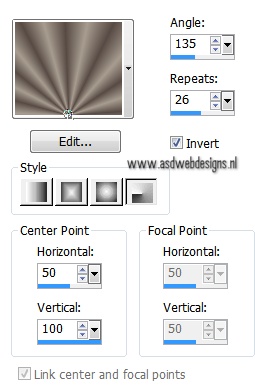
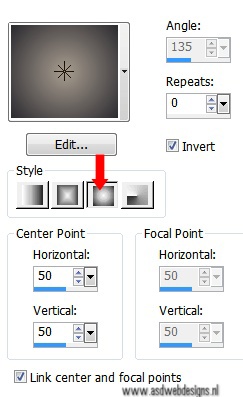
Color Palette: Change the Gradient
settings to Style
Sunburst
Layer
Palette - Click on the top
Layer
Layers - New Raster
Layer
Selection Tool
- Rectangle - Custom Selection:
Fill the Selection with the Gradient

Selections - Select None
Effects -
Plugins - Filter Factory A -
Spotlight
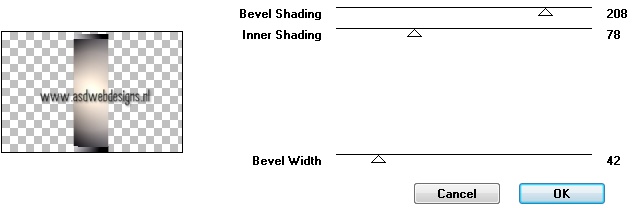
Effects -
Plugins - Toadies -
*Sucking Toad* Bevel
IV
Effects -
Geometric Effects - Circle -
Transparent
checked
Image -
Resize - 70% - Resize all
Layers not
checked
15
Layers - New
Raster Layer
Selections - Load/Save Selection
- Load Selection From Disk -
Msb_Sel_Sweet-Home_02
Effects - Plugins - Alien Skin
Eye Candy 5 - Impact - Brushed Metal - Settings Tab:
Preset Msb_Preset_BrM_23-9-12
Effects -
Plugins - Alien Skin Eye Candy 5 -
Impact - Extrude - Settings
Tab:
Msb_Preset_Extr_23-9-12
Selections - Select None
Hit the K key of your Keyboard, make
sure the Modus is set to
Scale
Move the
Bottom Middle Node a little bit up
like this:
Hit the M key of your Keyboard to
remove the nodes
Effects - Image
Effects - Offset
16
Color Palette: Change the Gradient
settings to Style
Linear
Layers - New Raster Layer
Selections - Load/Save Selection
- Load Selection From Disk -
Msb_Sel_ Sweet-Home_03
Fill the Selection with the Gradient

Selections - Select None
Effects - Image Effects -
Offset
Layers - Merge -
Merge Down
17
Layer
Palette - Click on the Second Layer
from the Top
Layers -
Arrange - Move Up
Effects - Image Effects -
Offset
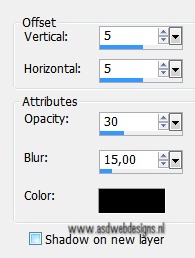
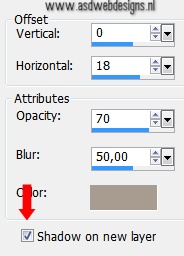
Effects
3D Effects - DropShadow - Color: #a79c8f  - Shadow on new Layer checked!
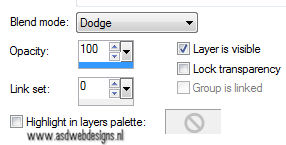
Layer Palette - Double click on this Layer and set
the Blend Mode to "Dodge"
Layers - Duplicate
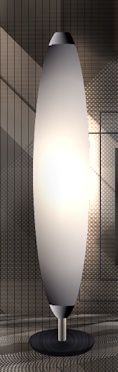
Your Lamp looks like
this now:
18
Color Palette: Set
the Foreground Gradient to color
and change to #000000
Set your Foregroundcolor to
GradientStyle:
Linear
Layers - New
Raster Layer
Selection Tool
- Rectangle - Custom Selection:
Fill the Selection
with the Gradient 
Adjust - Blur
- Gaussian Blur - 20
Selections - Select None
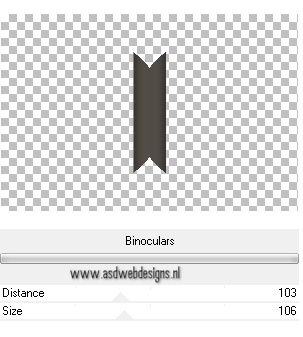
Effects -
Plugins - <I.C.NET Software>
Filters Unlimited - Special
Effects I - Binoculars
Effects -
Distortion Effects - Wind - From Right checked -
Wind Strength: 100
Effects - Distortion
Effects - Wind - From Left checked - Wind
Strength:
100
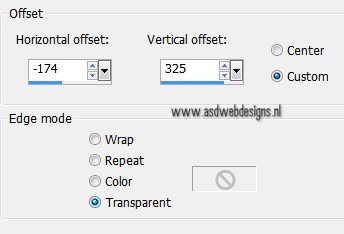
Effects - Image Effects -
Offset
19
Layers - Duplicate
Image - Mirror
Layers - Merge - Merge
Down
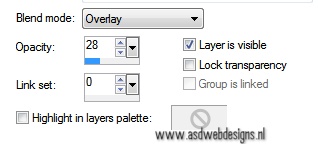
Layer
Palette - Double click on this Layer and
set the Layer Opacity of this Layer
to 28
20
Change the settings of your
Foreground Gradient
Layer Palette
- Click on the Second Layer from the Bottom
Layers - New Raster
Layer
Selection Tool
- Rectangle - Custom Selection:
Fill the Selection with the Gradient

Selections - Select None
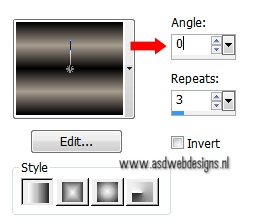
Effects -
Distortion Effects - Wave
Effects -
Distortion Effects - Wind - From Left checked -
Wind Strength: 100
Effects
3D Effects - DropShadow - Color: #000000
- Uncheck Shadow on new
layer
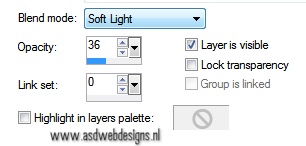
Layer Palette - Double click on this Layer and set
the Blend Mode to "Soft Light" and the Layer Opacity to
36
21
Open
Tube "Msb_Deco_24-9-12"
Edit - Copy
On your work image: Edit - Paste
as New Layer
No need to move
22
Layer Palette - Click on the top
Layer
Open
Tube "nicole-vase2-2012"
Edit - Copy
On your work image: Edit - Paste
as New Layer
Image - Resize - 80% - Resize
all Layers not checked
Effects - Image
Effects - Offset
Adjust - Hue and Saturation -
Hue/Saturation/Lightness (If you are using
different colors play with the settings to match your
tube)
Effects
3D Effects - DropShadow - Color: #000000
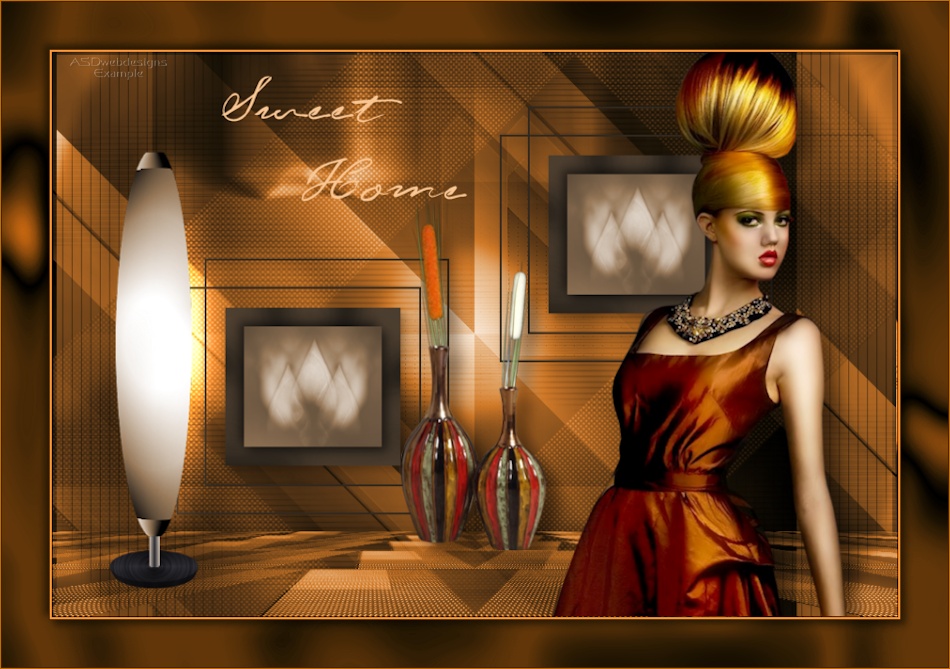
23
Maximize Tube
"Mary
0912-96" from tray
Edit - Copy
On your work image: Edit - Paste
as New Layer
Image - Resize
- 62% - Resize all Layers not
checked
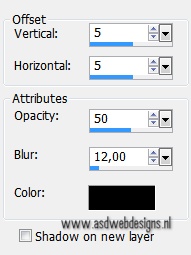
Effects
3D Effects - DropShadow - Color: #000000
Move to the Right
like this:
24
Color Palette: Set
your Foregroundcolor back to color
and change to #574b45

Change the
Backgroundcolor to
#b6aca0

Image - Add
Borders - Symmetric checked - 1 px -
Foregroundcolor
Image - Add
Borders - Symmetric checked - 2 px -
Backgroundcolor
Image - Add Borders -
Symmetric checked - 1 px -
Foregroundcolor
Selections - Select All
Image - Add
Borders - Symmetric checked - 50 px -
Backgroundcolor
Selections - Invert
Keep selected!
25
Maximize the image
you have set aside earlier

Edit - Copy!
On your
work image: Edit - Paste into
Selection
Adjust - Blur
- Gaussian Blur - 10
Effects -
Texture Effects - Polished Stone - Color #ffffff
Effects -
Plugins - Graphics Plus - Cross Shadow
- Default Settings
Selections - Invert
Effects
3D Effects - DropShadow - Color: #000000
Repeat with the Vertical and Horizontal
Offset to Minus 5
Selections - Select None
Image - Add Borders - Symmetric
checked - 1 px - Foregroundcolor
26
Open
Tube "Msb_Text_Sweet-Home"
Edit - Copy
On your work image: Edit - Paste
as New Layer
Effects - Image Effects -
Offset
Layers - Merge
- Merge all (Flatten)
27
Optional:
Image - Resize - Width 950 Pixels -
Resize all Layers checked
Add your name or watermark, save as JPG
file and you're done!
If you wish
you can post your result on my Facebook Page