Materials download 

Plugins:
Preparations:
-
Open the mask files in PSP and minimize to
tray
-
Double Click on the Eye
Candy Presets, they will be imported
automatically
-
Open the Brush in PSP and
export as custom brush ( File - Export - Custom
Brush)
-
Double click on the font (ttf) to open.
Minimize to tray, you can use it now in PSP.
-
Note: If you are using PSP13 in
combination with Windows 7 you need to copy the font to the
Font folder of windows.
Used Colors
Foregroundcolor: #000000
Backgroundcolor: #ac9e81
Other #584f4a,
#c9cacc
This translation is
written with PSP13 but can also be
made with other PSP
versions.

01.
Open a new
transparent image of 800 x 600 px
Set your
foregroundcolor to Foreground/Background Gradient
(Corel_06_029) - Style: Radial
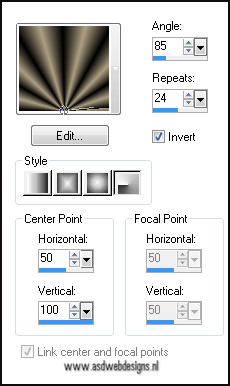
Fill your image with the gradient
Selections - Select
all
Open Tube "Mary 0312-41" - Copy and paste
into the selection
Selections - Select
None.
Effects - Image Effects
- Seamless Tiling. Default settings.
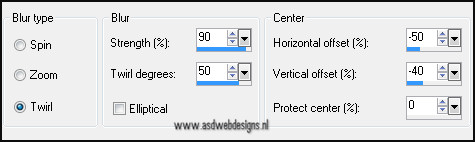
Adjust - Blur - Radial
Blur
Layers - Duplicate.
Adjust - Blur - Gaussian
Blur - 20.
Layer Palette - Set the Blend Mode of this
layer to "Multiply"
Window - Duplicate (or shift/D) -
Repeat once - Minimize both images to tray and go
back to the original work image.
(I always save as
PSP file)
02.
Open Tube "Mary 0312-40" - Copy and paste as
new layer on your image.
Image - Resize -
70% - Resize all layers not checked
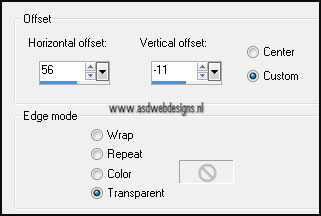
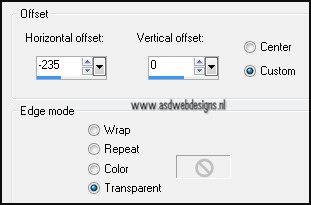
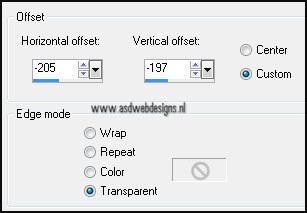
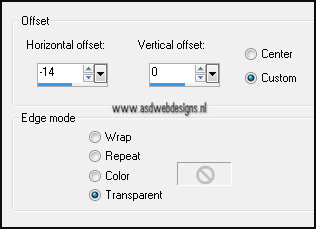
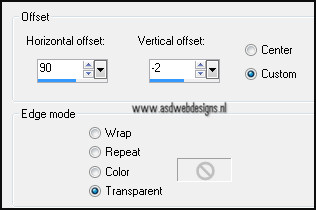
Effects - Image Effects
- Offset
Adjust - Sharpness -
Sharpen.
Effects 3D Effects
- Dropshadow - 5 - 5 - 30 - 15 - #000000
Layers -
Duplicate
Image -
Mirror
Image - Free Rotate -
Left - Free - 15°
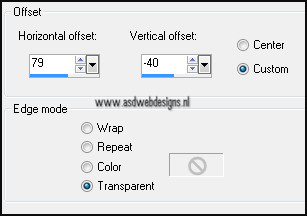
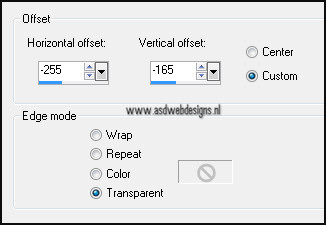
Effects - Image Effects
- Offset

03.
Layer Palette - Click
on the second layer from the top
Layers - Duplicate
Image - Free Rotate - Right - Free -
24°
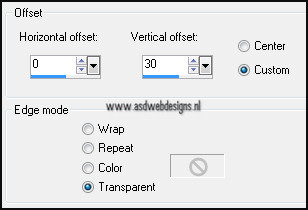
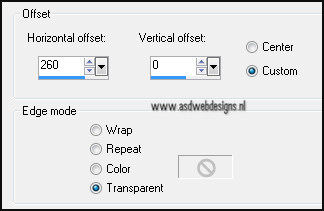
Effects - Image Effects -
Offset
04.
Layer Palette - Click on the top
layer
Adjust - Sharpness -
Sharpen
Layers - Merge - Merge Down -
Repeat once
Layer Palette - Click on the middle
layer
Selections - Select all
Image - Crop to selection
Image - Resize - 77% - Resize all
layers not checked
Effects - Plugins – Unlimited
2.0 – Buttons and Frames - Glass Frame 2 - Default
settings
05.
Layer Palette - Click on the top
layer
Image - Resize - 85% - Resize all
layers not checked
Effects - Image Effects -
Offset
Effects 3D Effects - Dropshadow
- Minus 5 - 5 - 30 - 15 - #000000
Layers - Merge - Merge all
Save as PSP File ( in case PSP
shut's down on you or something) and minimize to tray for
now
06.
Go back to one of the the images
you have set aside earlier.
This is your new work
image
Layers - Merge - Merge
Visible
Adjust - Blur - Gaussian
Blur - 25
Layers -
Duplicate
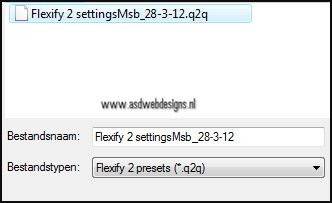
Effects
- Plugins – Flaming Pear – Flexify 2
Click on the red arrow  and look on your hard drive for the
"Flexify
2 settingsMsb_28-3-12" preset from
the zip
and look on your hard drive for the
"Flexify
2 settingsMsb_28-3-12" preset from
the zip
Edit
- Copy
Edit
- Paste as new image - save as PSP file and set aside for
now.
07.
Return to your work image
Undo
the last command  ( or Ctrl /Z)
Effects - Geometric
Effects - Skew

Repeat with the
same settings
Layers -
Duplicate
Effects - Image Effects
- Offset
08.
Layer Palette - Click on the middle layer
Effects - Image Effects
- Offset
Layer Palette - Click on the top
layer
Layers - Merge - Merge
Down
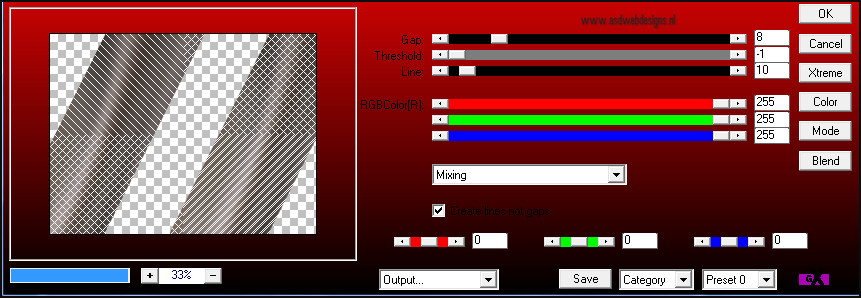
Effects - Plugins
– AP (Innovations) - Lines – Silverlining -
Mixing
Layer Palette - Set the Blend Mode of this
layer to "Soft Light"
Layers - Merge - Merge
Visible
Adjust - Hue and
Saturation - Colorize - Hue 28 - Saturation 19
09.
Layers -
Duplicate
Layers - New Raster Layer
Fill with the
backgroundcolor
Layers - New Mask Layer - From Image -
Design_Painting_Mask - Source Luminance checked - Invert
Mask Data NOT checked
Layers - Merge - Merge Group
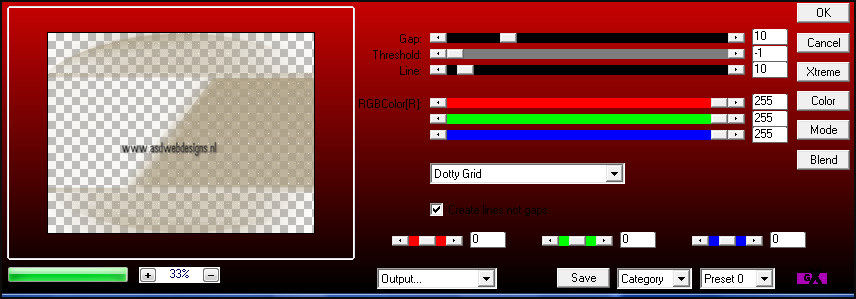
Effects - Plugins – AP
(Innovations) - Lines – Silverlining - Dotty
Gird
10.
Layers -
Duplicate
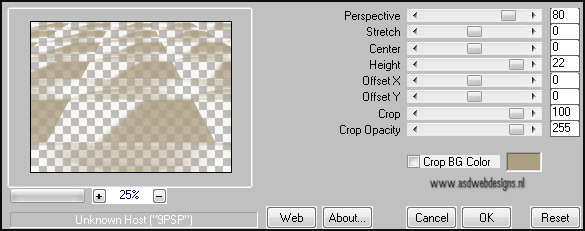
Effects - Plugins
– MuRa’s Meister – Perspective Tiling
Effects 3D
Effects - Dropshadow - 5 -5 - 30 - 15 -
#000000
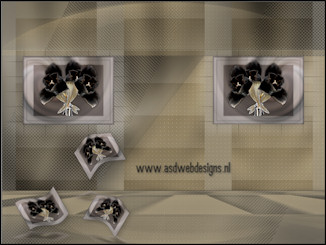
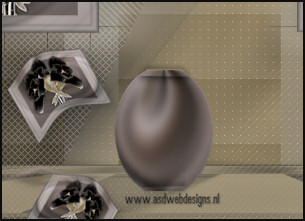
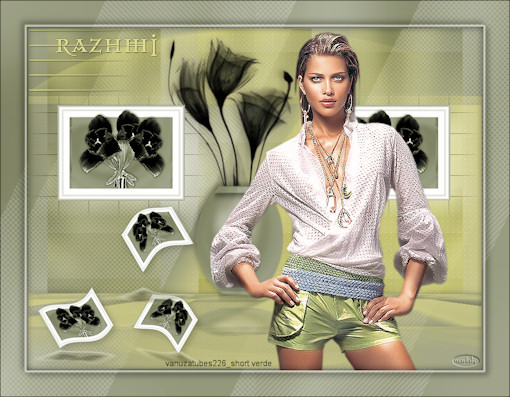
Your work should
look like this now

11.
Layers - New Raster
Layer
Selection Tool -
Rectangle - Custom Selection 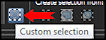
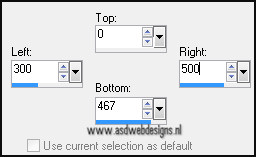
Fill the
selection with the gradient
Adjust - Blur - Gaussian
Blur - 20
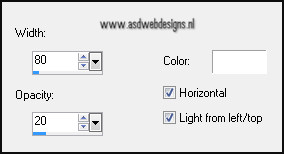
Effects - Texture
Effects - Blinds
Selections - Select
None
Effects - Plugins
– MuRa’s Meister – Copies - (preset *Line)
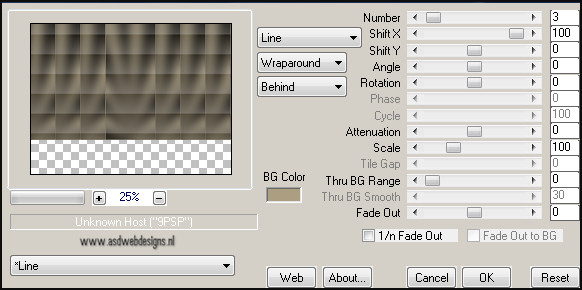
Layer Palette - Set the Blend Mode of this
layer to "Soft Light" and the Layer Opacity to
80
12.
Go back to the framed image we have set aside earlier
Edit - Copy
Back to your work image
Edit - Paste as new layer
Image -
Resize - 53% - Resize all layers not checked -
Repeat once
Adjust - Sharpness -
Sharpen
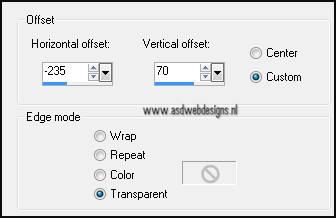
Effects - Image Effects
- Offset
13.
Layers -
Duplicate
Image -
Mirror
Layers - Merge - Merge
Down
Layers -
Duplicate
Layer Palette - Click on the second layer from the
top
Effects - Plugins
– Filters Unlimited - Toadies – Ommadawn - Default
settings.
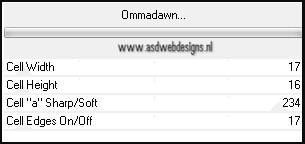
Layer Palette - Set the Layer Opacity of
this layer to 40
14.
Layer Palette - Click on the top layer
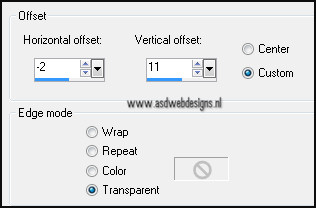
Effects - Image Effects -
Offset.
15.
Layers -
Duplicate
Effects - Distortion
Effects - Wave
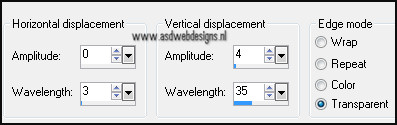
Image - Resize -
46% - Resize all layers not checked
Image - Free
Rotate - Left - Free - 30°
16.
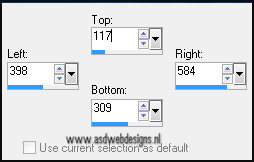
Selection Tool - Rectangle
 - Custom Selection
Selections - Promote
selection to layer.
Layer Palette - Click on the second layer
from the top
Hit the delete key of
your keyboard
Selections - Select
None
Effects - Image Effects
- Offset
Adjust - Sharpness -
Sharpen
Effects - Plugins - Alien
Skin Eye Candy 5 - Impact - Perspective Shadow
- Settings Tab:
Reflect in
Front – Faint
17.
Layer Palette - Click on the top
layer
Effects - Image Effects -
Offset
Adjust - Sharpness -
Sharpen.
Layers
- Duplicate
Effects - Plugins - Alien Skin Eye
Candy 5 - Impact - Perspective Shadow
- Settings Tab: Preset
Msb_Preset_PS_Rashmi_01
18.
Layer Palette - Click on the second layer
from the top
Image - Mirror
Image - Resize - 90% - Resize all
layers not checked.
Effects - Image Effects -
Offset

Effects - Plugins - Alien Skin Eye
Candy 5 - Impact - Perspective Shadow
- Settings Tab: Preset
Msb_Preset_PS_Rashmi_02
19.
Layer Palette - Click on the top
layer
Layers - Merge - Merge Down -
Repeat once
Effects 3D Effects - Dropshadow
- 5 - 5 - 18 - 15 - #000000
It looks like this now
Effects - Image Effects -
Offset
20.
Go back to the flexify
image you have set aside earlier
Edit -
Copy
Edit - Paste as
new layer on your work image
Image - Resize - 40% -
Resize all layers not checked
Selection Tool -
Rectangle - Mode:
Add (Shift)
Make a selection
areound the top and the bottom like this
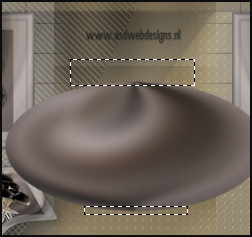
Hit
the delete key of your keyboard
Selections - Select None
21.
Selection Tool
- Freehand selection 

Make a selection at
the top like this
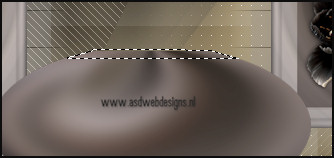
Effects 3D Effects -
Dropshadow - 2 - 0 - 80 - 15 -
#000000.
Selections - Select
None
22.
Selection Tool -
Freehand selection - Same settings
Make a selection at
the bottom like this
Effects 3D Effects -
Dropshadow - Minus 2 - 0 - 80 - 10 -
#000000
Selections - Select None
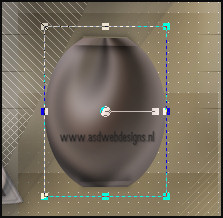
Hit the D key of
your keyboard to activate the
raster Deformation Tool
(or in another version of PSP the K
key of your keyboard)
Move the middle side
nodes inside until it looks like
this
Adjust - Sharpness -
Sharpen
Move down
23.
Open Tube
"Mtm_transparantetube37-Gentian—1Ma2006" - Copy and paste as new layer on your
image.
Image -
Resize - 55% - Resize all layers not
checked.
Move like this
Mesh warp tool 
Move the nodes inward, start at
point 1
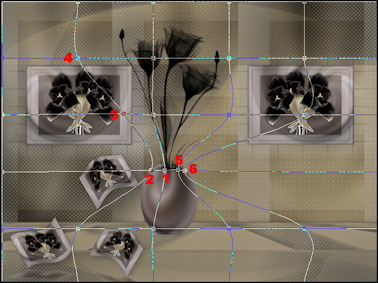
Hit the M key of your keyboard to remove the nodes
Layers -
Arrange - Move Down
Layer Palette - Click on the top layer
Layers - Merge - Merge
Down
Effects 3D Effects
- Dropshadow -Minus 5 - 5 - 30 - 15 - #000000
Image - Resize - 90% -
Resize all layers not checked
Effects - Plugins - Alien Skin Eye
Candy 5 - Impact - Perspective Shadow
- Settings Tab:
Reflect in Front –
Faint
Layers - Arrange - Move
Down
24.
Layer Palette - Click on the top
layer
Go back to
Tube
"Mary
0312-41" - Copy and paste as new layer on your
image.
Image - Resize -
69% - Resize all layers not checked.
Adjust - Sharpness -
Sharpen
Effects - Image Effects
- Offset
Effects 3D Effects
- Dropshadow - 15 - 15 - 20 - 25 - #000000
25.
Set your
foregroundback to color and to
#584f4a
Set your
backgroundcolor to
#c9cacc
26.
Layer Palette - Click on the top
layer
Layers - New Raster
Layer
Paint Brush Tool  - "Msb_Brush_31-3-12"
- Size: 184 - Step: 32 -
Density: 100 - Rotation: 0 -
Opacity: 100 - Blend Mode: Normal -
Continuous checked - Wet paint
Unchecked
- "Msb_Brush_31-3-12"
- Size: 184 - Step: 32 -
Density: 100 - Rotation: 0 -
Opacity: 100 - Blend Mode: Normal -
Continuous checked - Wet paint
Unchecked
Stamp with the
background color (right mouse click) in the left top
corner

Effects 3D Effects - Dropshadow - 1 - 1 -
50 - 1 -
#584f4a
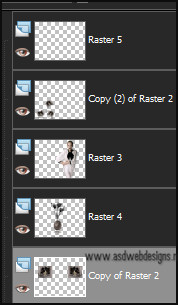
27.
Layer
Palette - Click on the 5th layer from the top
28.
Text Tool
 Font Alchemy
SilverHigh - Size 70 - Units:
Pixels - Stroke Width 0 - Create
as: Vector
Font Alchemy
SilverHigh - Size 70 - Units:
Pixels - Stroke Width 0 - Create
as: Vector
Type Rashmi ( IN
CAPITALS) with the backgroundcolor
Move where you
like it
Effects 3D Effects
- Dropshadow -1 - 1 - 50 - 1 - #584f4a
Adjust - Sharpness -
Sharpen
29.
Layer Palette - Click on the Bottom layer
Edit -
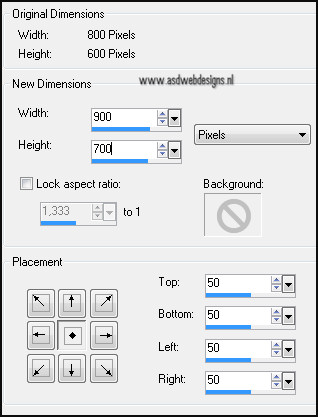
Copy
Image - Canvas Size
Layers - New Raster
Layer
Layers - Arrange - Send to Bottom
Selections - Select
all
Edit - Paste into
the selection ( background is still in your PSP
image)
Keep
selected
30.
Layers - New Raster
Layer
Layers - Arrange - Bring
to top.
Fill with
#000000
Selections - Modify -
Contract - 1 px
Hit the delete key of
your keyboard
Selections - Modify -
Contract - 44 px
Fill with
#c9cacc
Selections - Modify -
Contract - 1 px
Hit the delete key of
your keyboard
Fill with #000000
Selections - Modify -
Contract - 2 px
Hit the delete key of
your keyboard
Fill with
#c9cacc
Selections - Modify -
Contract - 1 px
Hit the delete key of
your keyboard
Keep
selected
31.
Selections -
Invert
Effects 3D Effects
- Dropshadow - 5 - 5 - 30 - 15 - #000000
Effects 3D Effects
- Dropshadow - Minus 5 - Minus 5 - 30 - 15 - #000000
Selections - Invert
Selections - Modify -
Expand - 4
Effects 3D Effects
- Dropshadow - 5 - 5 - 30 - 15 - #000000
Effects 3D Effects
- Dropshadow - Minus 5 - Minus 5 - 30 - 15 -
#000000
Selections -
Invert
Layers - Merge - Merge
all.
Effects - Plugins
– Graphic Plus – Cross Shadow - Default
settings.
32.
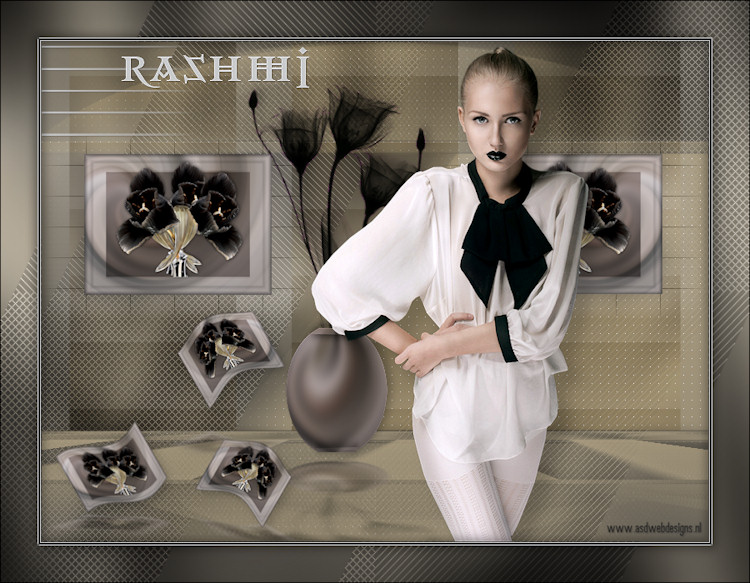
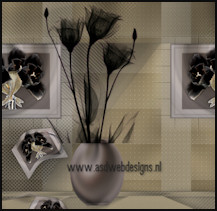
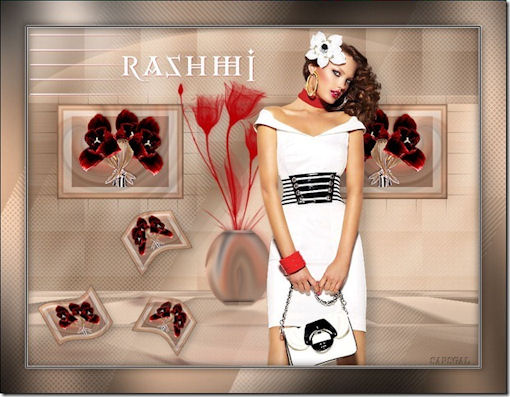
Add your name or
watermark, save as JPG file and you're done!
Thank you Martalip and Julie for testing
this translation!
By Martalip:
***
By Julie:
Back to the top
Home ASDwebdesigns
If
you want to use this tutorial for
your group ,club or forum please ask
permission first
anyasspecialdesigns@gmail.com
|
In
accordance with Title 17 U.S.C. Section 107, any
copyrighted work in this tutorial is
distributed under fair use without
profit or payment to those who have
expressed a prior interest in receiving
the included information for non-profit
research and educational or criticism
purpose only.
|