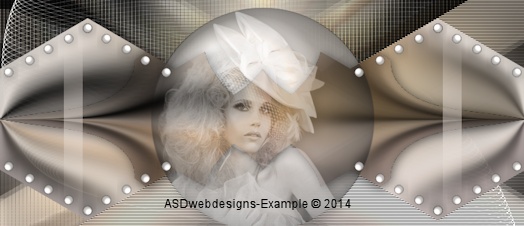
05
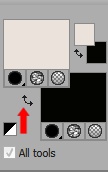
Layer Palette -
Click on the Bottom Layer
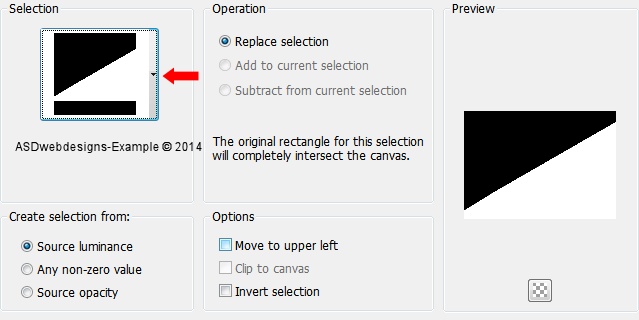
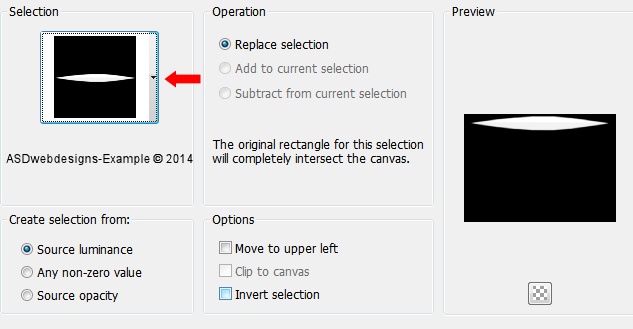
Selections - Load/Save Selection - Load Selection From Disk
- Msb_Lace-and-Silk_01
Selections -
Promote Selection to Layer
Effects -
Plugins - <I.C.NET Software>
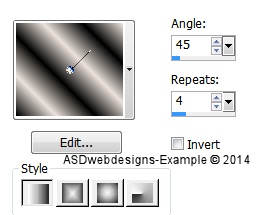
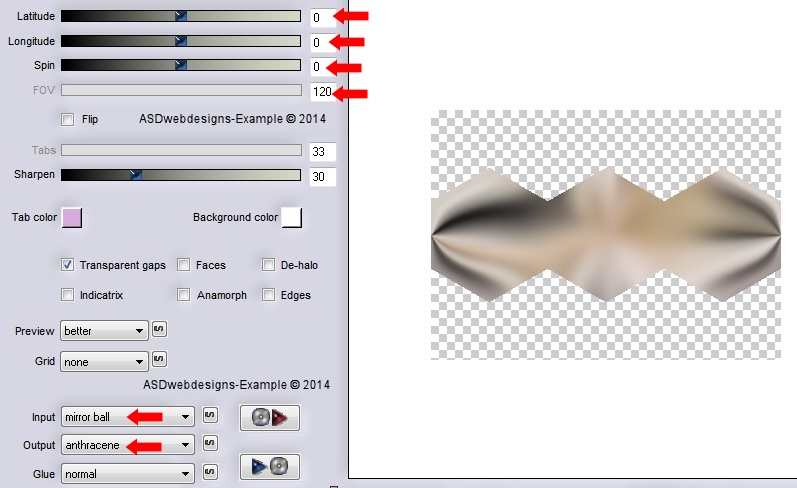
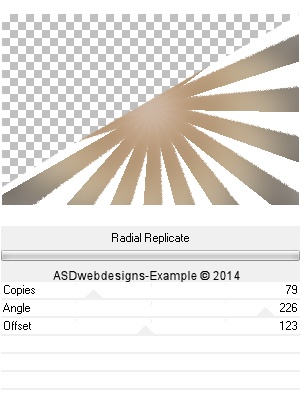
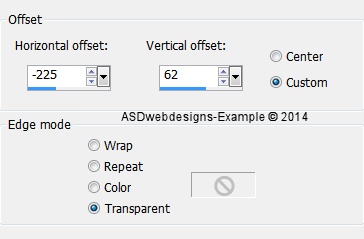
Filters Unlimited - &Bkg Kaleidoscope> -
Radial
Replicate
Effects -
Plugins - Transparency -
Eliminate White
Selections - Select None
Image - Mirror
Image - Flip
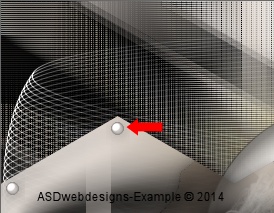
Effects - 3D
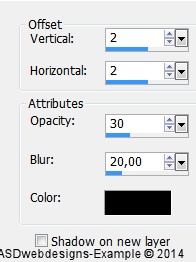
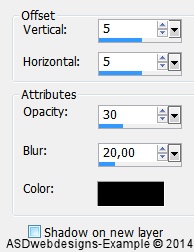
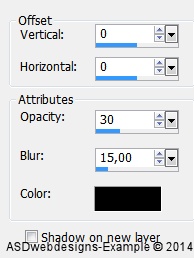
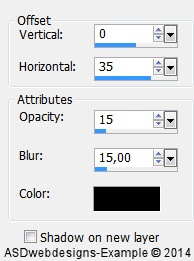
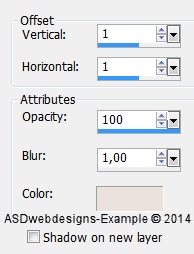
Effects - DropShadow - Color: #000000

Effects -
Distortion Effects - Wind - From Left checked -
Wind Strength:80
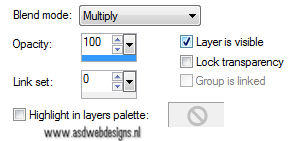
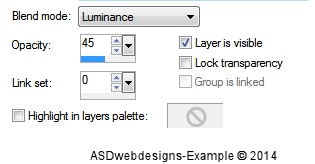
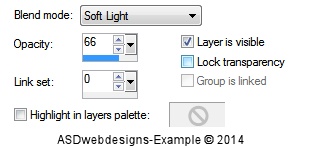
Layer Palette - Double click on this Layer and set the
Blend Mode to "Soft Light"
06
Layer Palette -
Click on the Bottom Layer
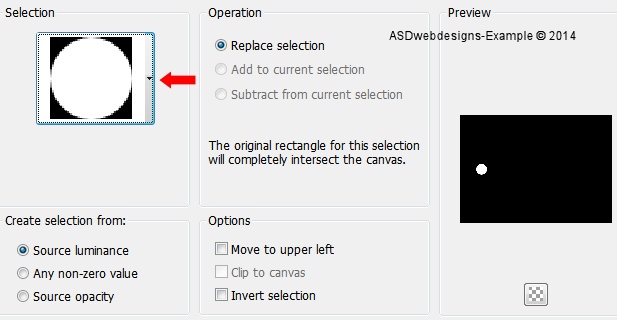
Selections - Load/Save Selection - Load Selection From Disk -
Again
Msb_Lace-and-Silk_01
Selections - Promote Selection to
Layer
Layers - Arrange - Move Up
Effects -
Plugins - <I.C.NET Software>
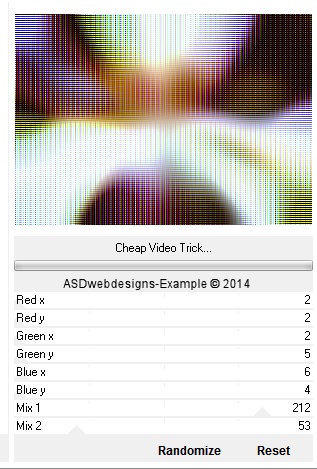
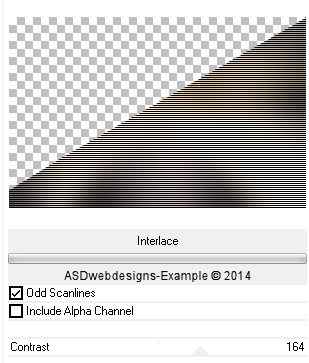
Filters Unlimited - Video -
Interlace
Layer Palette -
Click on the Third Layer from the Top
Edit - Cut (Or hit
the Delete Key of your Keyboard)
Selections - Select None
Layer Palette -
Click on the Third Layer from the Bottom
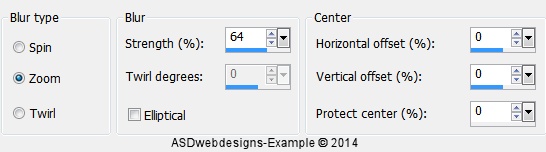
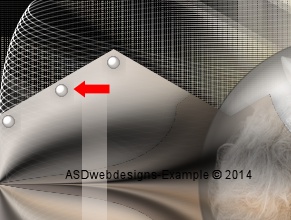
Effects - 3D
Effects - DropShadow - Color: #000000
07
Layer Palette -
Click on the Second Layer from the Top
Layers - Duplicate
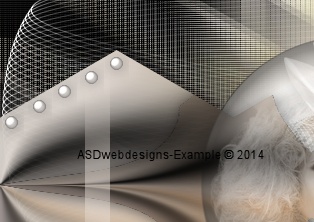
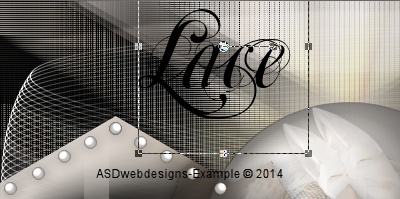
Effects - Artistic
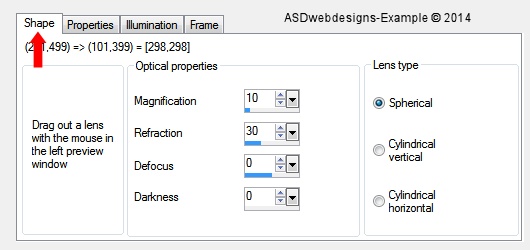
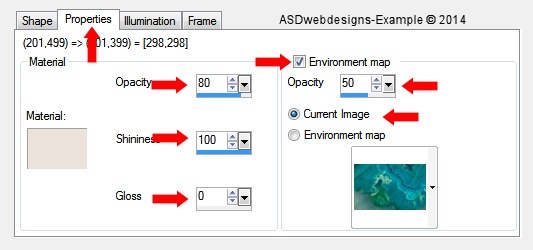
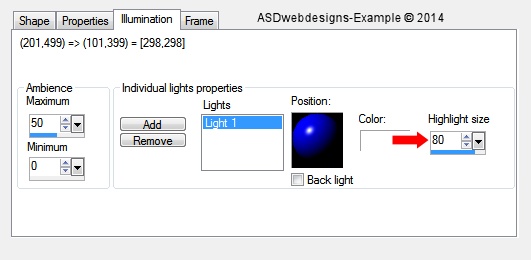
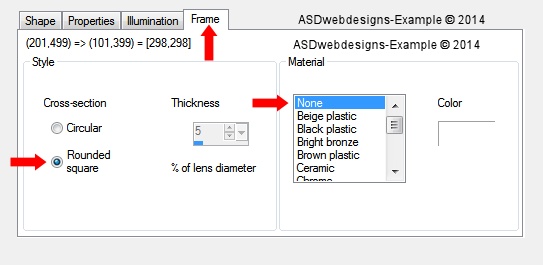
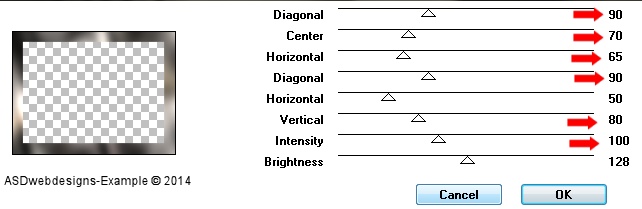
Effects - Magnifying Lens - Shape Tab:
Properties
Tab:
Illumination
Tab:
Frame Tab:
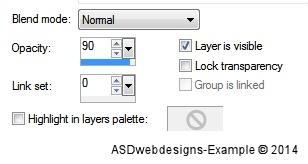
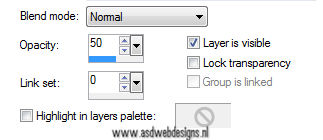
Layer Palette -
Double click on this Layer and set
the Layer Opacity of this Layer to
90
08
Layer Palette -
Click on the Third Layer from the Top
Layers - New Raster Layer
Selections - Load/Save Selection - Load Selection From Disk
- Msb_Lace-and-Silk_02
Fill the Selection with
the Gradient 
Selections - Select None
Effects -
Plugins - It@lian Editors Effect -
Effetto Fantasma
09
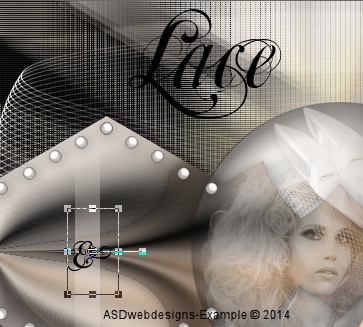
Layers - Duplicate
Image - Mirror
Layers - Merge - Merge Down
Layers - Duplicate