Layers - Duplicate
Effects - Distortion Effects - Warp
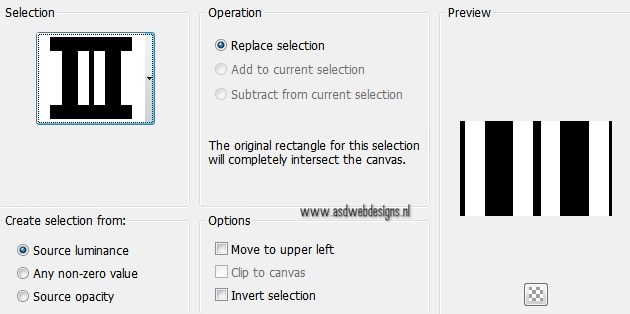
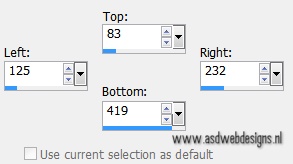
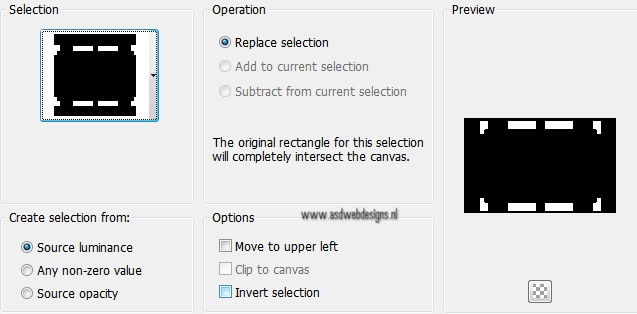
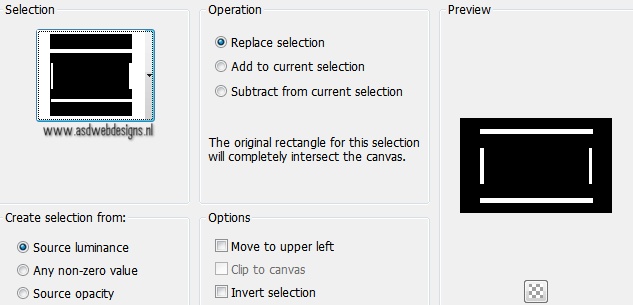
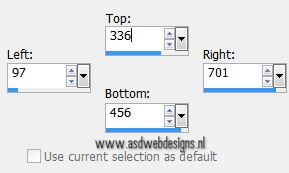
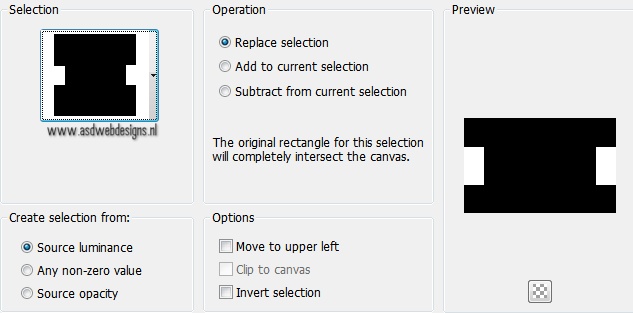
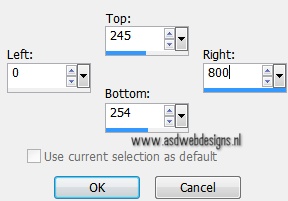
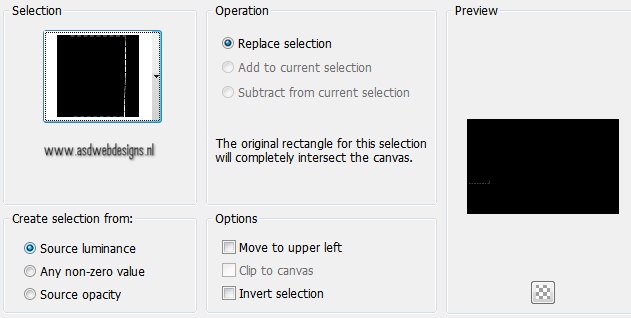
Selection Tool - Rectangle
 - Custom Selection:

Edit - Cut (Or hit the Delete Key of your
Keyboard)
Selections - Select None
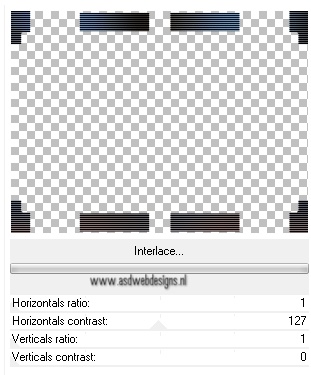
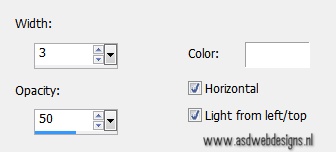
Effects - Distortion Effects - Wind - From
Left checked - Wind Strength:
100
11
Layers - New Raster
Layer
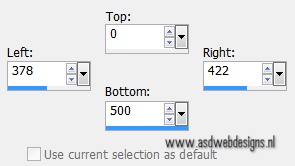
Selection Tool - Rectangle
- Custom Selection:
Fill with the
Backgroundcolor  (Right Mouse Click)
Selections - Select
None
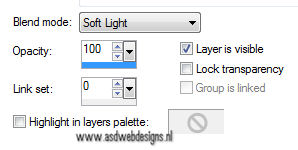
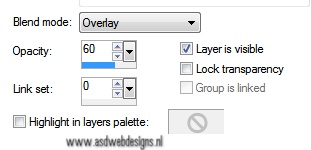
Layer Palette - Double click on
this Layer and set the Blend Mode to "Soft Light"
12
Layers - New Raster
Layer
Paint Brush Tool  - "Msb_Brush_Tekst_3-8-12" - Size: 354
Stamp with the
Backgroundcolor at the Left of your
image like this:
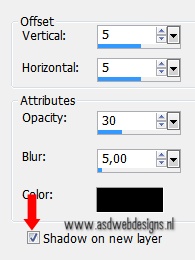
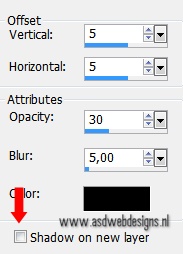
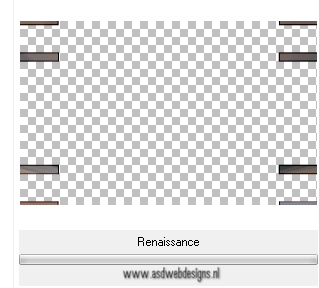
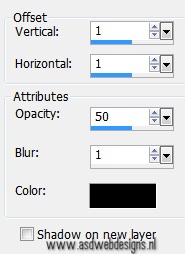
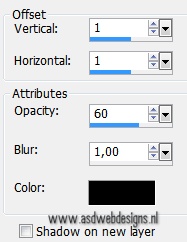
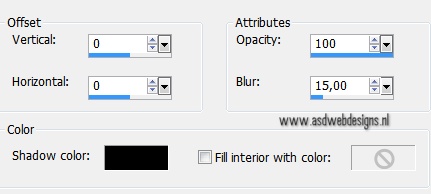
Effects 3D Effects - DropShadow -
Color: #000000 
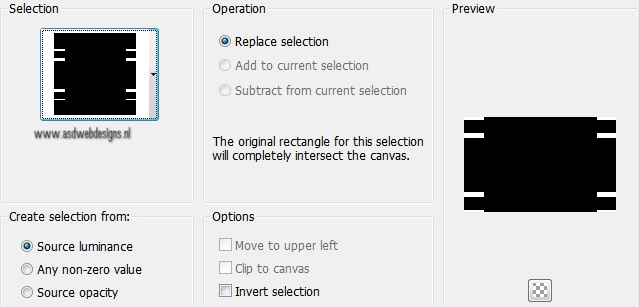
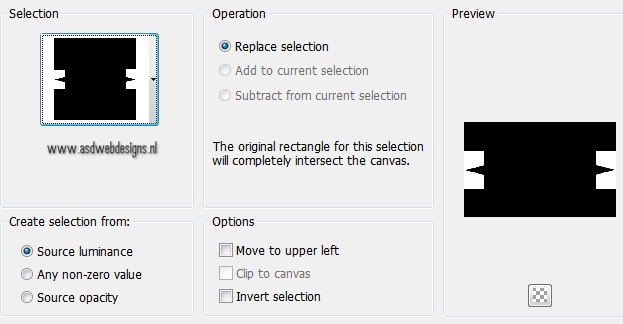
Selection Tool - Rectangle
- Custom Selection:
Edit - Cut (Or hit the Delete Key of your
Keyboard)
Selections -
Select None
13
Layer Palette - Click on
the Second Layer from the Bottom
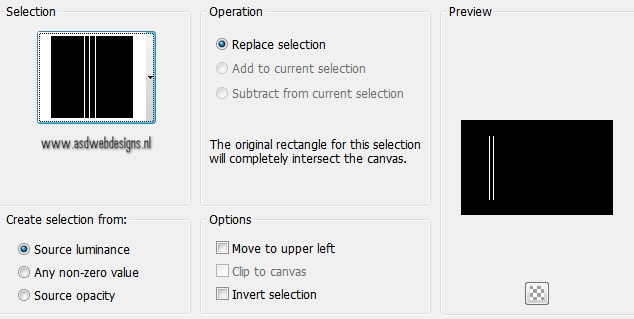
Selections - Load/Save
Selection - Load Selection From
Disk -
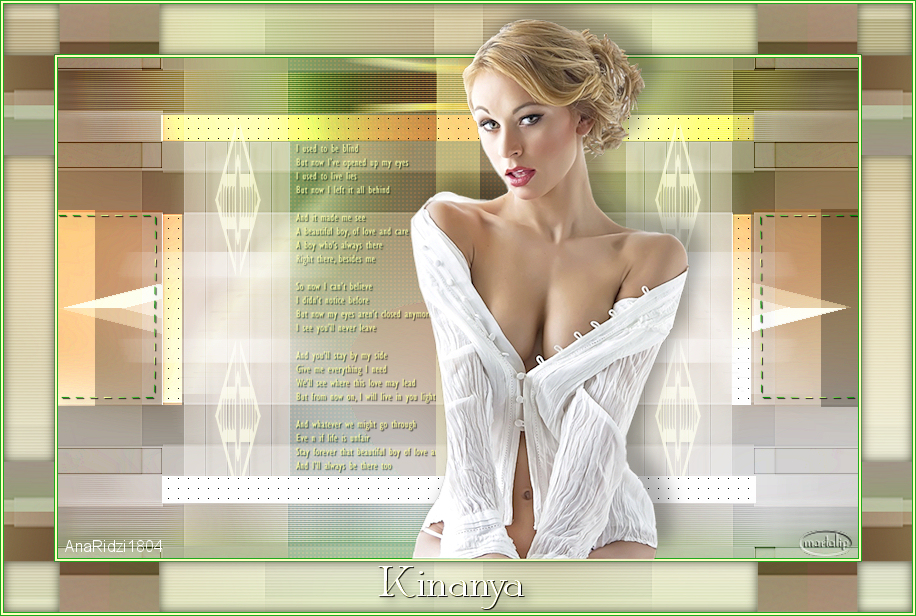
Msb_Kinanya_07
Selections - Promote
Selection to
Layer
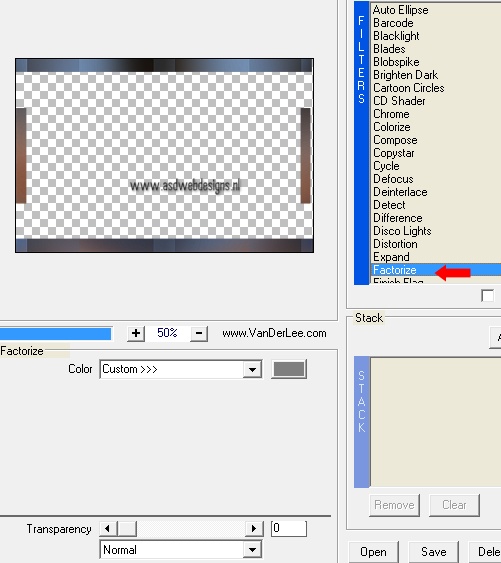
Effects - Plugins - <I.C.NET
Software> - Filters Unlimited 2.0
- Image Enchancement - Color
Booster
Keep selected
14
Layers - Duplicate
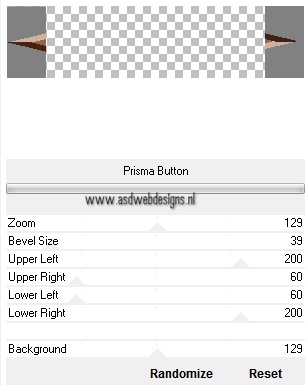
Effects - Plugins - <I.C.NET
Software> - Filters Unlimited 2.0
-
Harry's Button Tools -
Prisma
Button
Selections - Select
None
Selections - Load/Save
Selection - Load Selection From
Disk -
Msb_Kinanya_08
Edit - Cut (Or hit the Delete Key of your
Keyboard)
Selections -
Select None
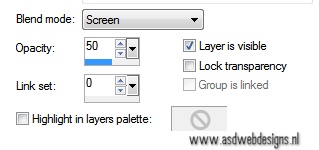
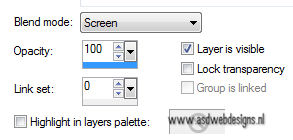
Layer Palette - Double click on
this Layer and set the Blend Mode to
"Screen"
Layer Palette - Click on the
Third Layer from the Bottom
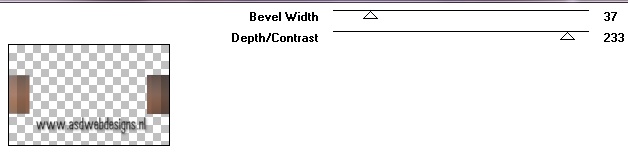
Effects - Plugins - Graphics
Plus -
Button Beveler II
15
Layer Palette - Click
on the top layer
Open
Tube "Deco
Msb_Deco_4-8-12"
Edit - Copy
On your work image: Edit - Paste
as New Layer
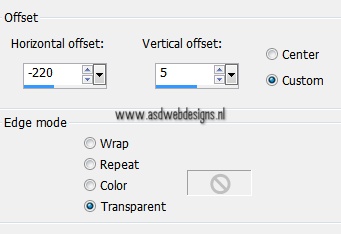
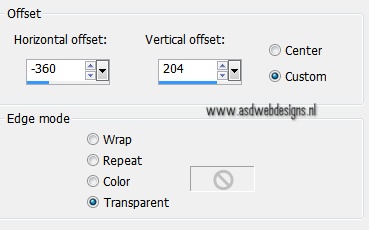
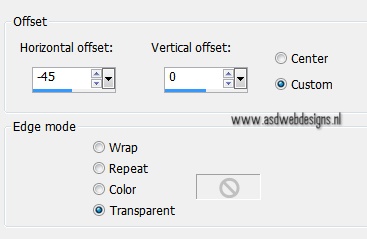
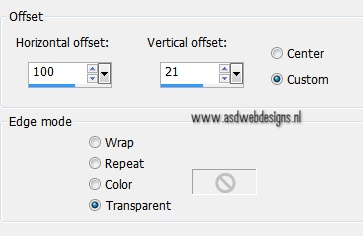
Effects - Image Effects -
Offset
Effects - Distortion Effects - Wind - From
Right checked - Wind Strength:
100
Effects - Distortion
Effects - Wind - From Left checked - Wind
Strength: 100
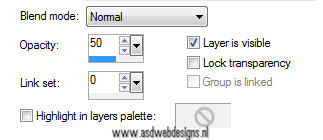
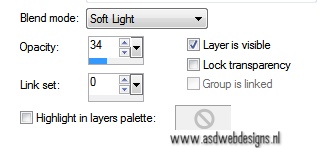
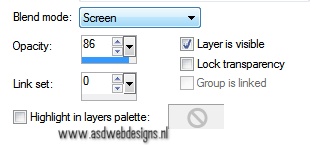
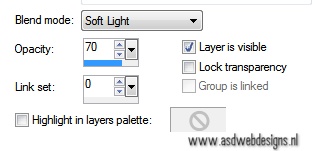
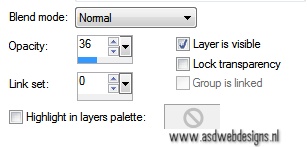
Layer Palette - Double click on
this Layer and set the Blend Mode to "Screen" and the
Layer Opacity to 86
Layers -
Duplicate
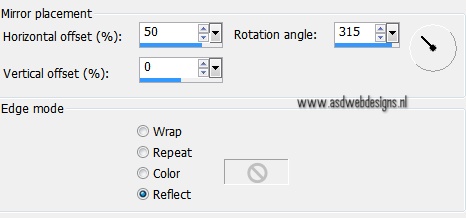
Image - Mirror
16
Edit - Paste as
New Layer (Tube
is still in your PSP
Memory)
Image - Resize - 50% - Resize all
layers not checked
Effects - Image Effects -
Offset
Effects - Plugins - Simple - Top
Left Mirror
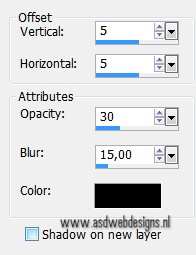
Effects 3D Effects - DropShadow -
Color: #000000
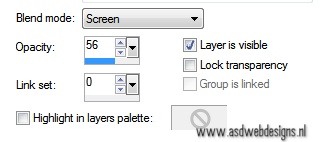
Layer Palette - Double click on
this Layer and set the Blend Mode to "Screen" and the
Layer Opacity to 56
17
Layer Palette - Click
on the Third Layer from the Bottom
Layers - New Raster
Layer
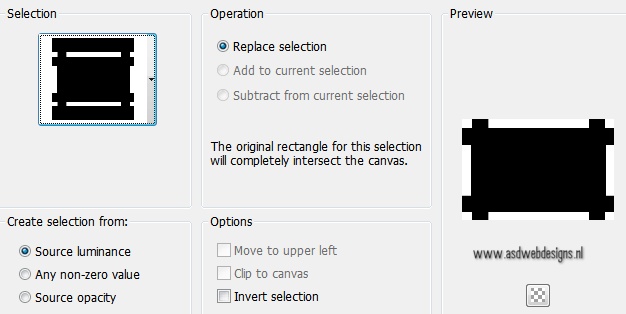
Selection Tool - Rectangle
- Custom Selection:
Fill the Selection
with the Backgroundcolor
Selections - Select
None
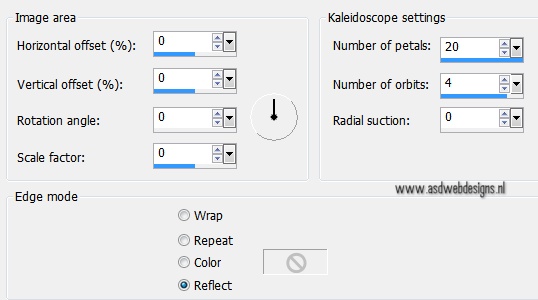
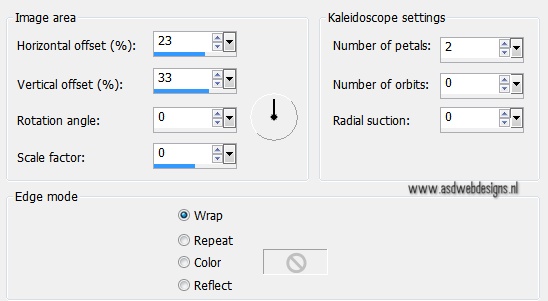
Effects - Reflection Effects -
Kaleidoscope
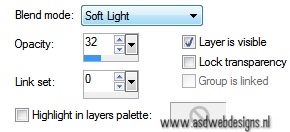
Layer Palette - Double click on
this Layer and set the Blend Mode to "Soft Light" and the
Layer Opacity to 32
18
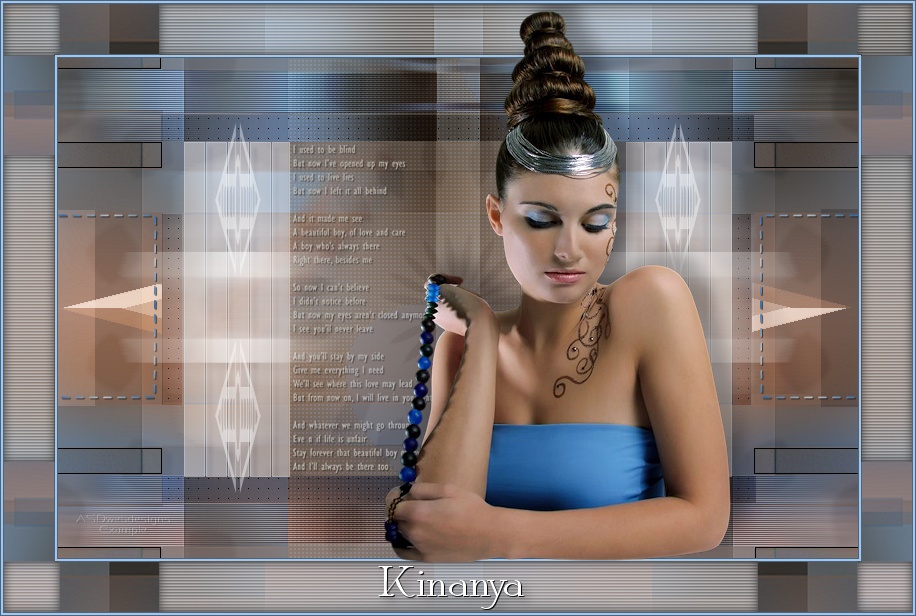
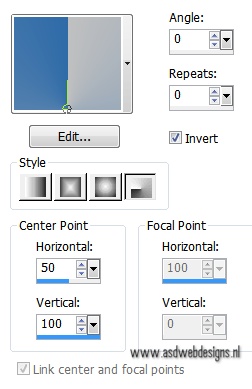
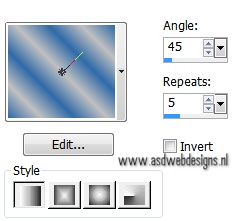
Color Palette:
Change your Foreground Gradient
to these settings: Style
Linear
Layer Palette - Click on the top
layer
Layers - New
Raster Layer
Selections - Load/Save
Selection - Load Selection From
Disk -
Msb_Kinanya_09
Fill the Selection
with the Foreground Gradient

Selections -
Select None
19
Layers -
Duplicate
Image -
Mirror
Layers - Merge -
Merge Down
Effects 3D Effects - DropShadow -
Color: #000000
Effects 3D Effects - DropShadow -
Color: #000000