01.
Open a new White image of
900 x 550 px
Selections -
Select All
Open Tube "Joanie_Woman_10-03-2013"
Edit - Copy
On your work image: Edit - Paste Into
Selection
Selections -
Select None
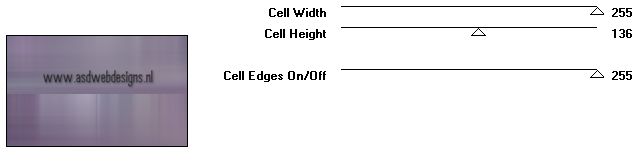
Effects - Image
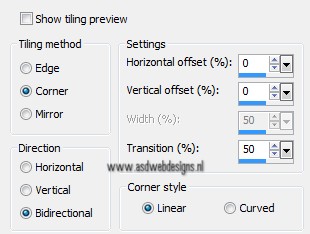
Effects - Seamless Tiling
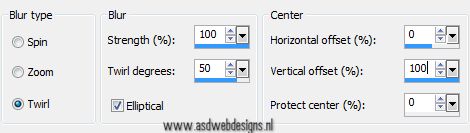
Adjust - Blur -
Radial Blur
Effects - Plugins
– Toadies – Weaver
02.
Layers -
Duplicate
Layer Palette - Set the Blend Mode of this
layer to "Multiply"
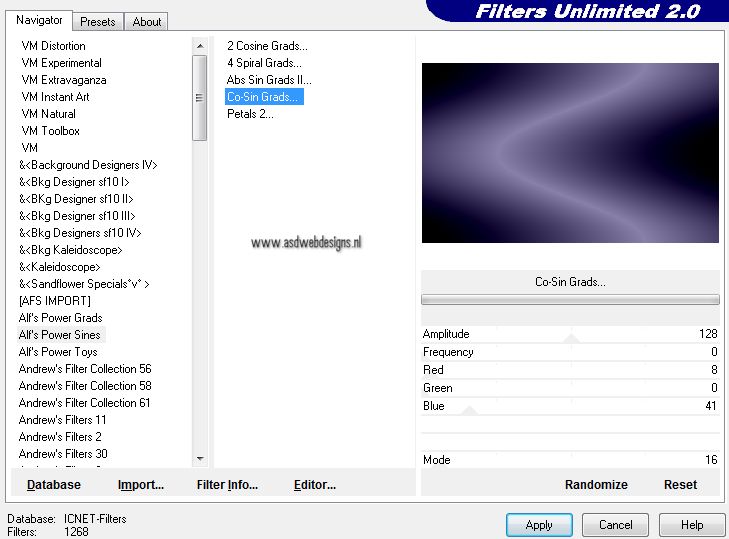
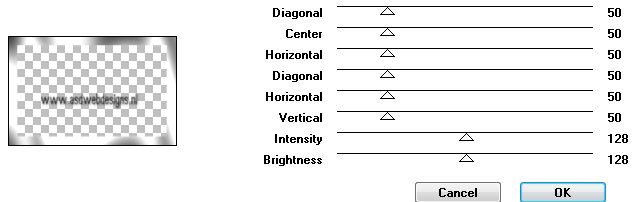
Effects - Plugins
– Effects - Plugins -
<I.C.NET Software> - Filters
Unlimited 2.0 - Alf’s Power Sines – Co-Sin
Grads
Effects - Image
Effects - Seamless Tiling
Layers - Merge -
Merge Visible
03.
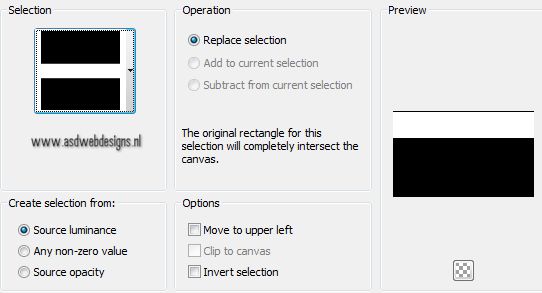
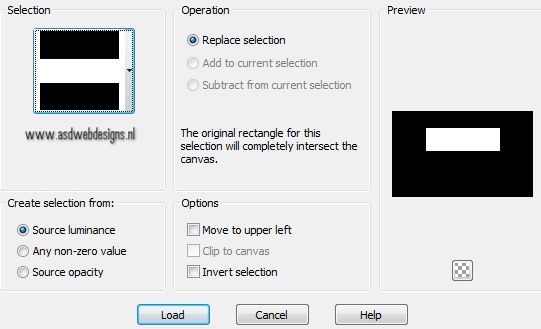
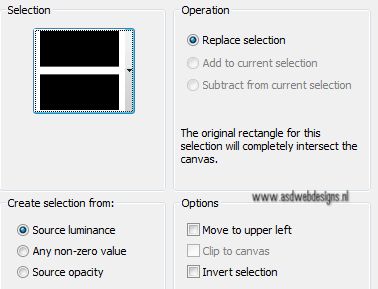
Selections -
Load/Save Selection - Load Selection From Disk -
MDlessen-selectie116
Selections -
Promote Selection to Layer
Selections -
Select None
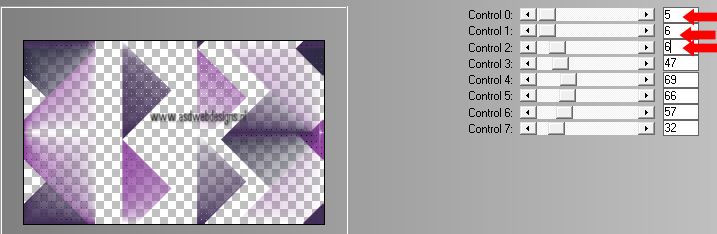
Effects - Plugins
– It@lian Editors Effect – Effetto Fantasma
Layers -
Duplicate
Image - Flip ** Users PSP 14
& 15 ( use the new icons
you created!, see the
tutorial
here
**
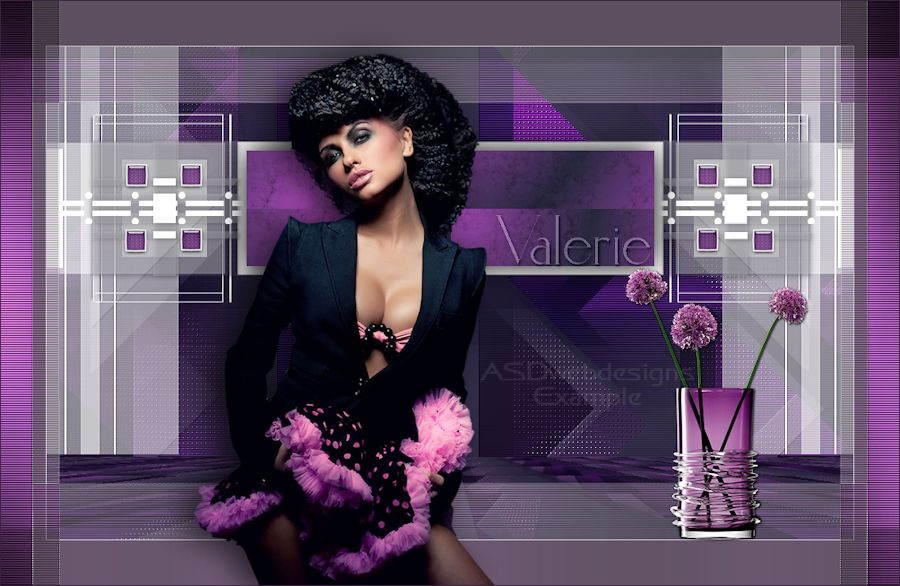
It looks like
this now:
04.
Layers - New
Raster Layer
Selections -
Load/Save Selection - Load Selection From Disk -
MDlessen-selectie117
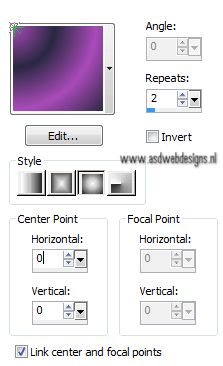
Set your Foregroundcolor to
Foreground/Background Gradient
(Corel_06_029) - Style: Sunburst
Fill the Selection
with the Gradient
Selections -
Select None
Effects - Plugins
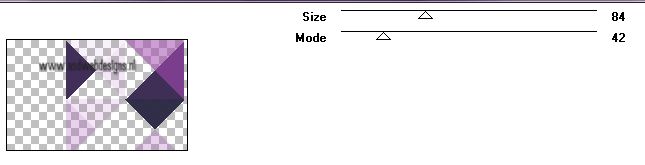
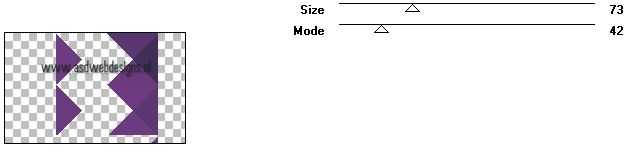
– Filter Factory Gallery A – Triangular Mosaic
Filter
05.
Effects - Image
Effects - Seamless Tiling
Effects - Plugins
– L en K landksiteofwonders – L & K’s Zitah
06.
Layers - New
Raster Layer
Selections -
Load/Save Selection - Load Selection From Disk -
MDlessen-selectie117 (same as before)
Fill the
Selection with the Gradient
Selections
- Select None
Effects - Plugins
– Filter Factory Gallery A – Triangular mosaic
filter
Effects - Image
Effects - Seamless Tiling
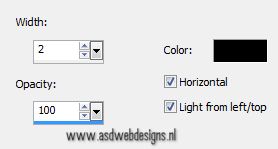
Effects - Texture Effects - Blinds - Color:
#000000
Layer Palette - Set the Blend Mode of this
layer to "Overlay"
Layers - Merge -
Merge Visible
07.
Layers -
Duplicate
Effects
- Image Effects - Seamless Tiling
Effects - Plugins
– FM Tile Tools – Blend Emboss
Layers - Merge -
Merge Visible
Your work looks
like this now:
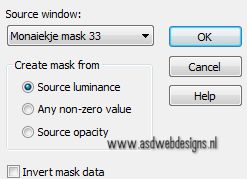
08.
Set your
Backgroundcolor to #ffffff 
Layers - New
Raster Layer
Fill with the
Backgroundcolor
Layers - New Mask Layer - From Image
- Monaiekje mask 33
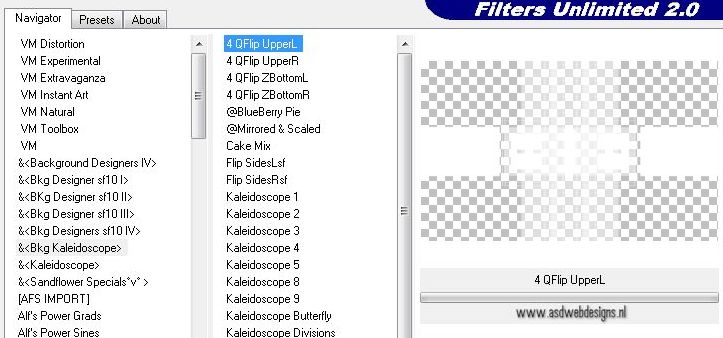
Layers - Merge - Merge Group
Effects - Plugins
- <I.C.NET Software> - Filters Unlimited –
&<Bkg Kaleidoscope> - 4 QFlip UpperL
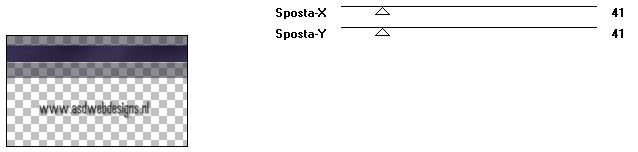
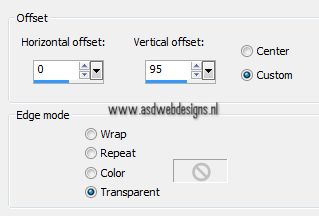
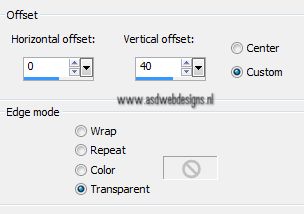
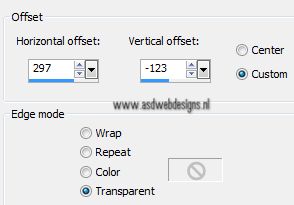
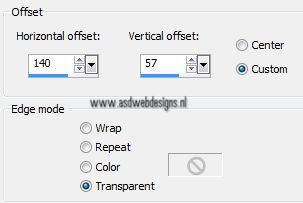
Effects - Image
Effects - Offset
Effects - Plugins
– Simple - Left Right Wrap
09.
Layers - New
Raster Layer
Selections -
Load/Save Selection - Load Selection From Disk -
MDlessen-selectie118
Selections - Modify - Contract - 10 px
Set your
Backgroundcolor back to #292941 
Fill the Selection
woth the Foreground Gradient
Effects - Plugins
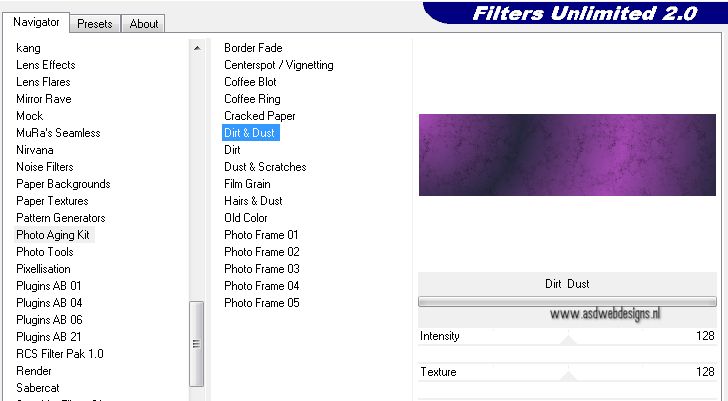
- <I.C.NET Software> - Filters Unlimited – Photo
Aging Kit – Dirt & Dust
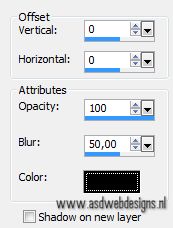
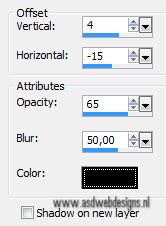
Effects 3D Effects - DropShadow -
Color: #000000 
Effects - Plugins
– Simple – Half Wrap
Adjust - Sharpness - Sharpen More
10.
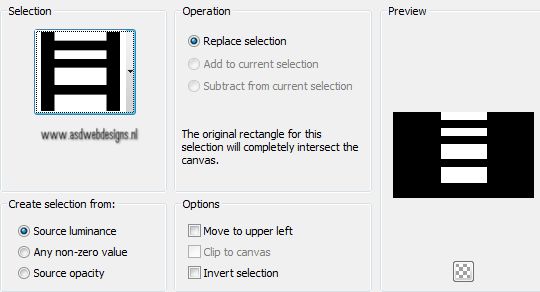
Selections -
Load/Save Selection - Load Selection From Disk -
MDlessen-selectie119
Layer Palette - Click on the Second layer from the
top
Selections - Promote Selection to
Layer
Selections -
Select None
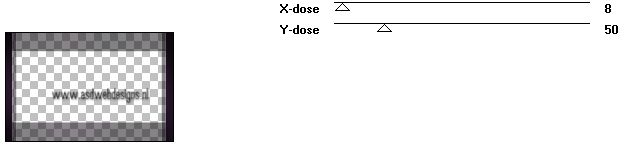
Effects - Plugins
– Toadies – What Are You? - 20 - 20
Effects - Plugins - Alien Skin Eye
Candy 5 - Impact - Perspective
Shadow - Settings Tab:
Dropshadow,Lowest
11.
Open Tube "deco 1 Valerie MD"
Edit - Copy
On
your work image: Edit - Paste As New
Layer
Effects - Image
Effects - Offset
Open Tube "deco 2 Valerie MD"
Edit - Copy
On
your work image: Edit - Paste As New
Layer
Effects - Image
Effects - Offset
Open Tube "deco 3 Valerie MD"
Edit - Copy
On
your work image: Edit - Paste As New
Layer
Effects - Image
Effects - Offset
Adjust - Sharpness - Sharpen More
Layer Palette - Set the Blend Mode of this
layer to "Soft Light"
Layers - Merge - Merge all (Flatten)
13.
Selections -
Load/Save Selection - Load Selection From Disk -
MDlessen-selectie120
Selections -
Promote Selection to Layer
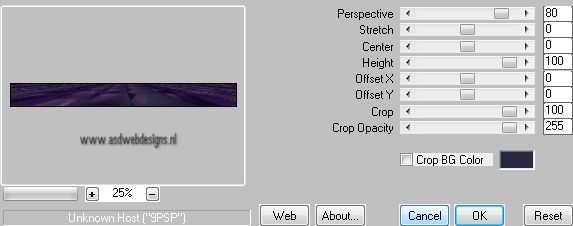
Effects - Plugins
– MuRa’s Meister – Perspective Tiling
Selections -
Select None
14.
Set your
Foregroundcolor back to Color and change to #3b2140 
Set your
Backgroundcolor to #ffffff
Image - Add Borders - Symmetric
checked - 1 px - Backgroundcolor
Selections -
Select All
Image - Add Borders - Symmetric
checked - 50 px - Foregroundcolor
Selections -
Invert
Selections -
Promote Selection to Layer
Effects - Plugins
– Graphics plus – Cross Shadow
Effects - Texture Effects - Blinds - Color:
#000000
Selections -
Select None
Effects - Plugins
– Toadies – What Are You?
Effects - Edge Effects - Enhance
15.
Open Tube "Athe-FM365"
Edit - Copy
On
your work image: Edit - Paste As New
Layer
Image - Resize - 75% - Resize all
layers not checked
Effects - Image
Effects - Offset
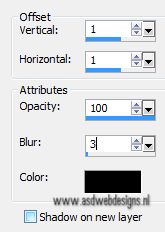
Effects 3D Effects - DropShadow -
Color: #000000
16.
Open Tube "Radyga-tubes-047-16-03-2013"
Edit - Copy
On
your work image: Edit - Paste As New
Layer
Image - Resize - 45% - Resize all
layers not checked
Adjust - Sharpness - Sharpen
Effects - Image
Effects - Offset
Effects 3D Effects - DropShadow -
Color: #000000
17.
Open Tube "tekst Valerie MD"
Edit - Copy
On
your work image: Edit - Paste As New
Layer
Image - Resize - 80% - Resize all
layers not checked
Effects - Image
Effects - Offset
Layer Palette - Set the Blend Mode of this
layer to "Soft Light"
Effects - Edge Effects - Enhance
More
18.
Image - Add Borders - Symmetric
checked - 1 px - Foregroundcolor
Image - Resize - Width 900 Pixels -
Resize all layers checked
Add your name or
watermark, save as JPG file and you're done!
If you wish you
can post your result on my Facebook Page