.
01.
Open a new transparent image of 900 x 600 px
02.
Fill with the
Backgroundcolor
03.
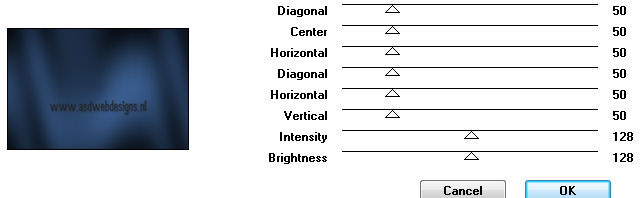
Effects -
Plugins – Graphics Plus – Cross Shadow
04.
Layers - New Raster
Layer
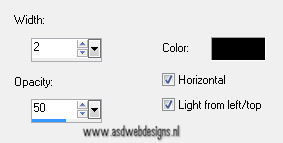
05.
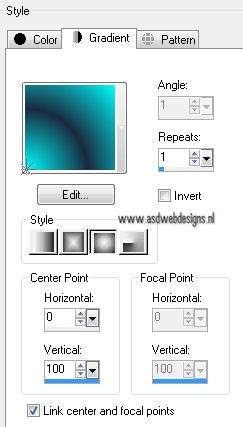
Color Palette: Set your Foregroundcolor to
Foreground/Background Gradient
(Corel_06_029) - Style: Sunburst
Fill
your image with the
Gradient
06.
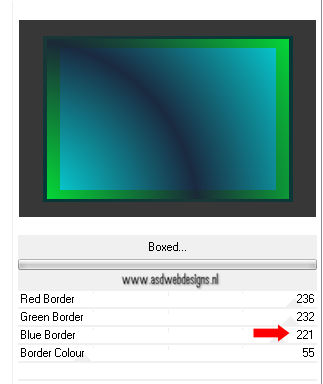
Effects -
Plugins – <I.C.NET Software> - Filters Unlimited 2.0 –
Andrew's Filters 1 – Boxed
07.
Image - Resize – 75% -
Resize all layers not checked
08.
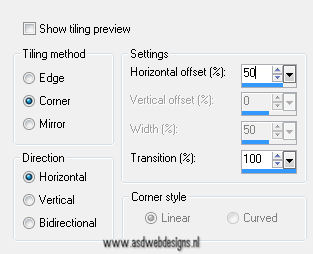
Effects - Image Effects
- Seamless Tiling
09.
Effects - Edge
Effects - Enhance
10.
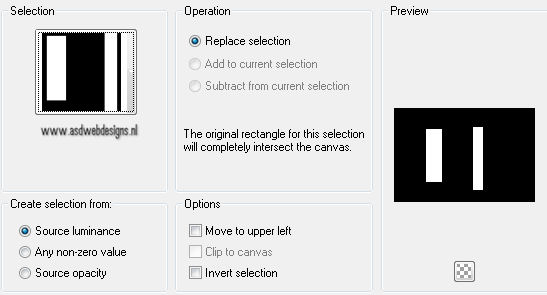
Selection Tool -
Rectangle  - Custom Selection:

11.
Selections - Promote
Selection to Layer
12.
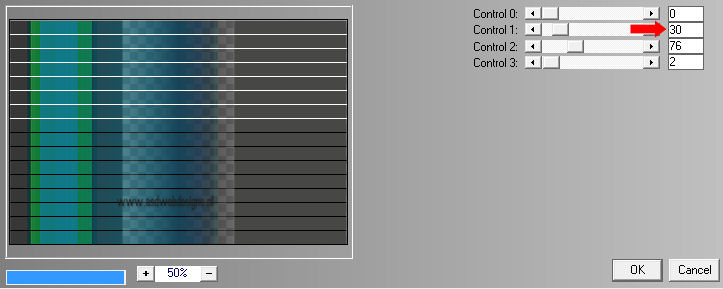
Effects - Plugins –
L&K SiteOfWonders - L en K - Mayra
13.
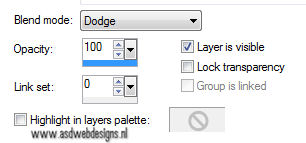
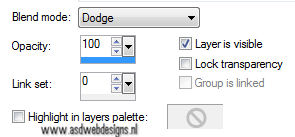
Layer
Palette - Double click on this Layer and set the Blend Mode to
"Dodge"
14.
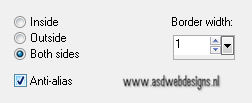
Selections - Modify -
Select Selection Borders
15.
Color Palette:
Set your Foregroundcolor back to color
Fill the
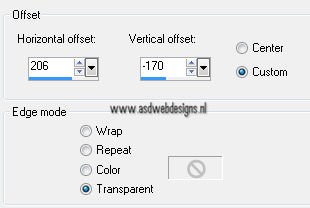
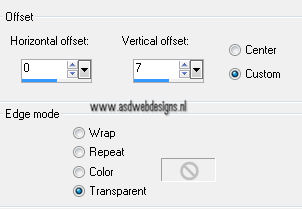
Selection with the Foregroundcolor 
16.
Selections
- Select None
17.
Layers - Merge - Merge
Down
18.
Selections
- Select All
19.
Selections - Modify -
Contract – 50 px
20. Selections - Promote Selection to
Layer
21.
Color
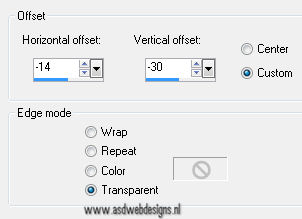
Palette - Set your Foregroundcolor to #ffffff

Fill the
Selection with the Foregroundcolor
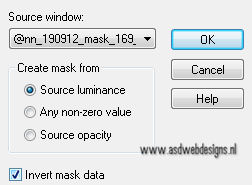
22.
Layers
- New Mask Layer - From Image -
@nn_190912_mask_169_tdstudio
23.
Layers - Merge - Merge Group
24.
Selections
- Select None
25.
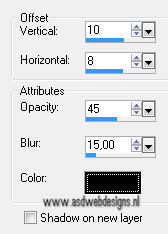
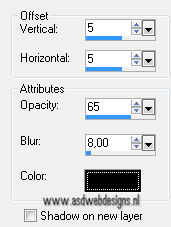
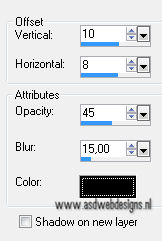
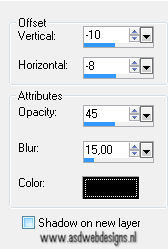
Effects 3D
Effects - DropShadow - Color: #000000
Repeat the
Dropshadow once
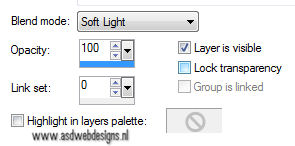
26.
Layer Palette - Double
click on this Layer and set the Blend Mode to "Soft
Light"
27.
Selections - Select
All
28.
Selections - Modify -
Contract – 50 px
29.
Selections - Modify -
Select Selection Borders
30.
Layers - New
Raster Layer
31.
Color Plaette -
Set your Foregroundcolor to #00ffff
Fill the
Selection with the Foregroundcolor
32.
Selections - Select
None
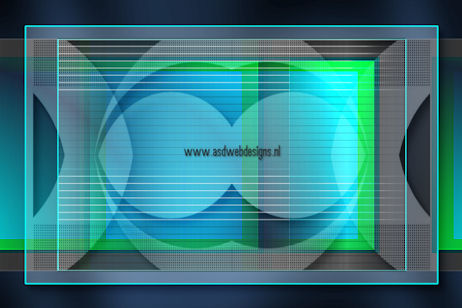
33.
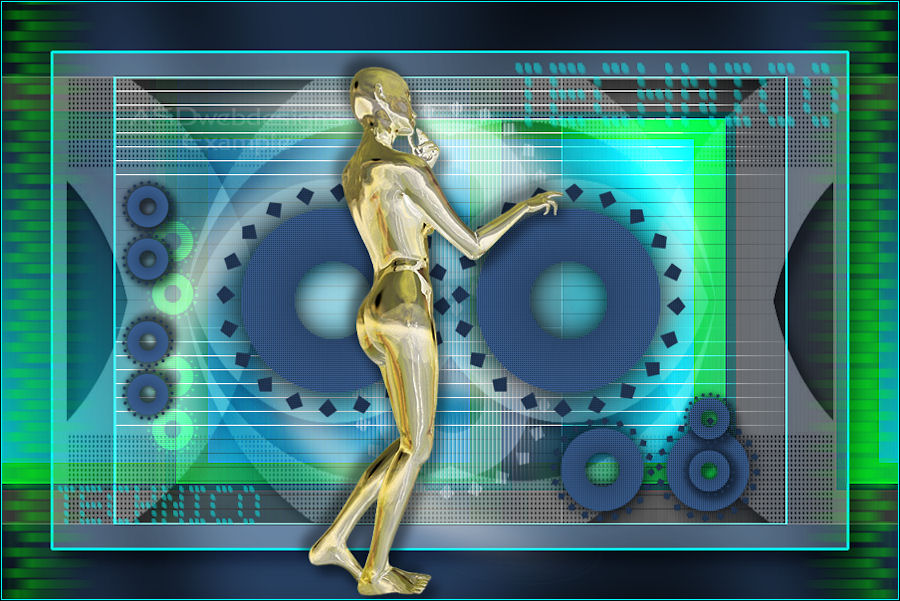
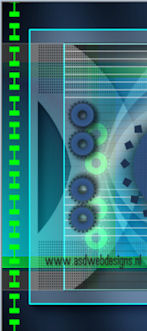
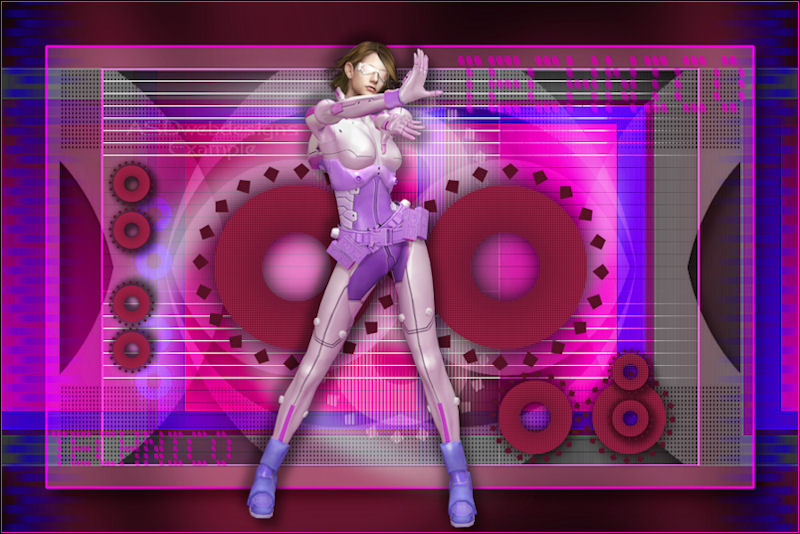
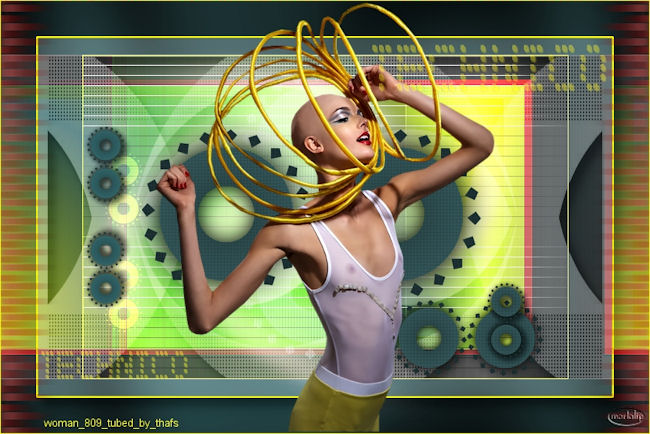
Your work looks like this
now
34.
Selections - Load/Save
Selection - Load Selection From Disk -
MDlessen-selectie89
35.
Layer Palette - Click
on the Bottom layer
36. Selections
- Promote Selection to Layer
37.
Layers - Arrange -
Bring to Top
38.
Selections - Select
None
39.
Layers
- Duplicate - Repeat Once
40.
Adjust - Blur -
Gaussian Blur - 30
41.
Effects -
Distortion Effects - Twirl - 250°
42.
Image - Negative
Image
43.
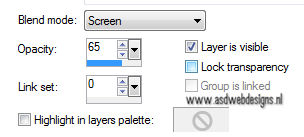
Layer Palette - Double
click on this Layer and set the Blend Mode to "Screen"
and the Layer Opacity to 65
44.
Layer
Palette - Click on the Second layer from the top
45.
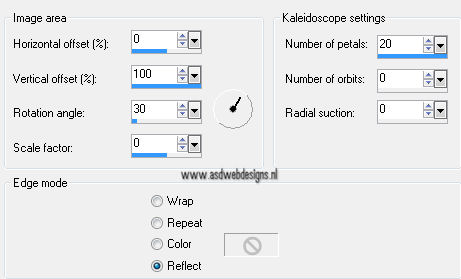
Effects -
Reflection Effects - Kaleidoscope
46.
Layer
Palette - Click on the Third layer from the top
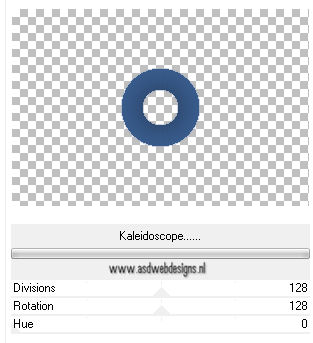
47.
Effects
- Plugins –<I.C.NET Software> -
Filters Unlimited
2.0
VM
Distortion – Kaleidoscope
48.
Layer
Palette - Click on the Second layer from the top
49.
Layers - Merge - Merge
Down
50.
Layers - Arrange -
Bring to Top
51. Effects 3D Effects -
DropShadow - Color: #000000 
52. Image - Resize – 80% - Resize
all layers not checked
53. Effects -
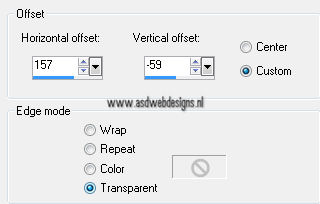
Image Effects - Offset
54.
Layers - Duplicate
55. Effects - Image Effects -
Offset
56. Layers - Merge - Merge
Down
57. Layers - Duplicate
58. Image - Resize – 85% - Resize all
layers not checked
59. Image - Free Rotate - Right -
Free - 90°
60. Layer Palette - Double click on this
Layer and set the Blend Mode to "Screen" and the Layer
Opacity to 60
61. Layers - Arrange - Move
Down
62. Effects - Texture Effects - Blinds -
Color: #ffffff
63. Layer Palette - Click on the top
layer
64. Layers - Duplicate
65. Image - Resize – 45% - Resize all
layers not checked
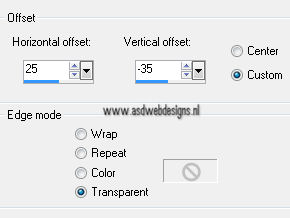
66. Effects - Image Effects - Offset
67. Layers - Duplicate
68. Image - Resize – 50% - Resize all
layers not checked
69. Image - Free Rotate - Right -
Free - 90°
70. Effects - Image
Effects - Offset
71.
Effects 3D Effects -
DropShadow - Color: #000000
72. Layers - Duplicate
73. Effects - Image Effects -
Offset
74. Layers - Duplicate
Image
- Flip
75. Layers - Merge - Merge
Down
76. Layers - Duplicate
77. Effects - Image Effects - Offset
78. Adjust - Hue and Saturation -
Colorize - Hue 85 - Saturation 255
79. Layer Palette - Double click on this
Layer and set the Blend Mode to "Dodge"
80. Effects
- Texture Effects - Blinds - Color: #000000
81. Layers - Arrange - Move
Down
82. Layer Palette - Click on the Third layer
from the top
83. Layers - Merge - Merge Down -
REPEAT ONCE
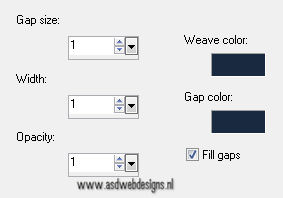
84. Effects - Texture Effects - Weave -
Weave Color #1a2a40 - Gap Color
#1a2a40
85. Layers - Merge - Merge
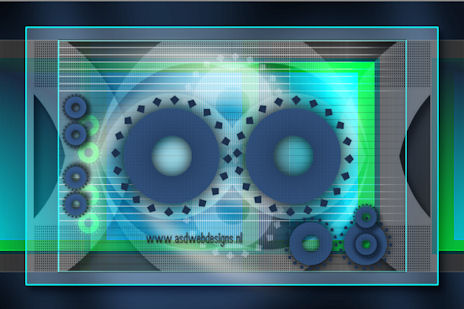
Visible
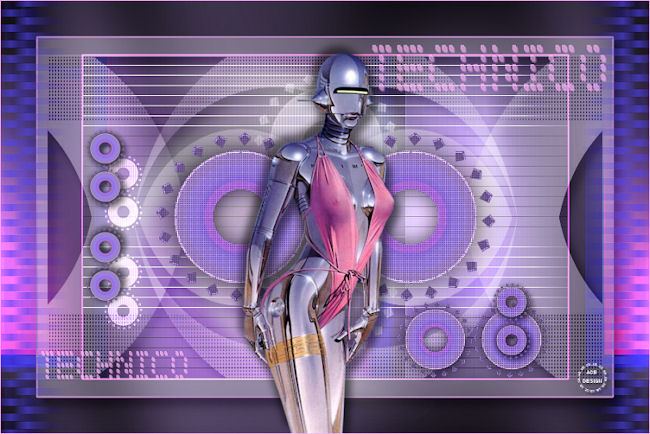
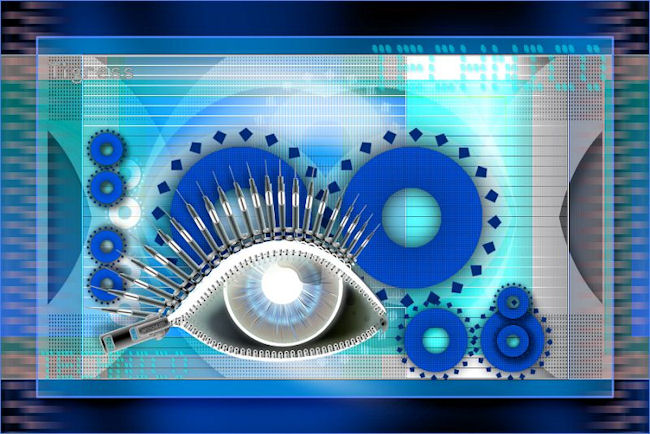
Your work
looks like this now
86. Open
"LexHa_VisualParadox_Februari 2010"
Edit
- Copy
On
your work image: Edit - Paste As New
Layer
87. Image
- Resize – 80% - Resize all layers not
checked
88. Effects - Image Effects - Offset
89. Image - Negative
Image
90. Effects
3D Effects - DropShadow - Color: #000000
Effects
3D Effects - DropShadow - Color: #000000
91 Pen Tool  - Mode: Draw Lines and Poly
Lines - Create as Vector
checked - Linestyle Round End-Gaps
(Corel_13_014)- Width 3
- Mode: Draw Lines and Poly
Lines - Create as Vector
checked - Linestyle Round End-Gaps
(Corel_13_014)- Width 3
92. Color Palette
- Set your Forgroundcolor to #00ff00 
93. Draw a
vertical line at the left edge of the image, Hold down your Shift
key to get a straight line!
94. Layers - Convert to Raster
Layer
95.Effects - Distortion Effects - Wind -
From Left checked - Wind Strength:100
96. Move to
the edge of the image
97. Layers - Duplicate
98. Move like
this:
99. Layers
- Merge - Merge Down
100. Layers - Duplicate
Image -
Mirror
101. Open "Tekst technico
MD"
Edit
- Copy
On
your work image: Edit - Paste As New
Layer
102. Effects - Image Effects -
Offset
103. Layers - Duplicate
Layers
- Merge - Merge Down
104. Effects - Plugins -
Alien Skin Eye Candy 5 - Impact -
gradient Glow - Settings
Tab: Preset MDlessen- technico gg
105. Effects - Edge Effects - Enhance
106. Layers - New Raster
Layer
Add your name or watermark
107. Color Palette - Set your
Foregroundcolor to#00ffff
Image - Add Borders - Symmetric
checked - 1 px - Foregroundcolor
108.
Image - Resize - Width 800 Pixels -
Resize all layers checked
109. Save
as JPG file and you're done!
If you wish you
can post your result on my Facebook Page 
Attention
If you wish you can send your result to Monaiekje, she will
place it at her site. But only of your work is 900 PX
Width
Email
monaiekje.design@gmail.com
With special
thanks to my testers, this is what they
made:
Chris:
~°~
Martalip:
~°~
Tigress:
Back to the top