Window - Duplicate (or shift+D) -
Close the original and proceed on the copy
Layers - Duplicate
Image - Resize - 70 - Resize all Layers not checked
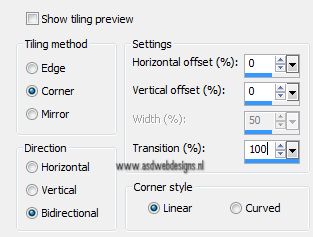
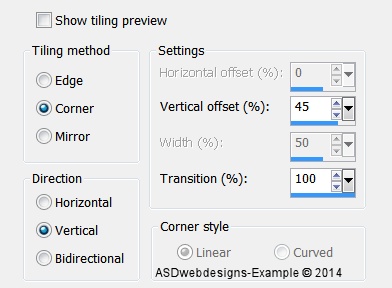
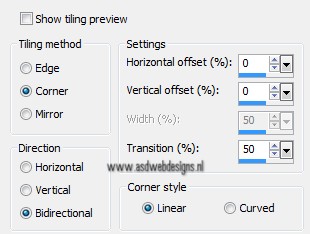
Effects - Image Effects - Seamless Tiling
02
Layers - New Raster Layer
Fill with the Backgroundcolor  (Right Mouse Click)
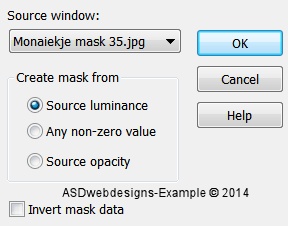
Layers - New Mask Layer - From Image - Monaiekje mask
35
Layers - Merge - Merge Group
03
Layer Palette - Click on the middle Layer
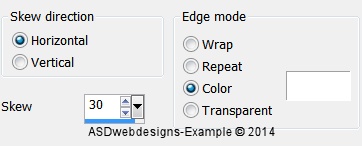
Effects - Geometric Effects - Skew -Color #ffffff

Effects - Image Effects - Seamless Tiling
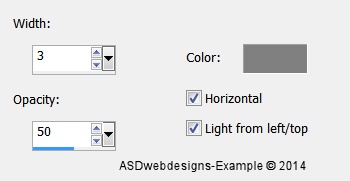
Effects - Texture Effects - Blinds - Color: #808080 
04
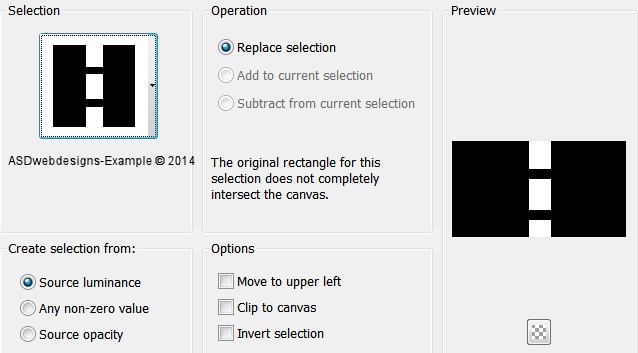
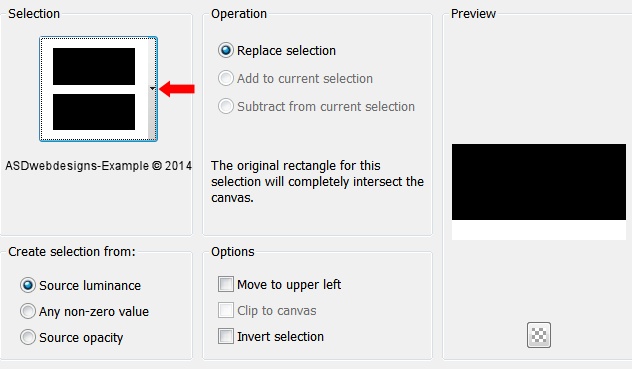
Selections - Load/Save Selection - Load Selection From Disk -
MDlessen-selectie129
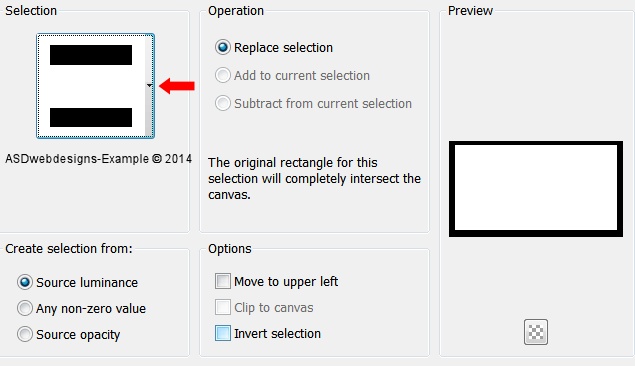
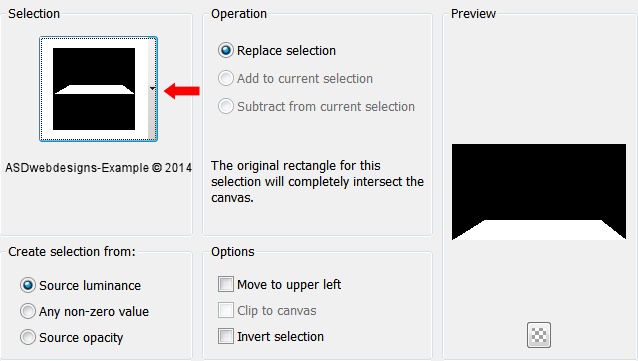
Selections - Promote Selection to Layer
Effects - Plugins - Tramages - Wee Scratches
Effects - Edge Effects - Enhance
Selections - Select None
Effects - Image Effects - Seamless Tiling
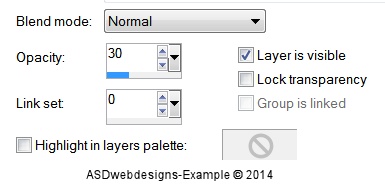
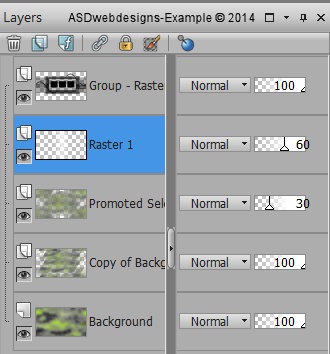
Layer
Palette - Double
click on this Layer and set
the Layer Opacity of this Layer to
30
05
Layers - New Raster Layer
Selections - Load/Save Selection - Load Selection From Disk -
MDlessen-selectie130
Fill the Selection with the Foregroundcolor
Selections - Select None
Adjust -
Blur - Gaussian Blur - 50
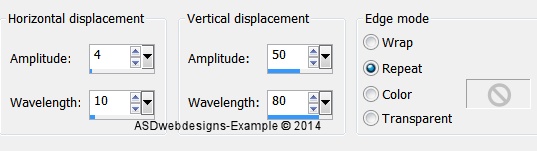
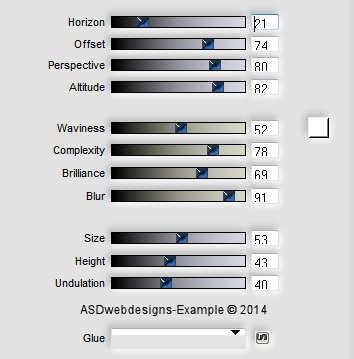
Effects - Distortion Effects - Wave
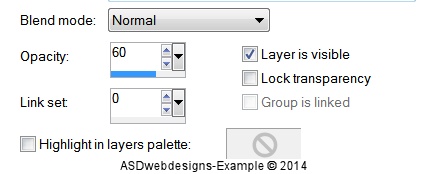
Layer
Palette - Double
click on this Layer and set
the Layer Opacity of this Layer to
60
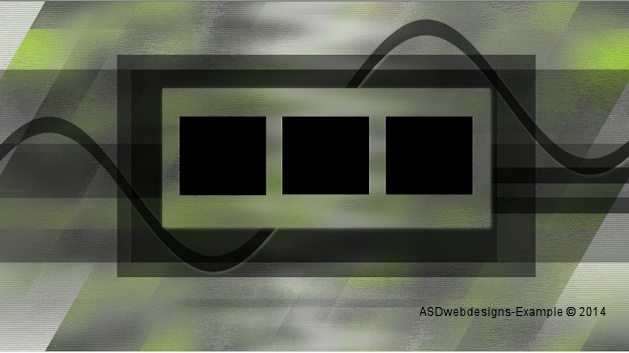
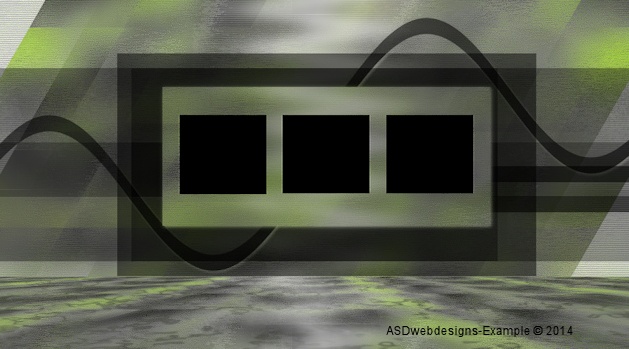
Your work and Layer
Palette look like this
now
06
Layer Palette - Click on the Bottom
Layer
Selections - Load/Save Selection
- Load Selection From Disk -
MDlessen-selectie131
Selections - Promote Selection to Layer
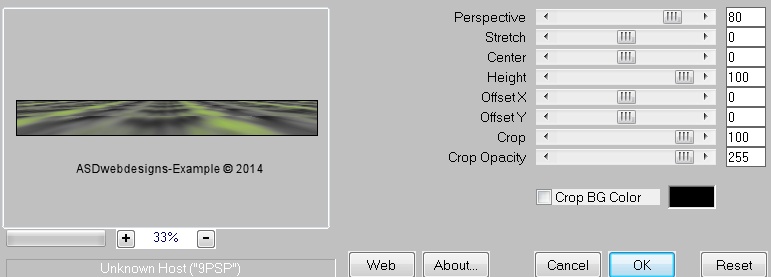
Effects - Plugins - MuRa's Meister -
Perspective Tiling
Selections - Select None
Layers -
Arrange - Move Up
07
Selections - Load/Save Selection - Load Selection From Disk -
MDlessen-selectie132
Edit - Copy
On your work image: Edit -
Paste As New Layer
Image - Resize - 80% - Resize all Layers not checked
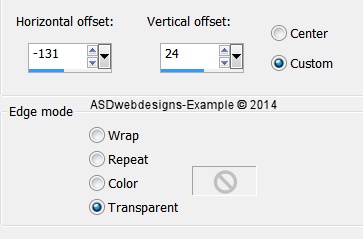
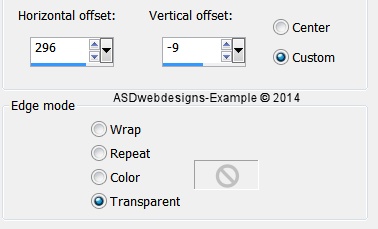
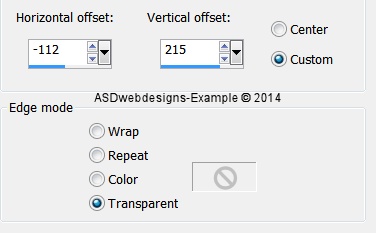
Effects - Image Effects - Offset
Layers - Duplicate
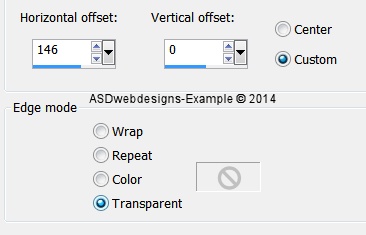
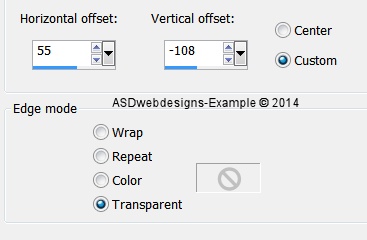
Effects - Image Effects - Offset
Layers - Duplicate
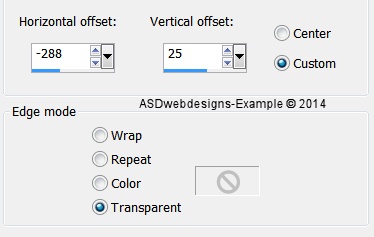
Effects - Image Effects - Offset - Same Settings
Layers - Merge - Merge Down
Edit -
Repeat Layers Merge Down
Adjust - Sharpness - Sharpen
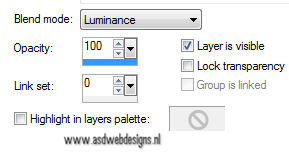
Layer Palette - Double click on this
Layer and set the Blend Mode to "Luminance"
09
Open Tube "Boom"
Edit - Copy
On your work image: Edit -
Paste As New Layer
Image - Resize - 68% - Resize all Layers not checked
Effects - Image Effects - Offset
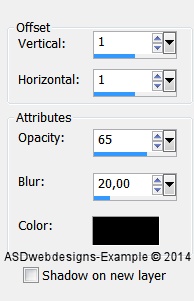
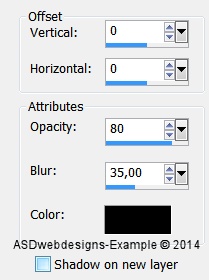
Effects 3D Effects - Dropshadow -
Color #000000
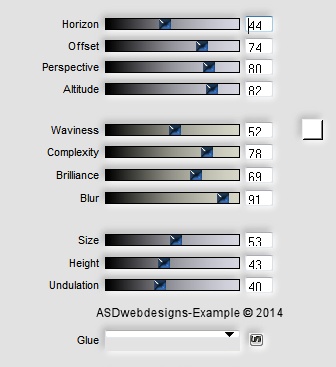
Effects - Plugins - Flaming Pear -
Flood
-
Click on the Red Arrow  and load Preset flood settings monaiekje
september2
and load Preset flood settings monaiekje
september2
Or if this is not working for you use these
settings:
Layer Palette - Double click on this
Layer and set the Blend Mode to "Luminance"